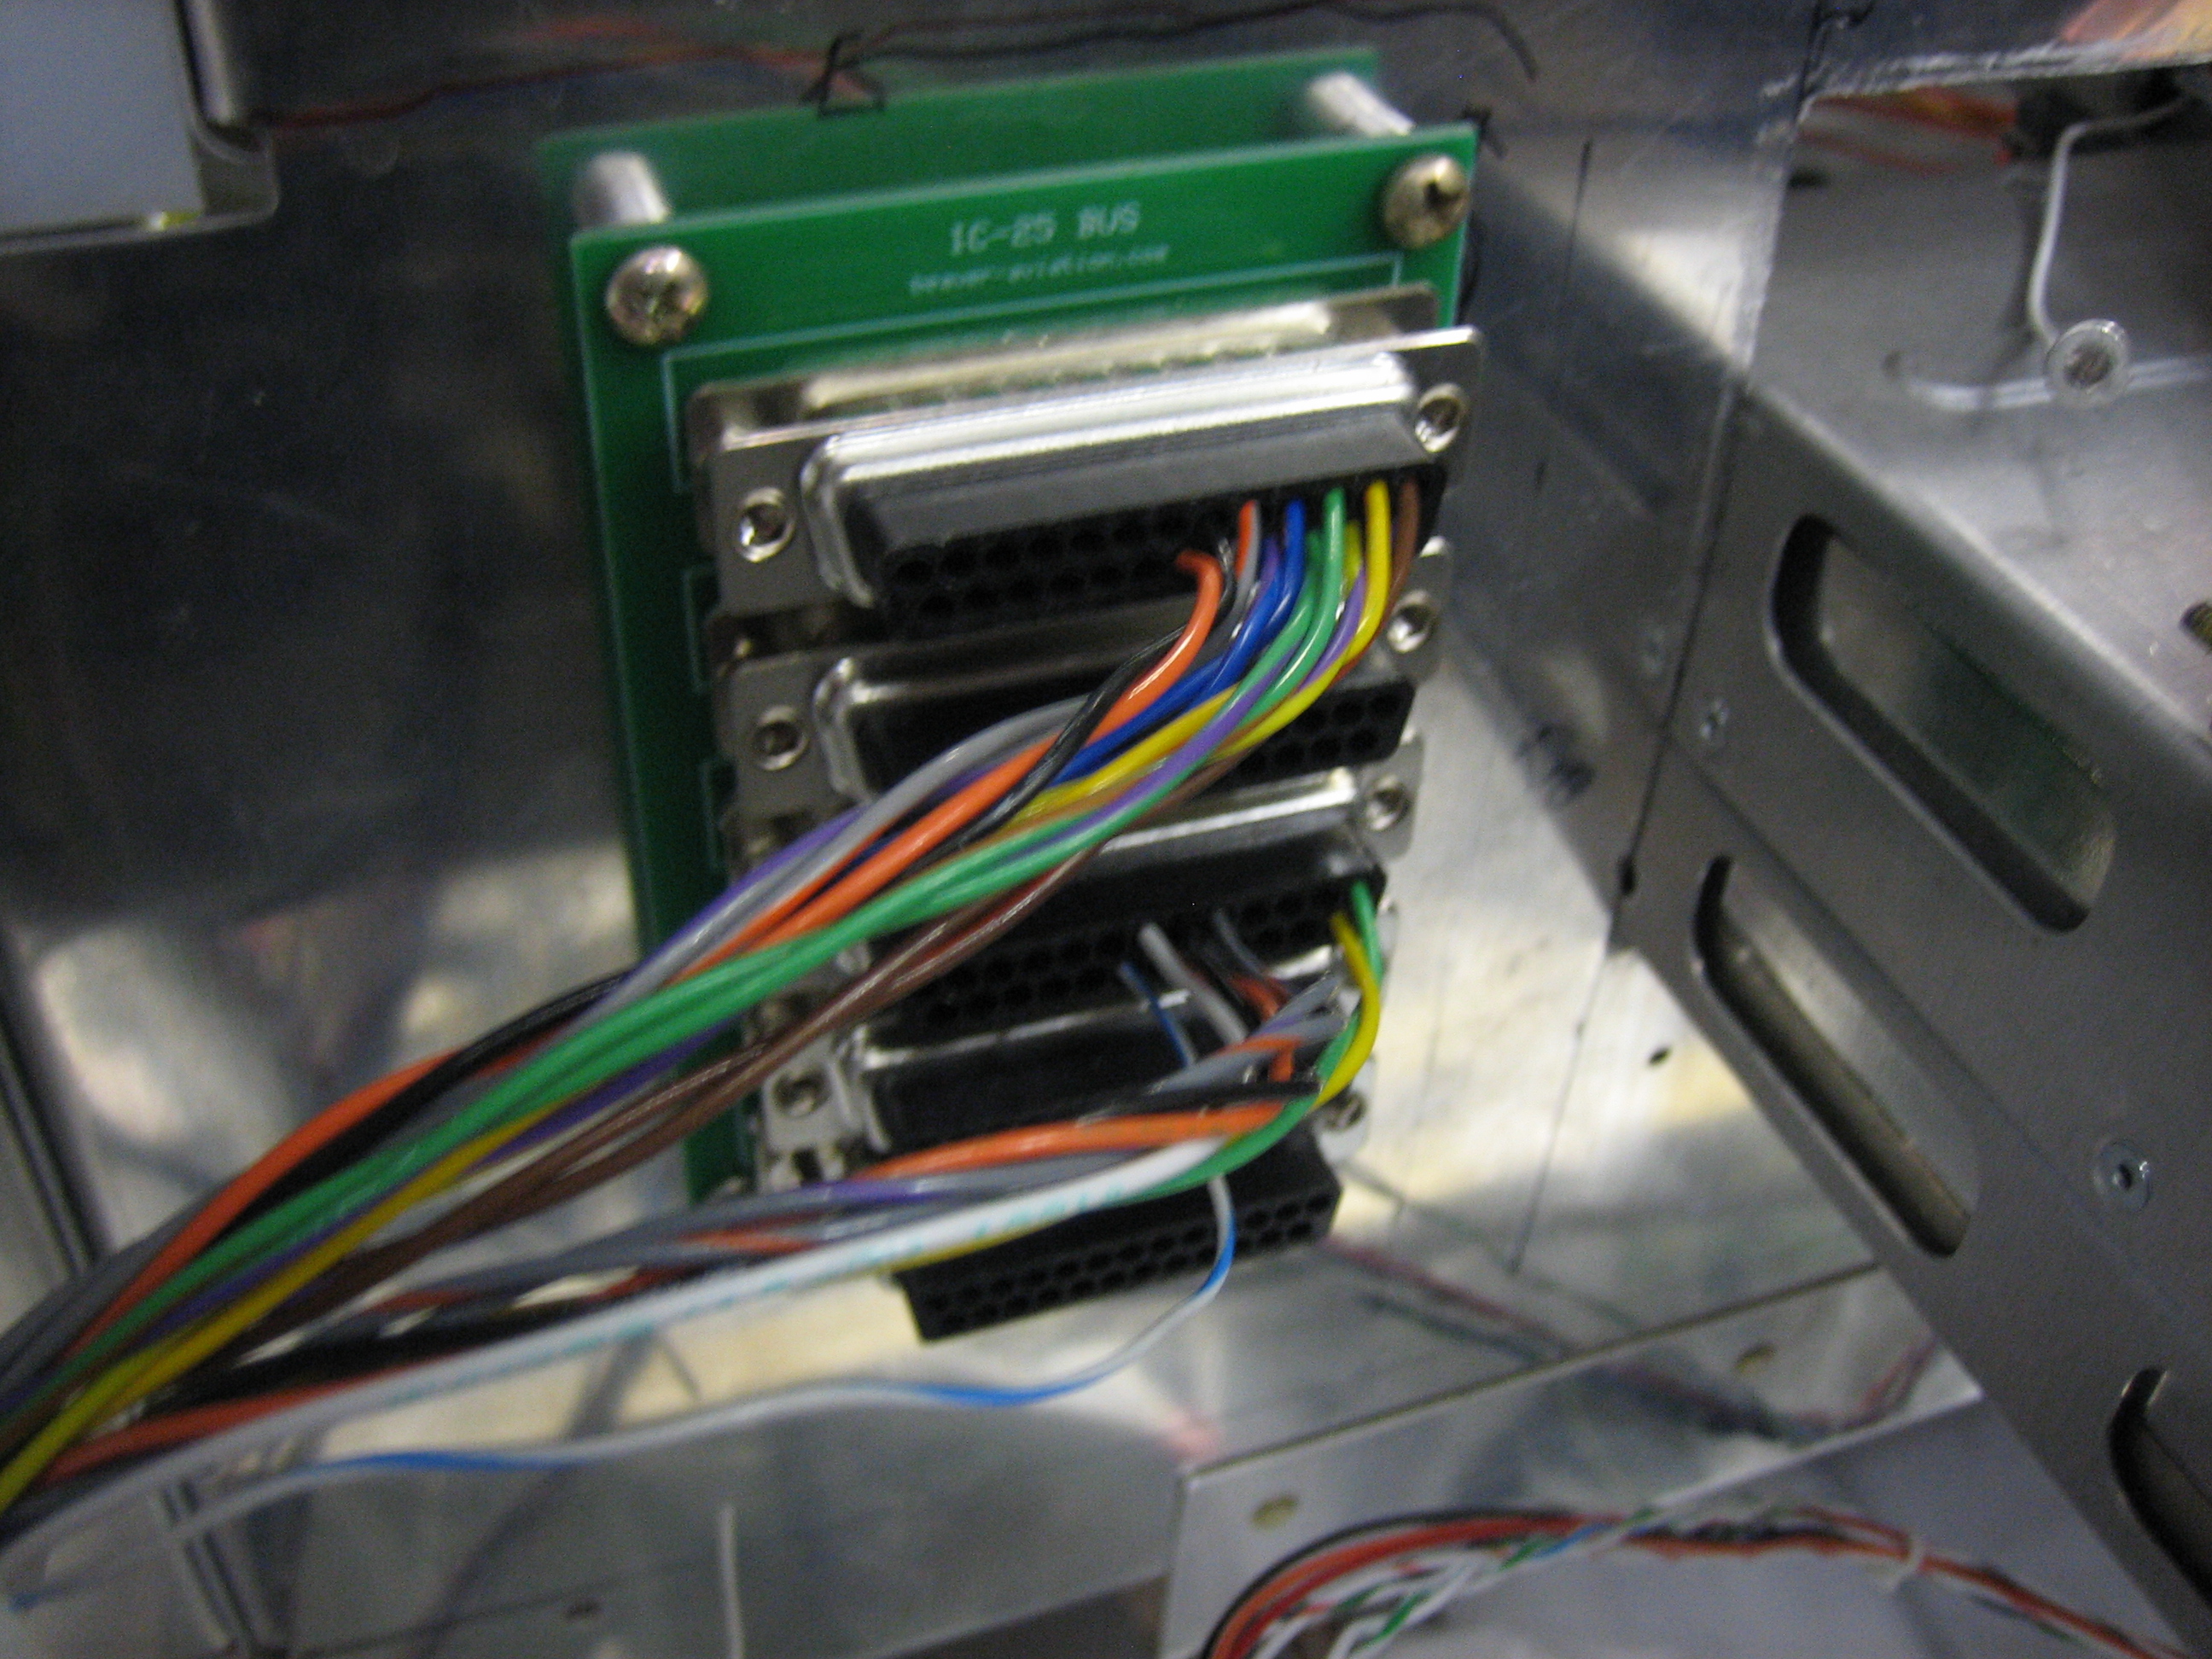
With the screens in place, I started hooking up the serial ports to the interconnect bus I made. The top connector is for the left SkyView screen. The next one down is for the right SkyView screen. The third is for the other accessories in the aircraft (SkyView GPS, transponder and ELT). The fourth will be for the GTN 635 and the bottom one will be for the audio panel. I haven’t hooked up the SkyView audio outputs or dimming input/output since the SkyView install manual says not to until they’re supported in software. When this is eventually supported, all I will have to do is plug the appropriate wires into the appropriate holes to hook them up.
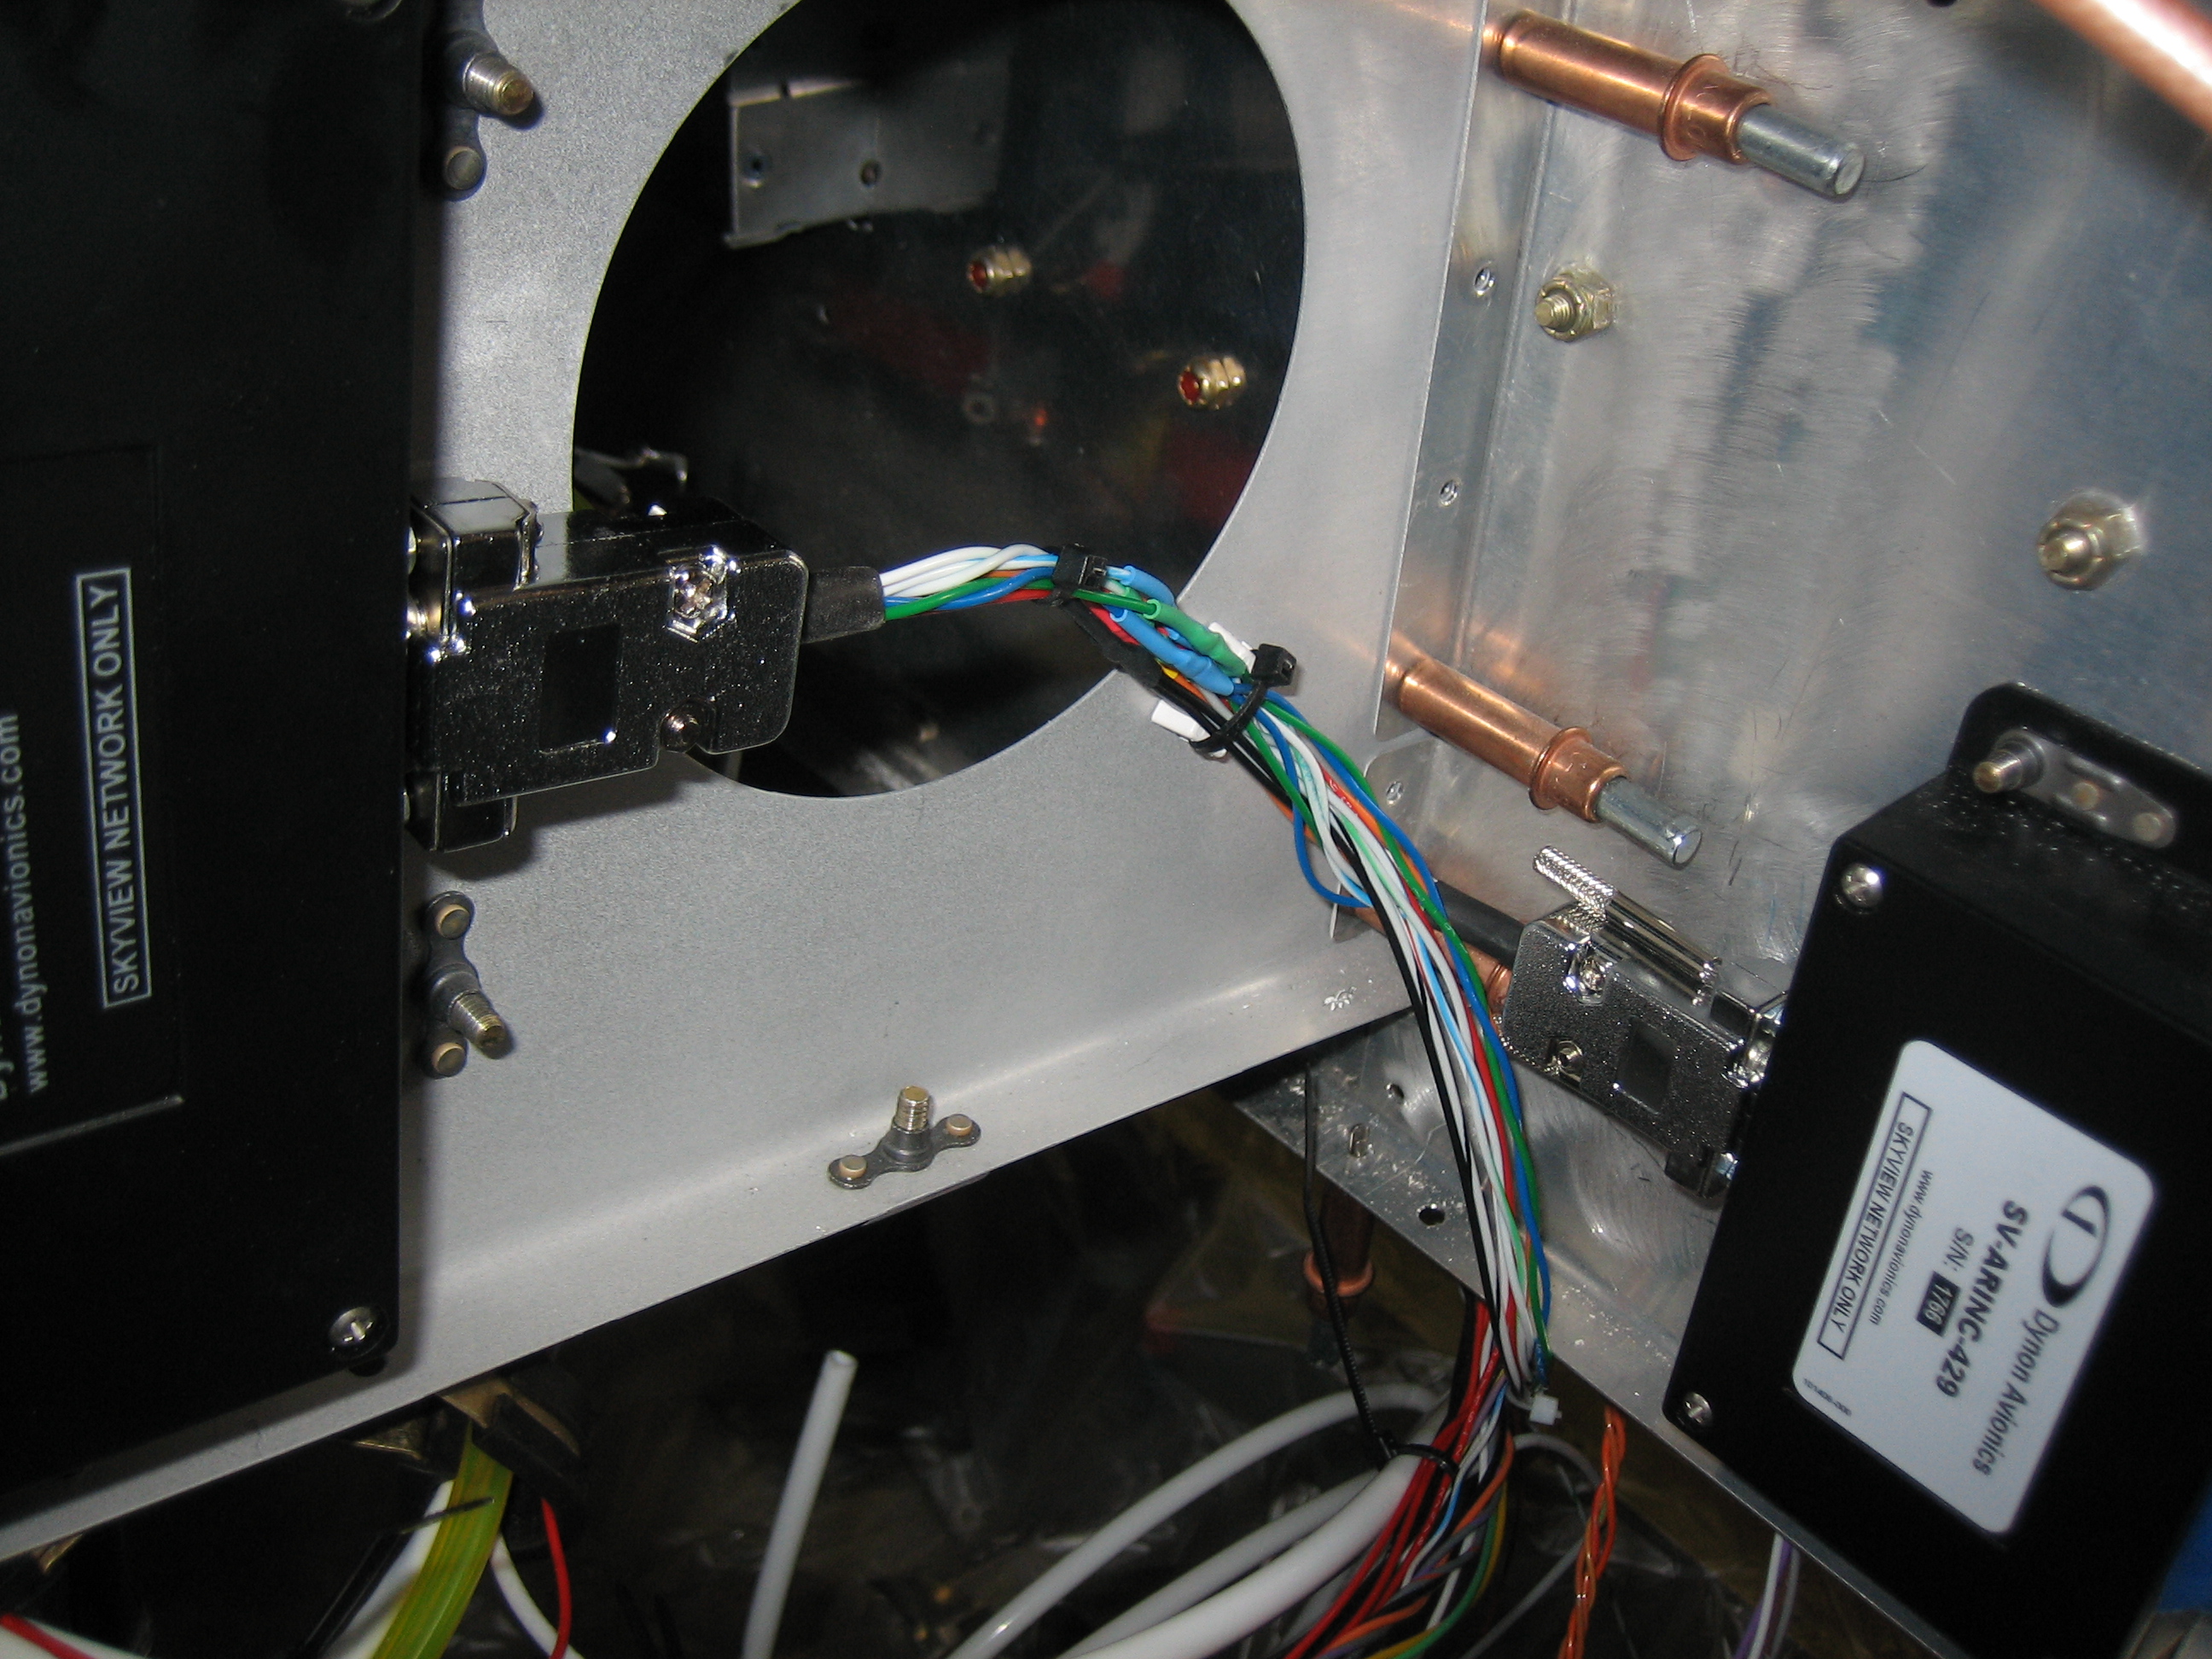
I also finished fabricating the SkyView network cables. Here is the connection between the EMS and the ARINC-429 box with a tee over to the left SkyView screen. If you look closely, you’ll notice that the connector on the ARINC box (on the right) has thumb screws, while the one on the EMS has small screws that need a screwdriver. I’ve swapped most of the thumb screws for small screws, but left a few where access is restricted.
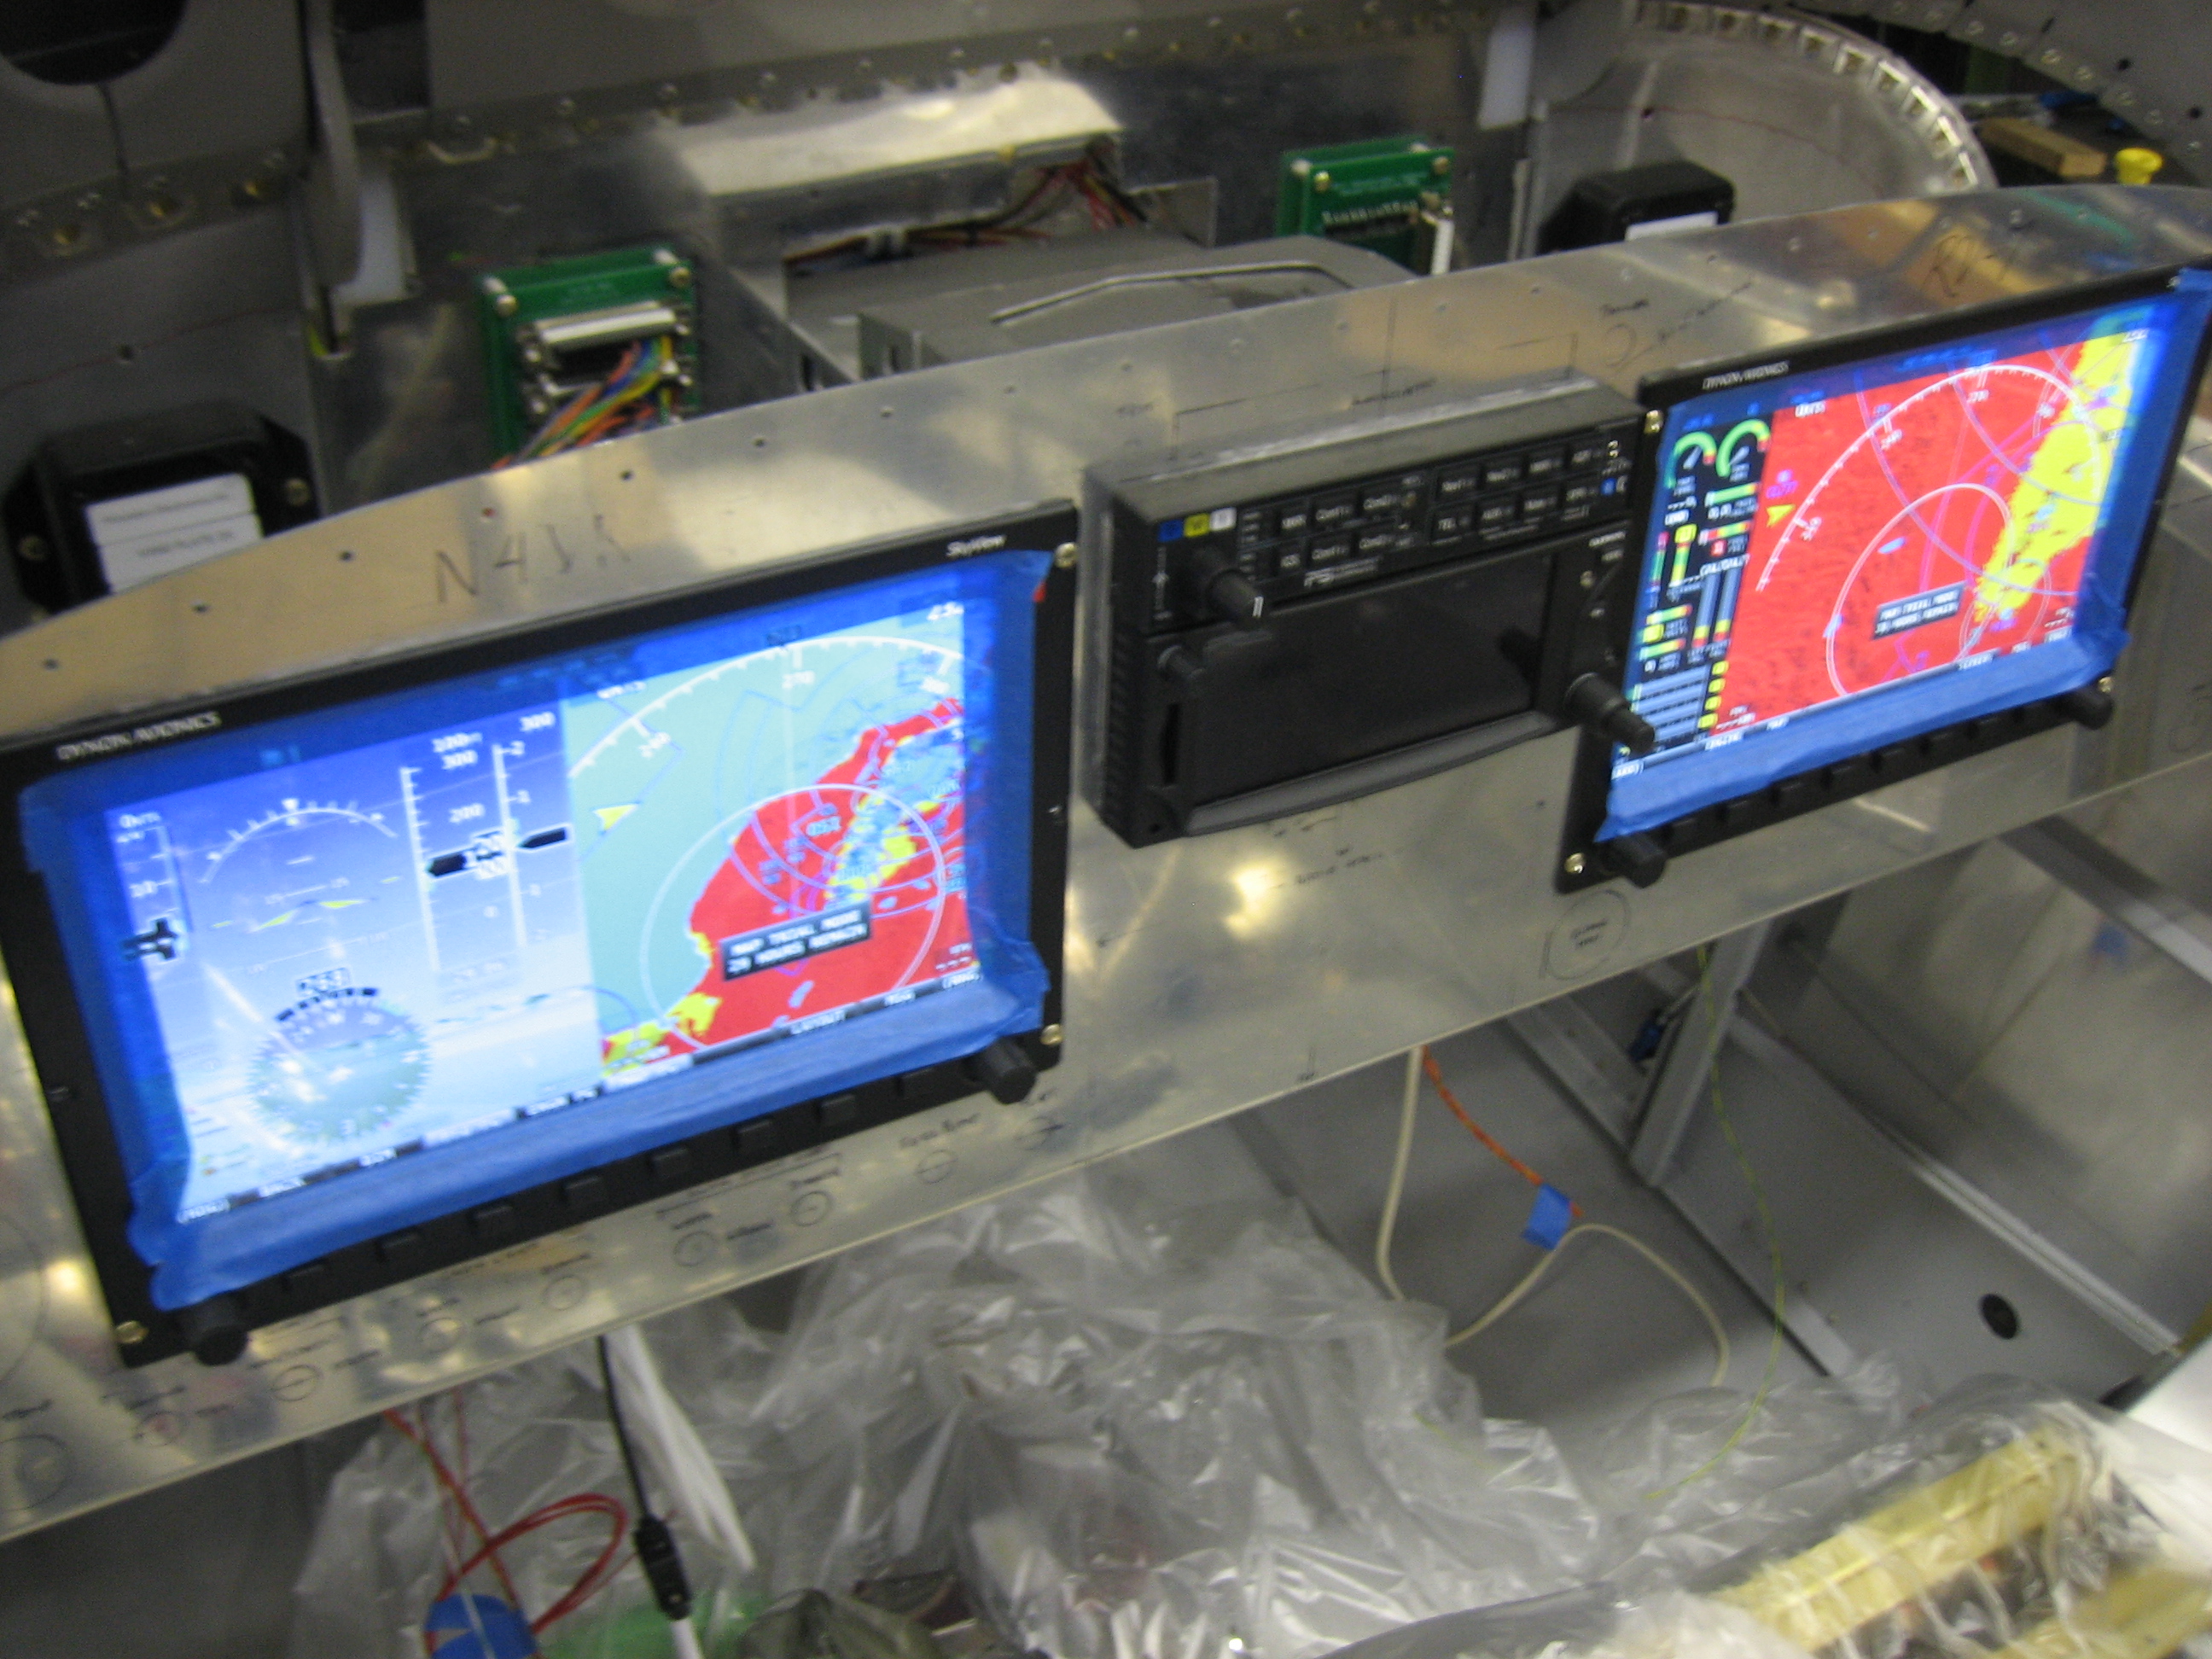
I bypassed the VP-X temporarily and fired up the SkyView screens. Initially, the left screen was running 2.6 (I think) and the right screen was running 3.1.1, so not everything was working properly.
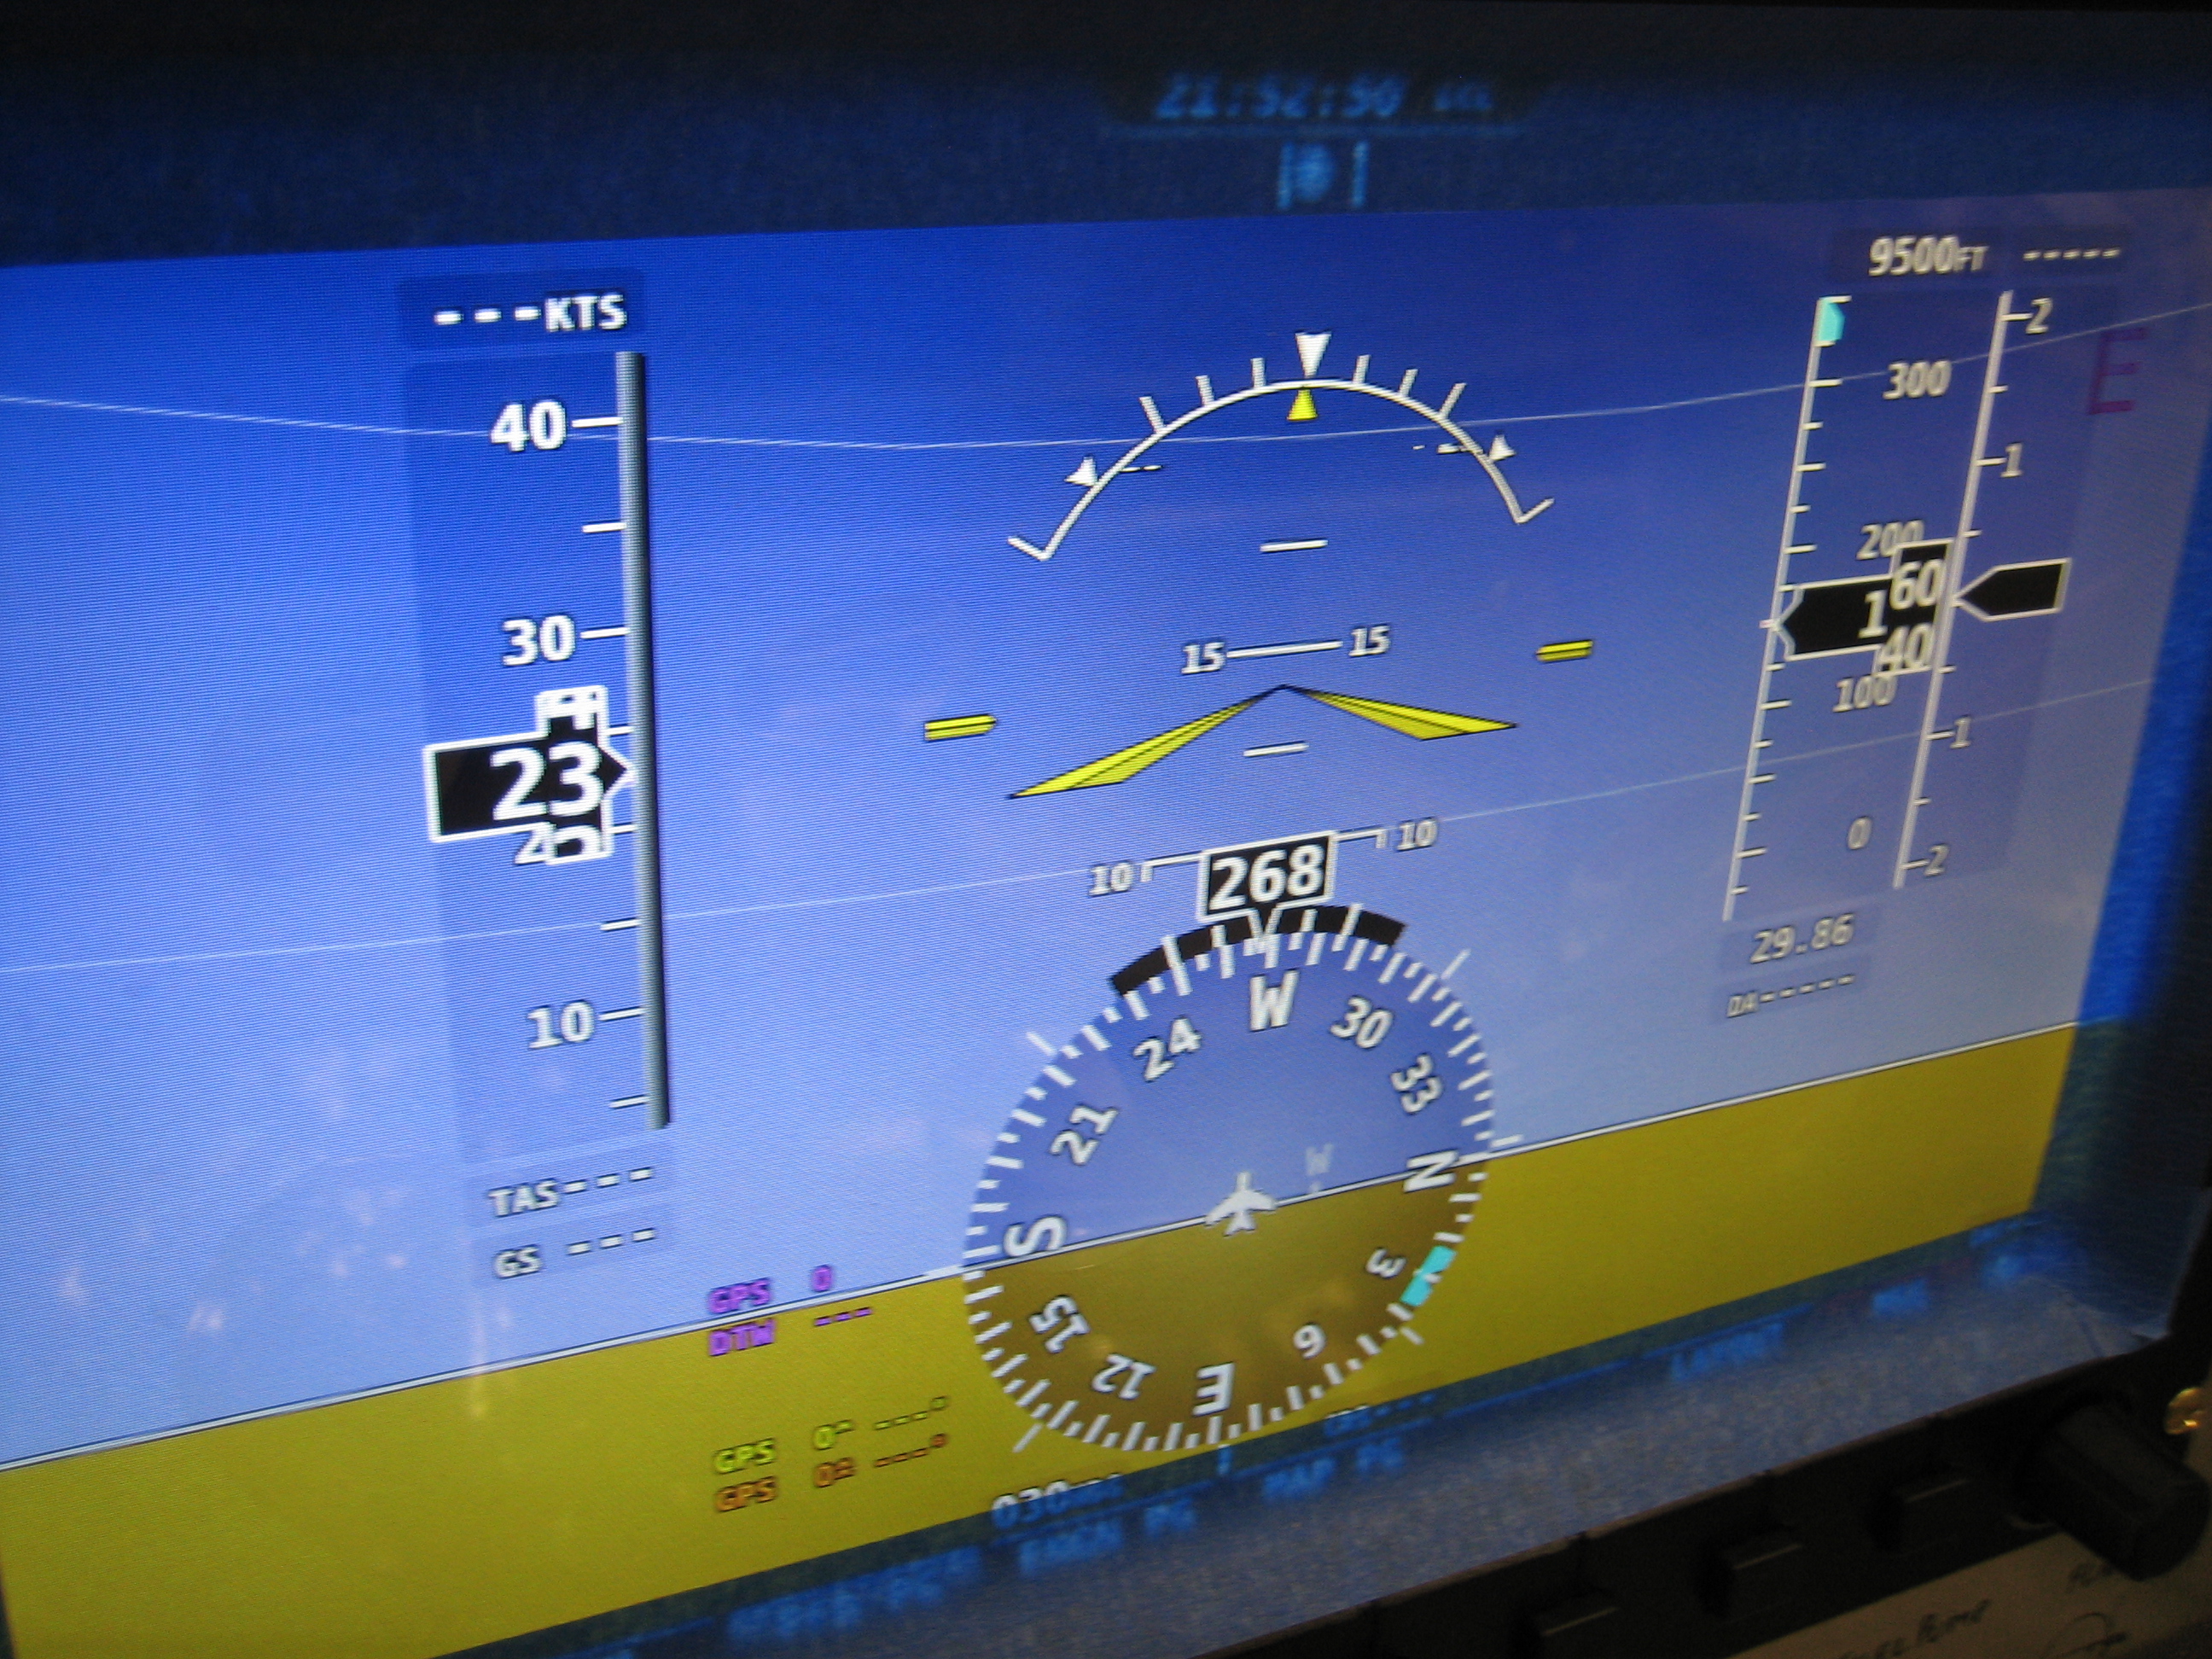
The left screen was showing proper attitude, but no synthetic vision.
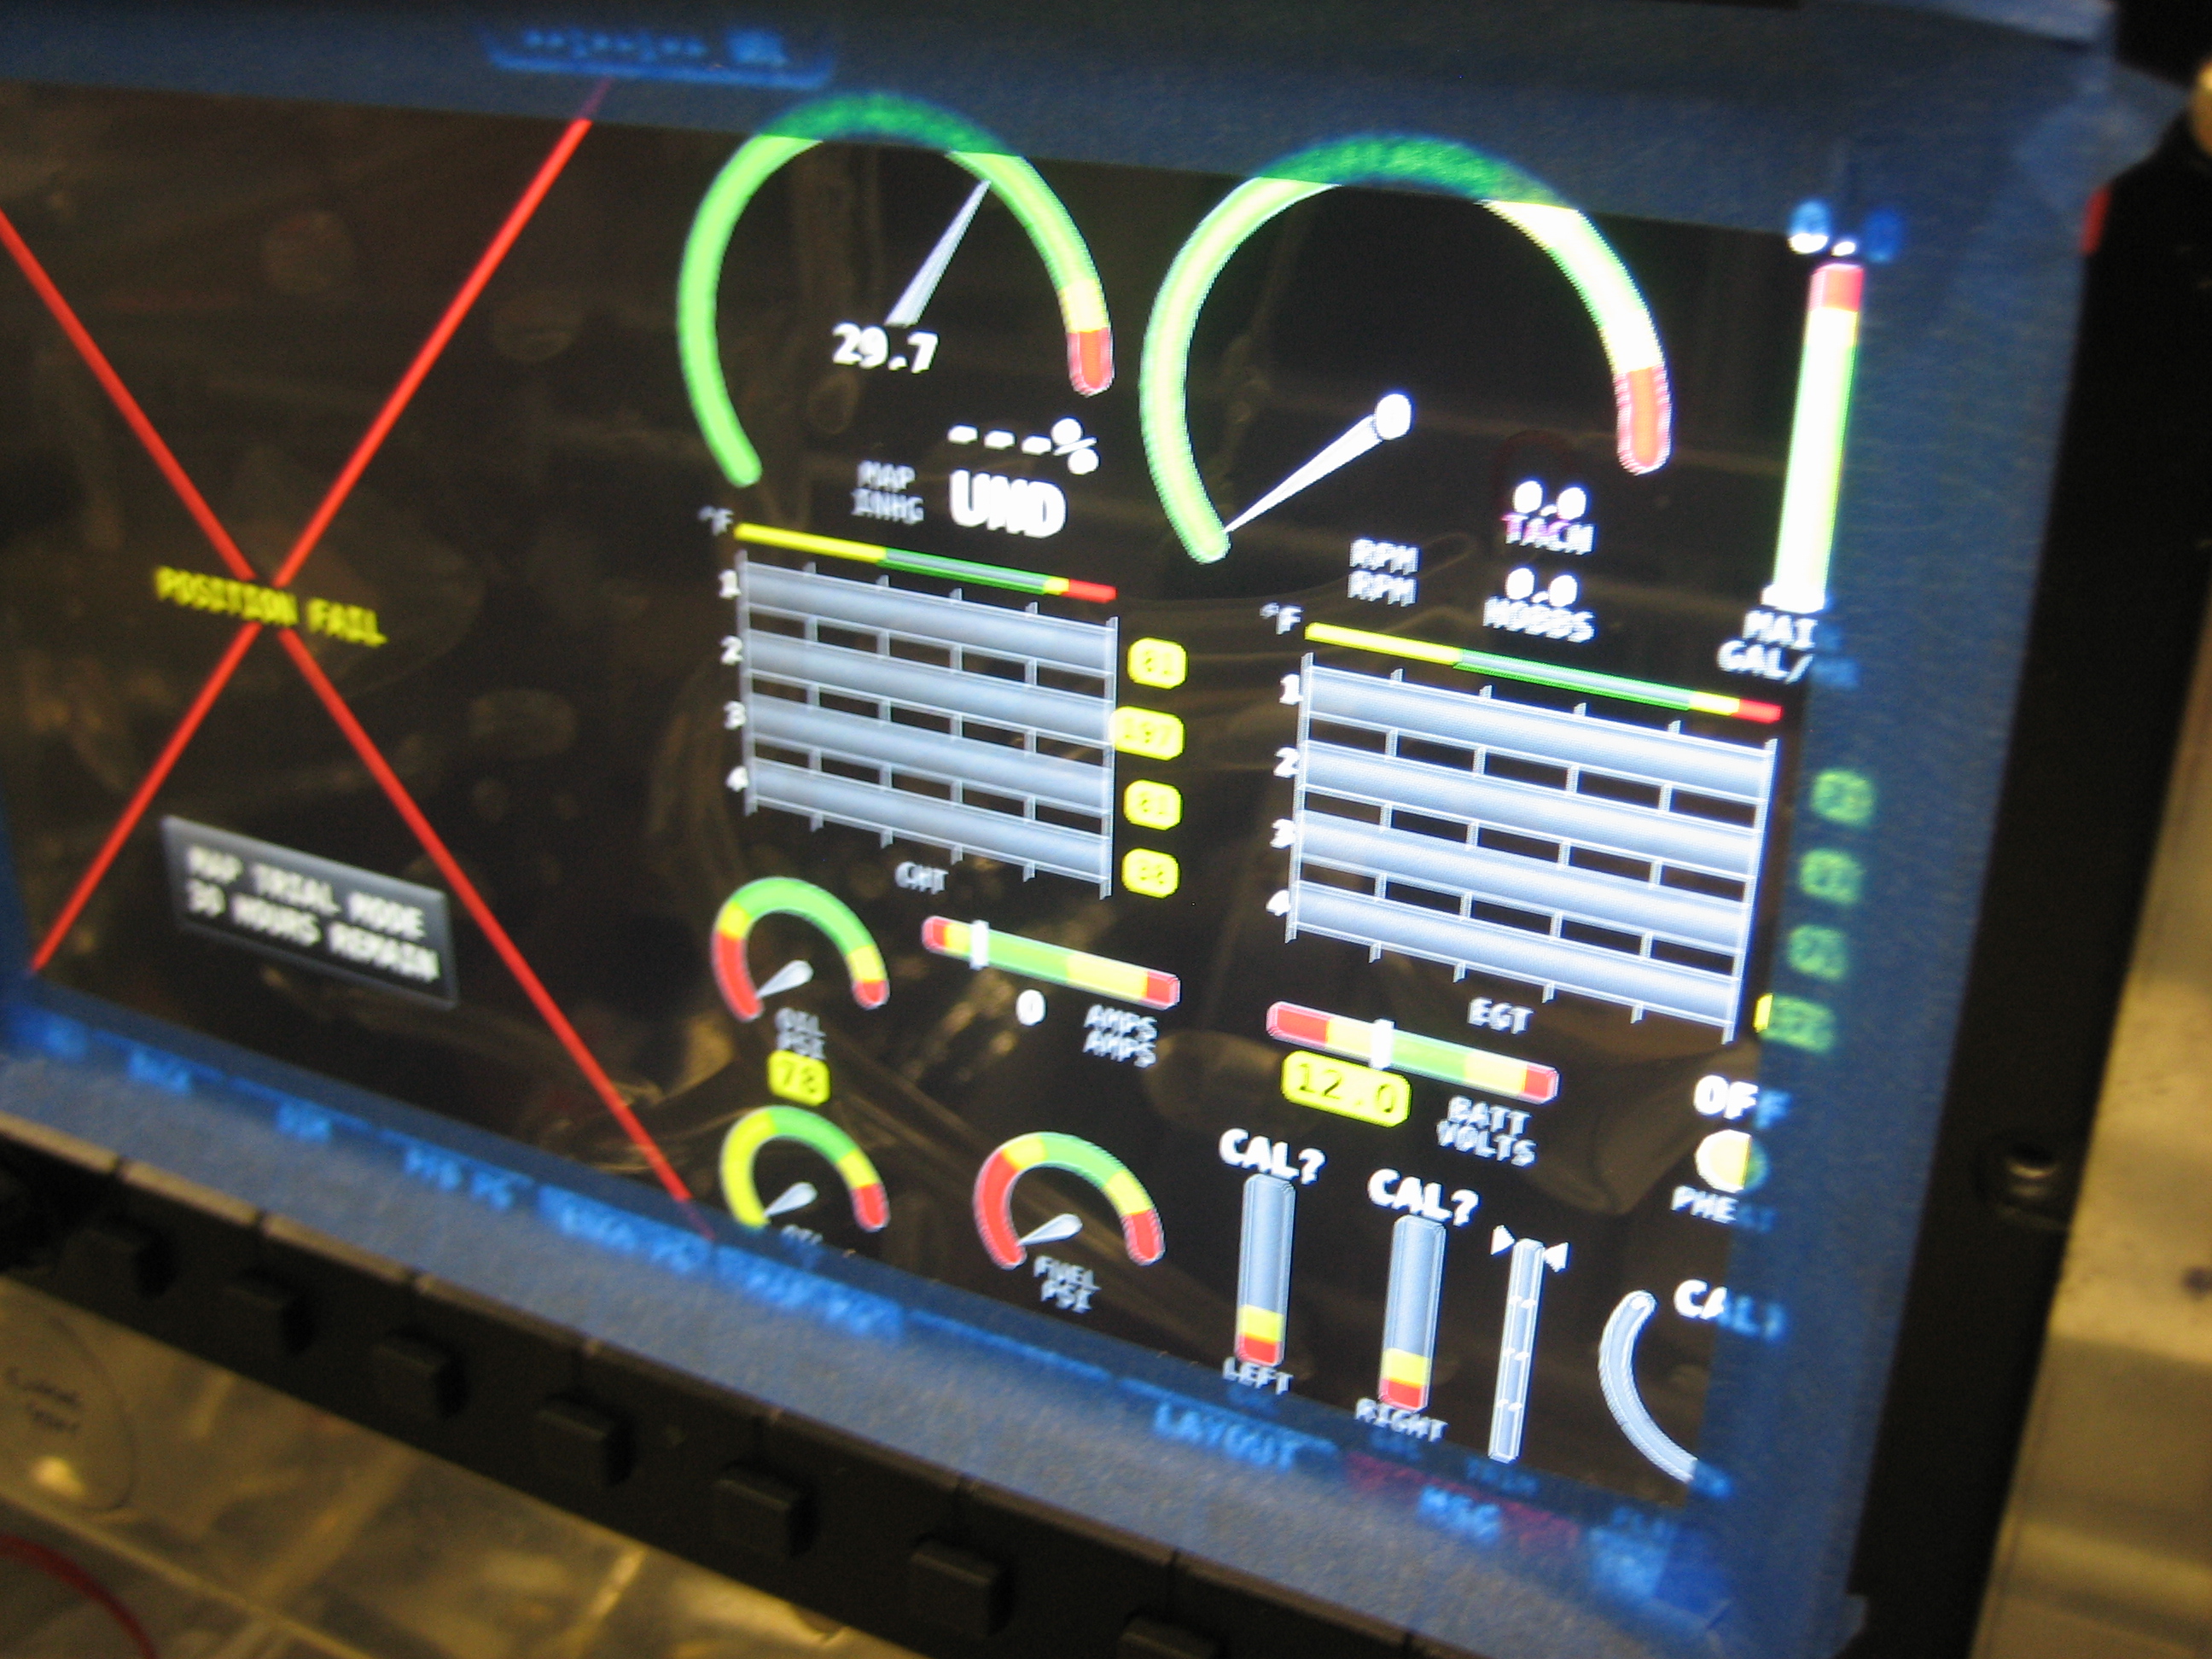
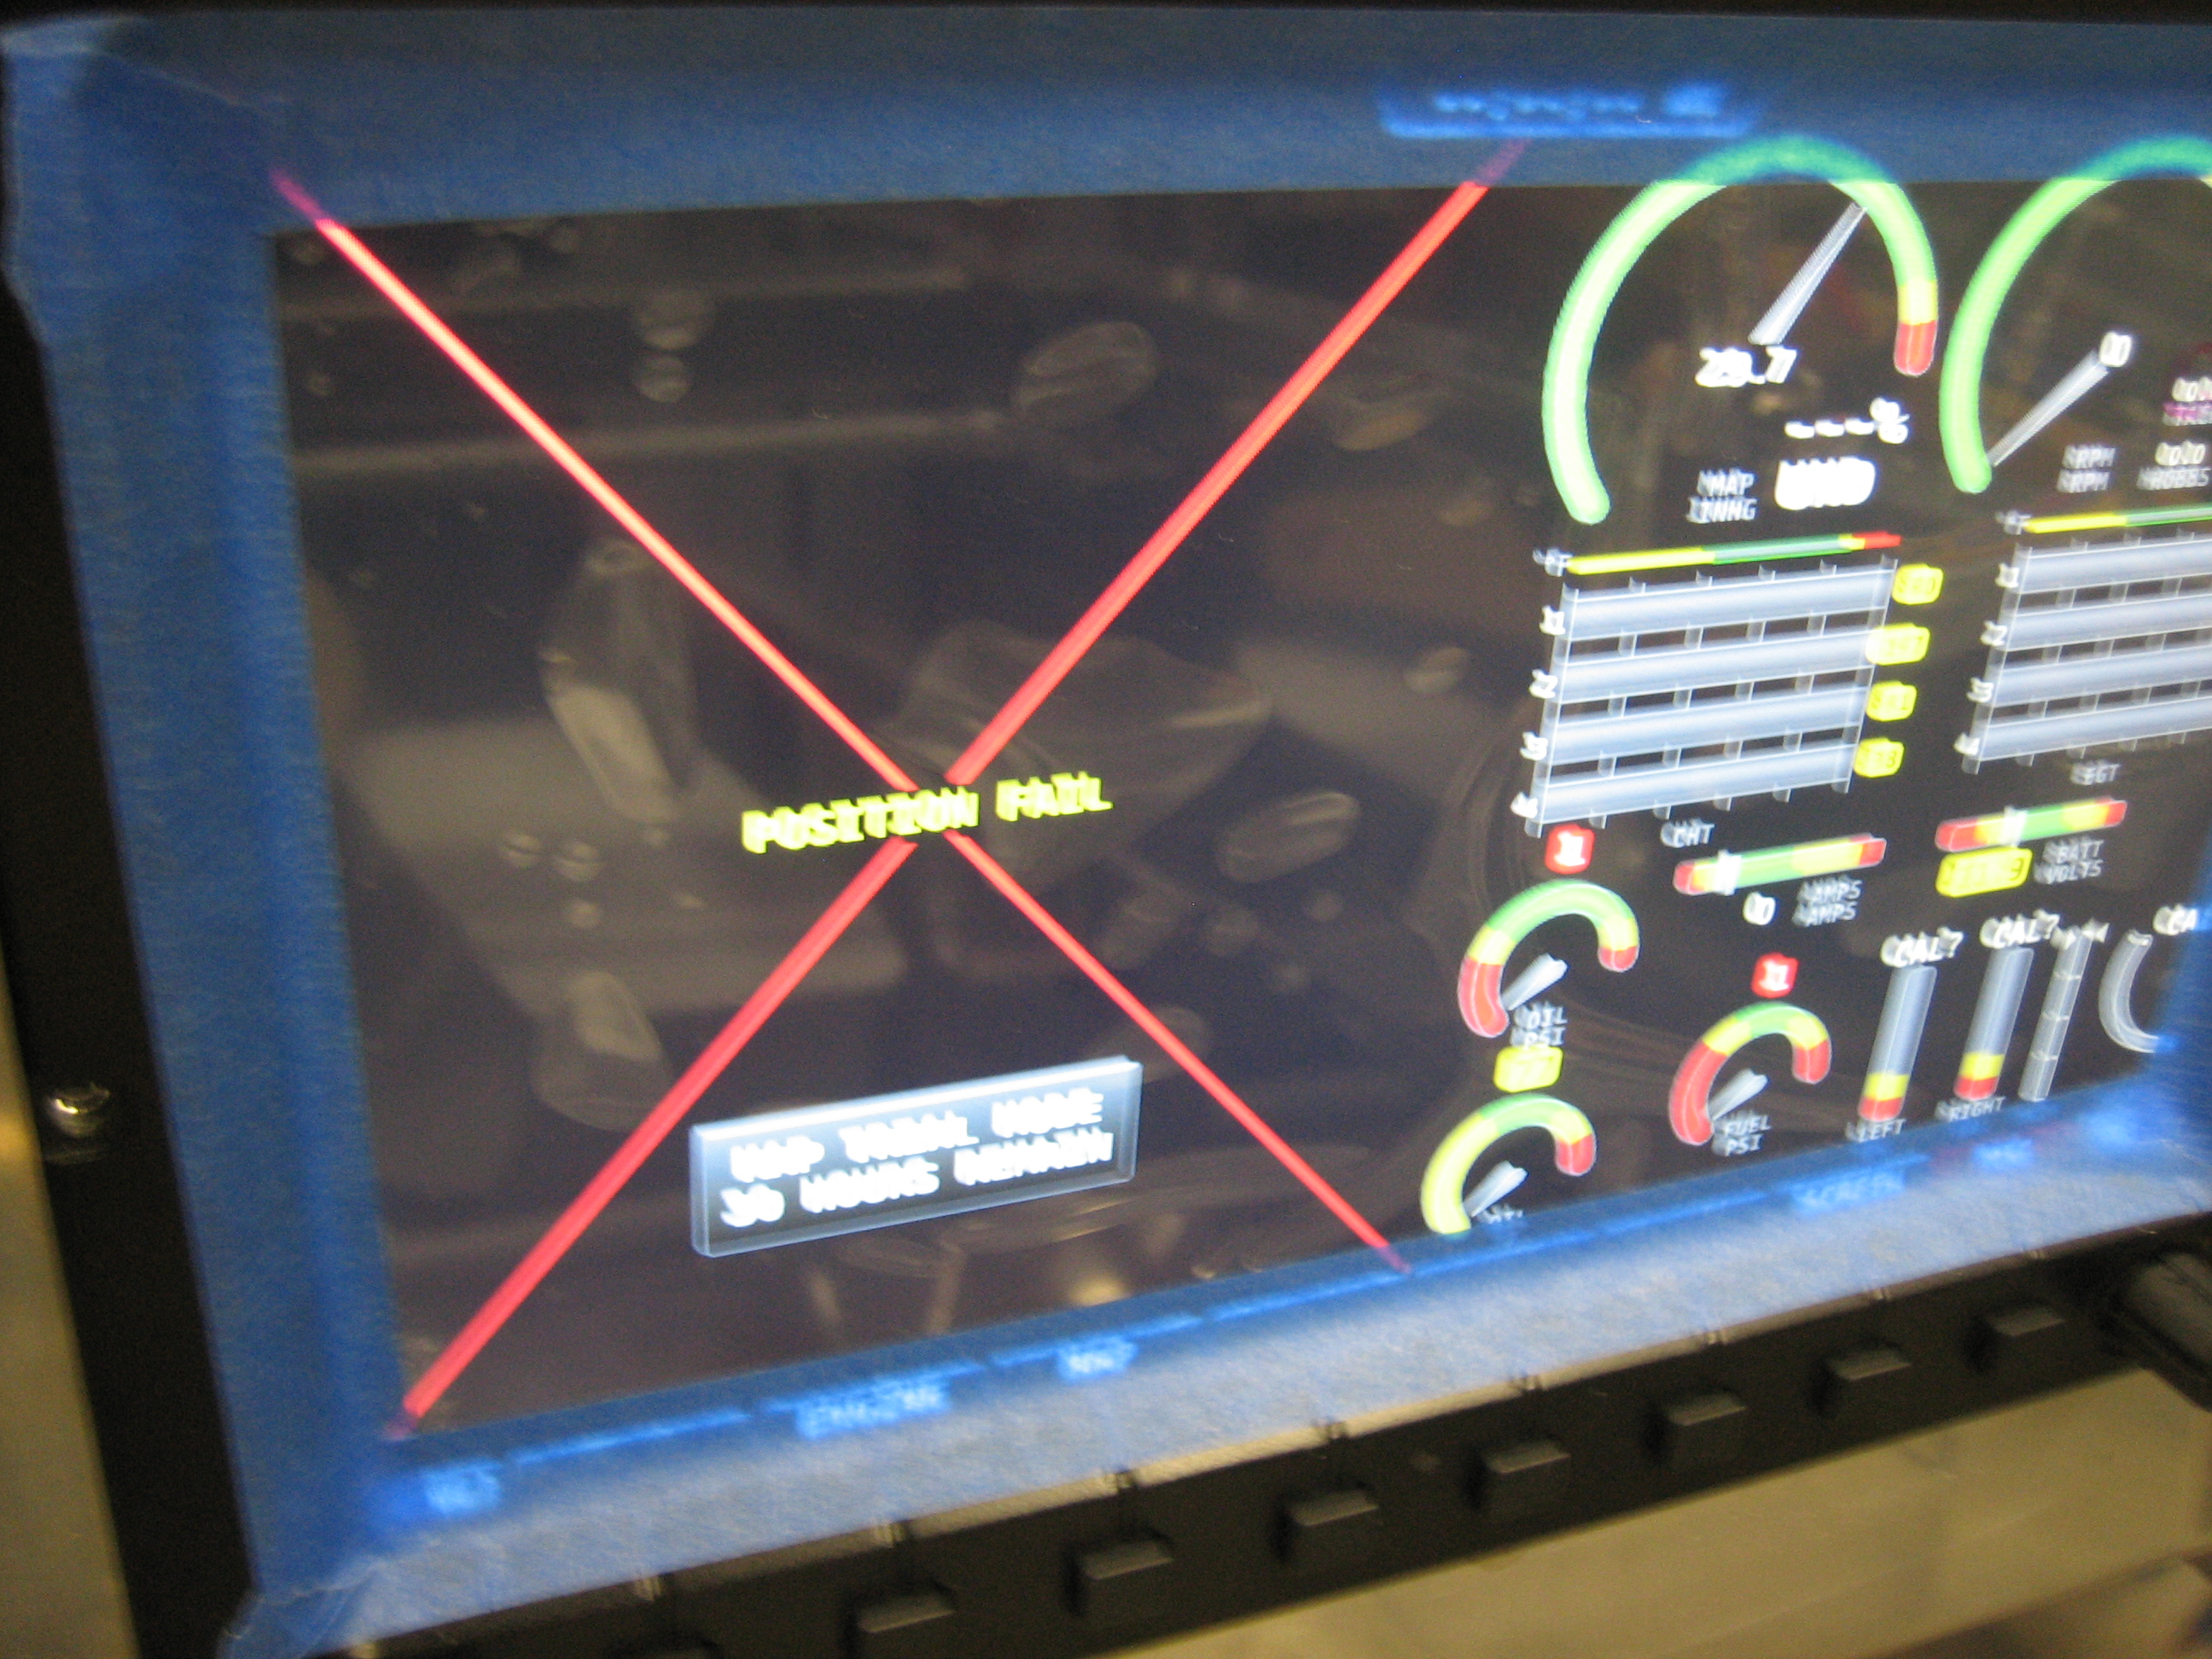
The right screen was showing a position fail indication, but that was expected since the serial ports haven’t been hooked up on the right screen yet. The engine monitor seems to be working properly. The manifold pressure is showing 29.7 inches of mercury. The oil temp, #1 & #3 EGT/CHT temps and battery voltage are also indicating correctly
After a software update and reboot, the left screen has a valid GPS fix which caused the PFD to start showing synthetic vision.
The right screen still has the position fail indicator though. Time to hook up the serial ports.
You can see that all of the connections on the top two connectors are identical. The SkyView installation manual says that all of these connections should be shorted together between the two screens. By hooking them up to the same pins on separate connectors, this happens automatically. For example, the rightmost pins on the top and bottom row of each connector are for the #1 serial TX & RX lines. Since both displays are connected to these pins on different connectors, their TX & RX lines are shorted together. On the third connector down, you can see the transponder serial lines are connected to these same pins. This allows both displays to send and receive data to/from the transponder.

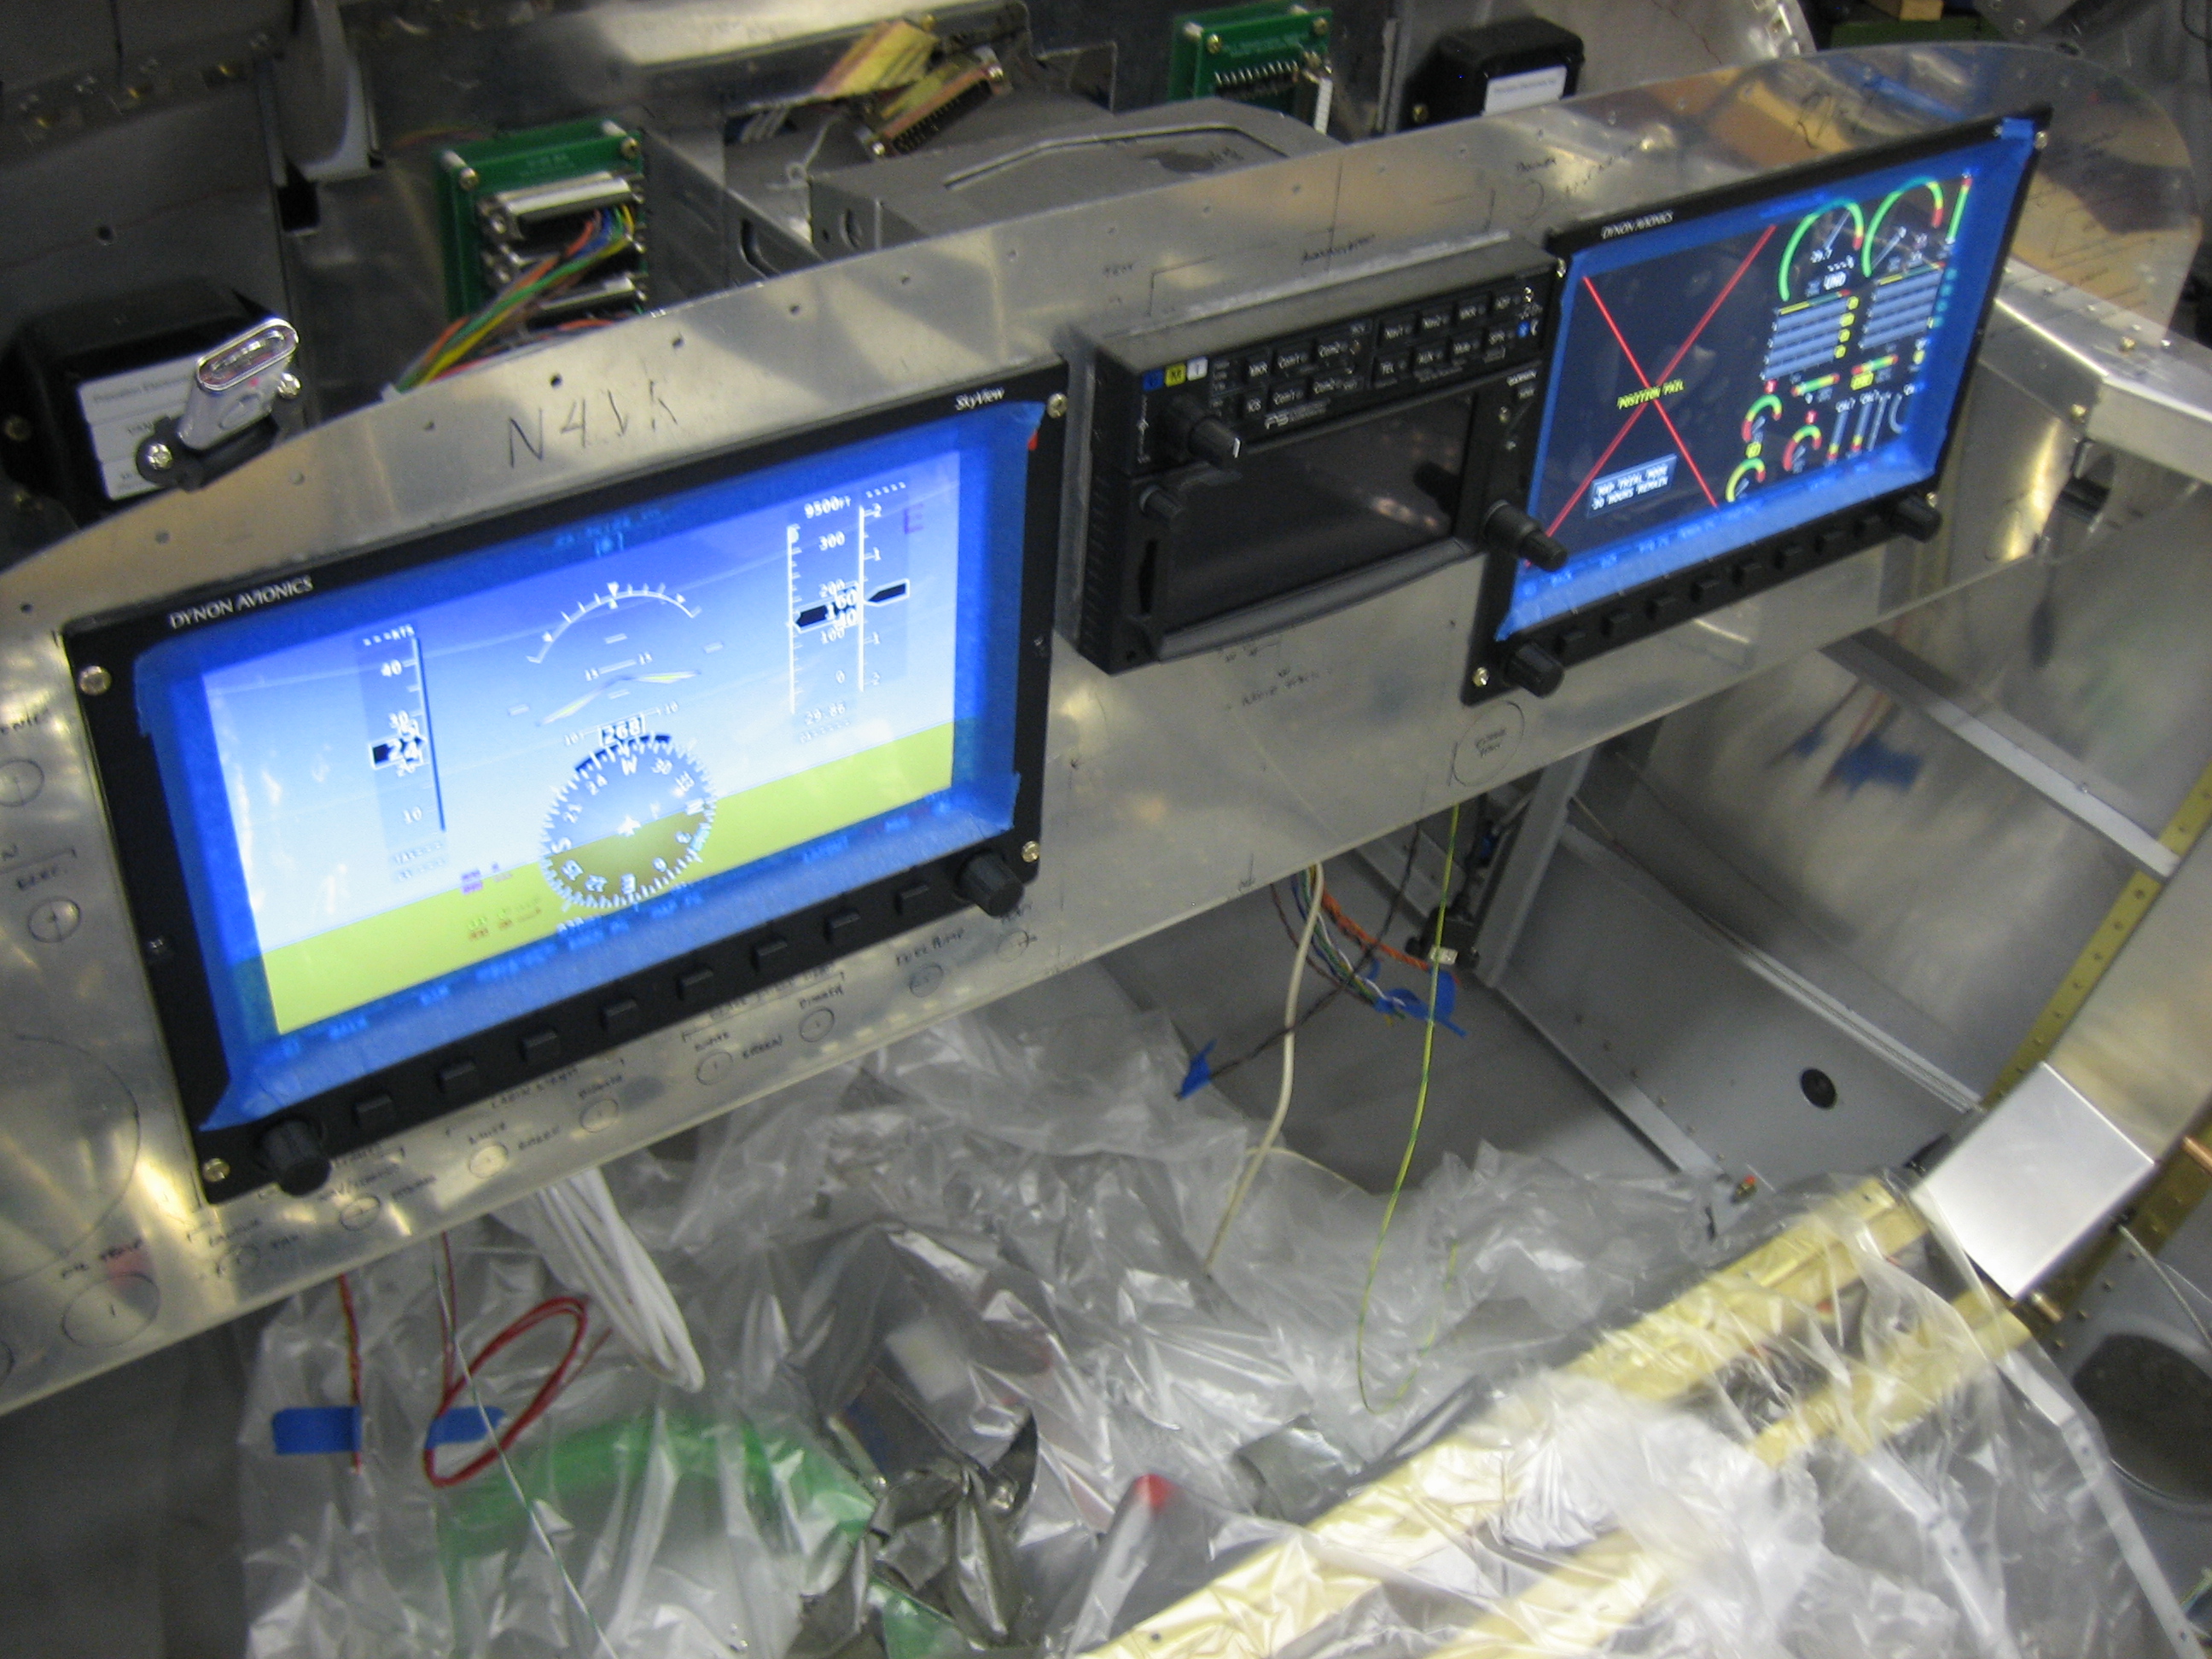
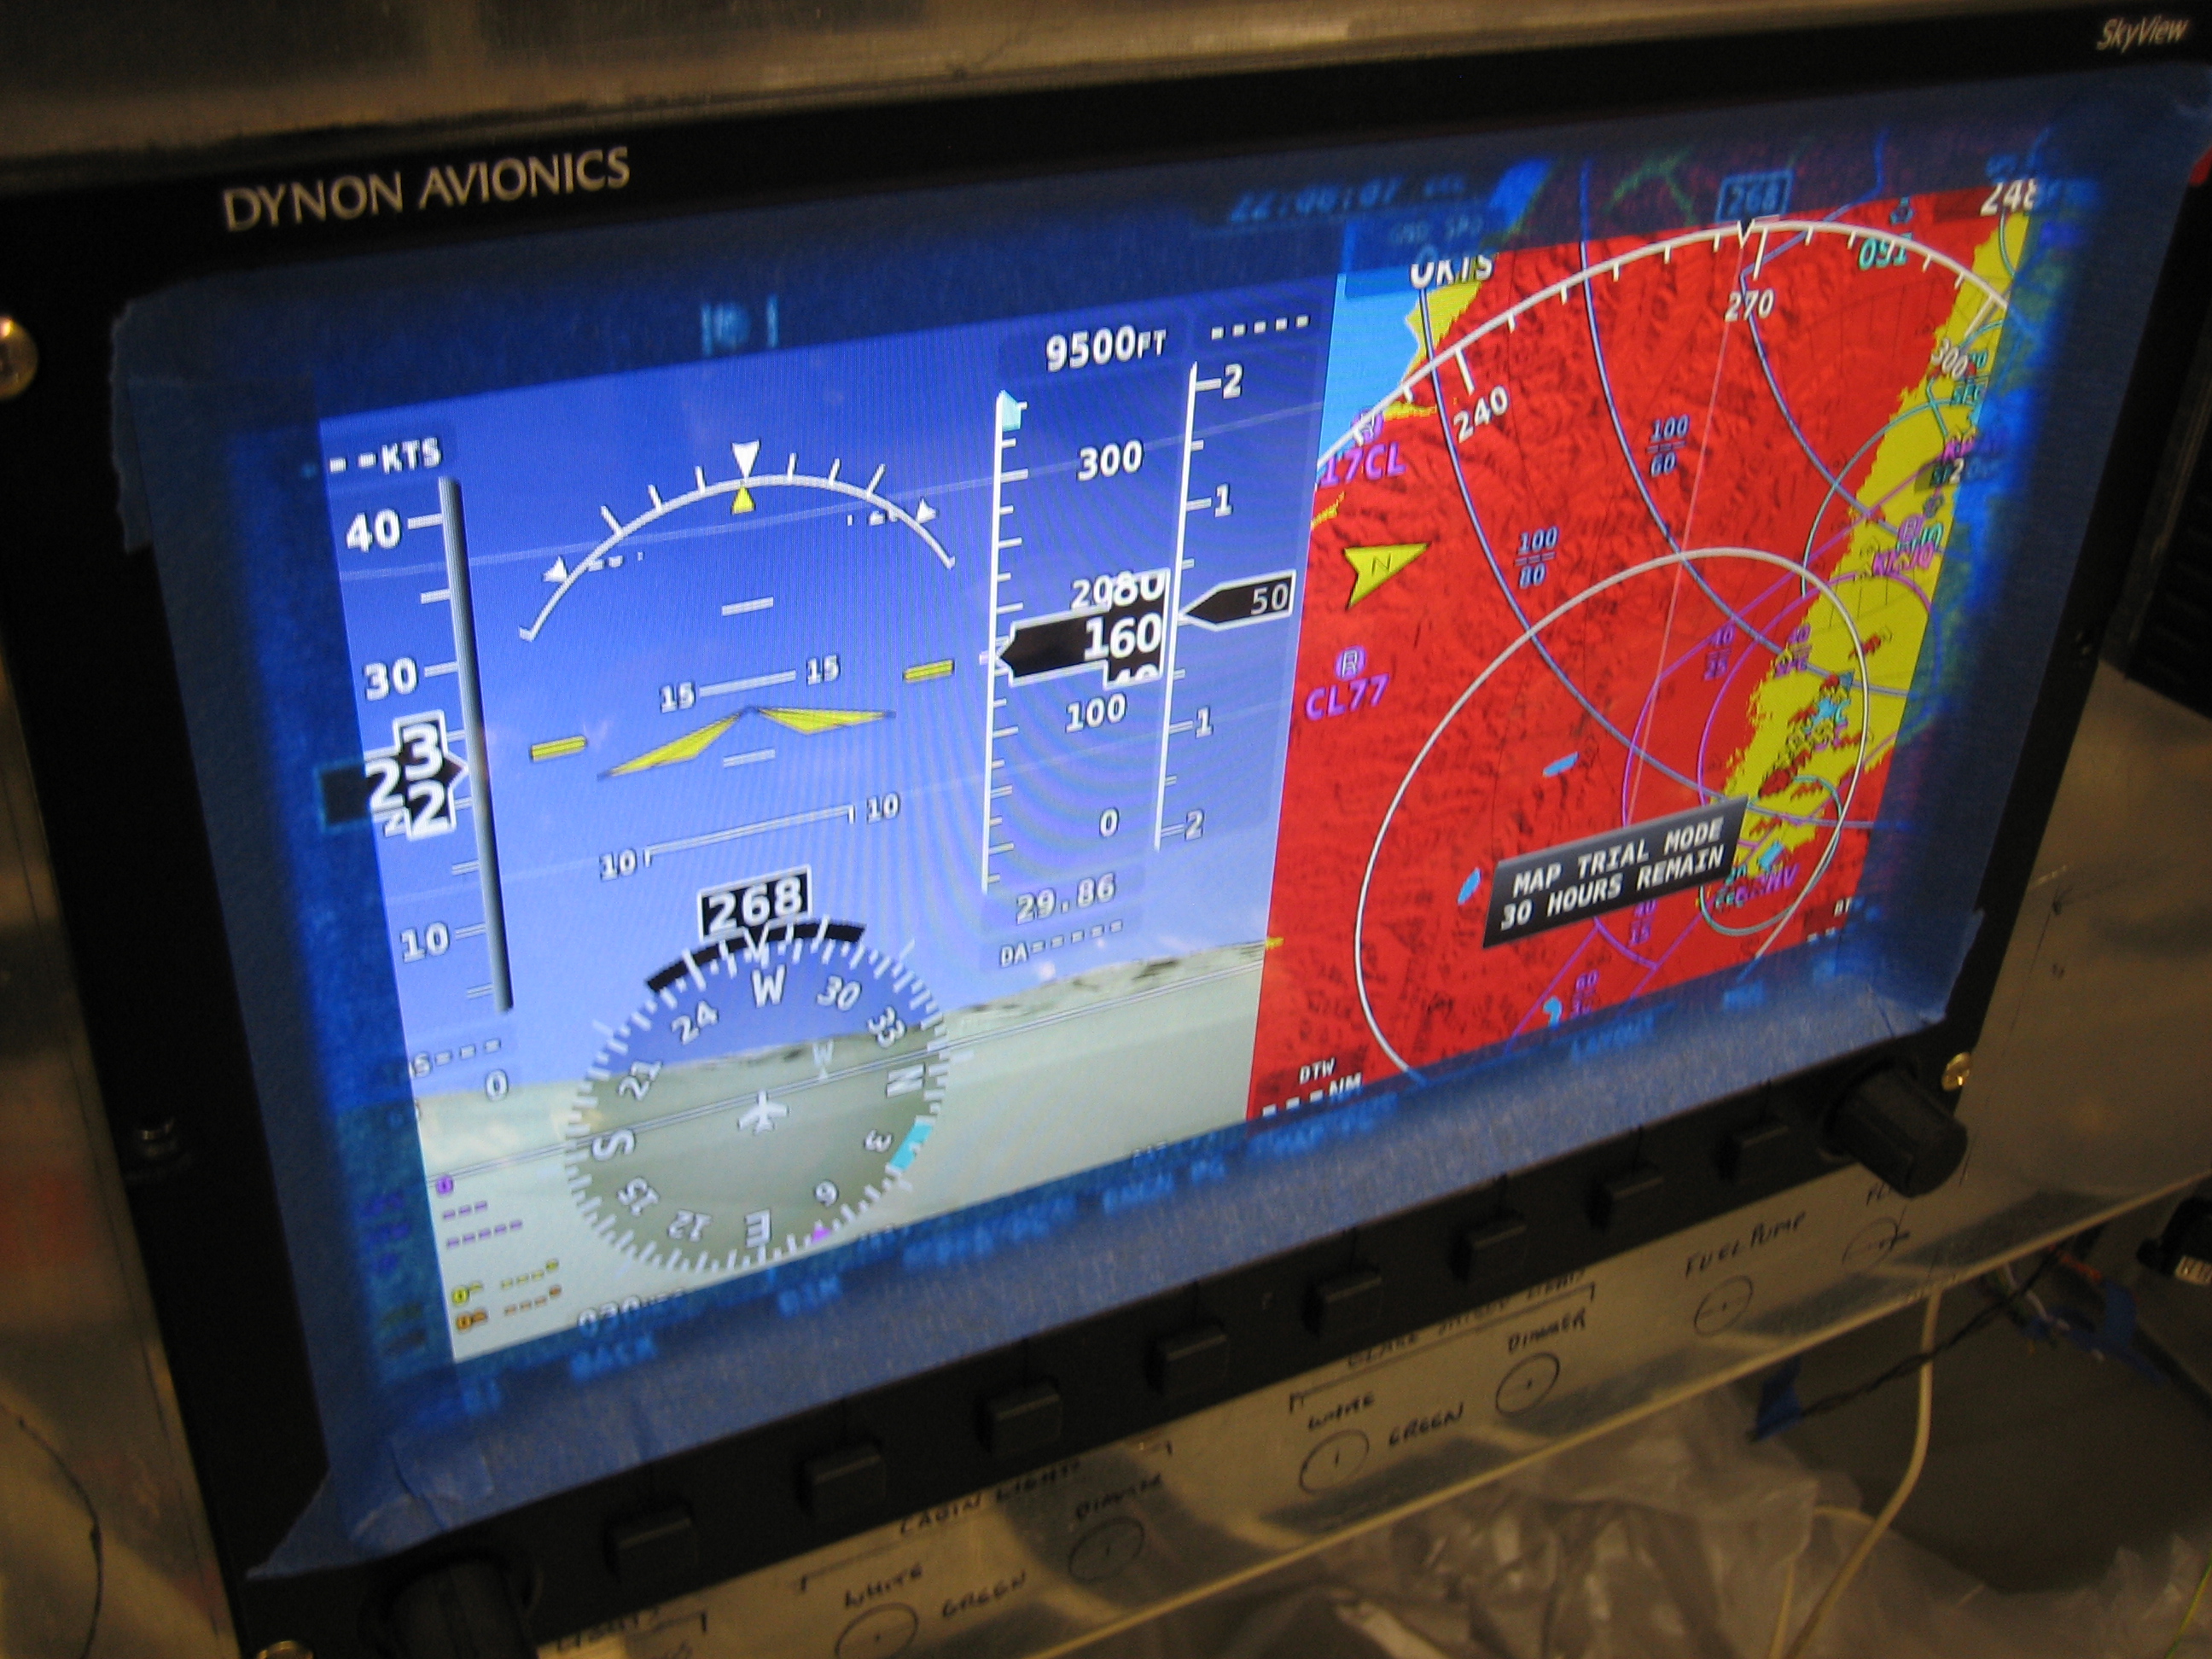
After hooking up all of the serial lines from the right screen, both displays now have position data.