I got back from Oshkosh late last night. I had two main goals for my trip to Oshkosh: decide on an engine and decide on an EFIS.
Engine: I had heard good things about the IO-375 from AeroSport Power. Fundamentally, it is a parallel valve IO-360 with a redesigned crank that simultaneously lowers compression ratio (8:1) while moving the peak pressure to a point in the crank’s rotation that has more mechanical advantage. The end result is an engine that weighs exactly the same as the parallel valve IO-360 but makes 195 hp. I spoke at length with Bart LaLonde and am now convinced that this is the engine I’ll go with.
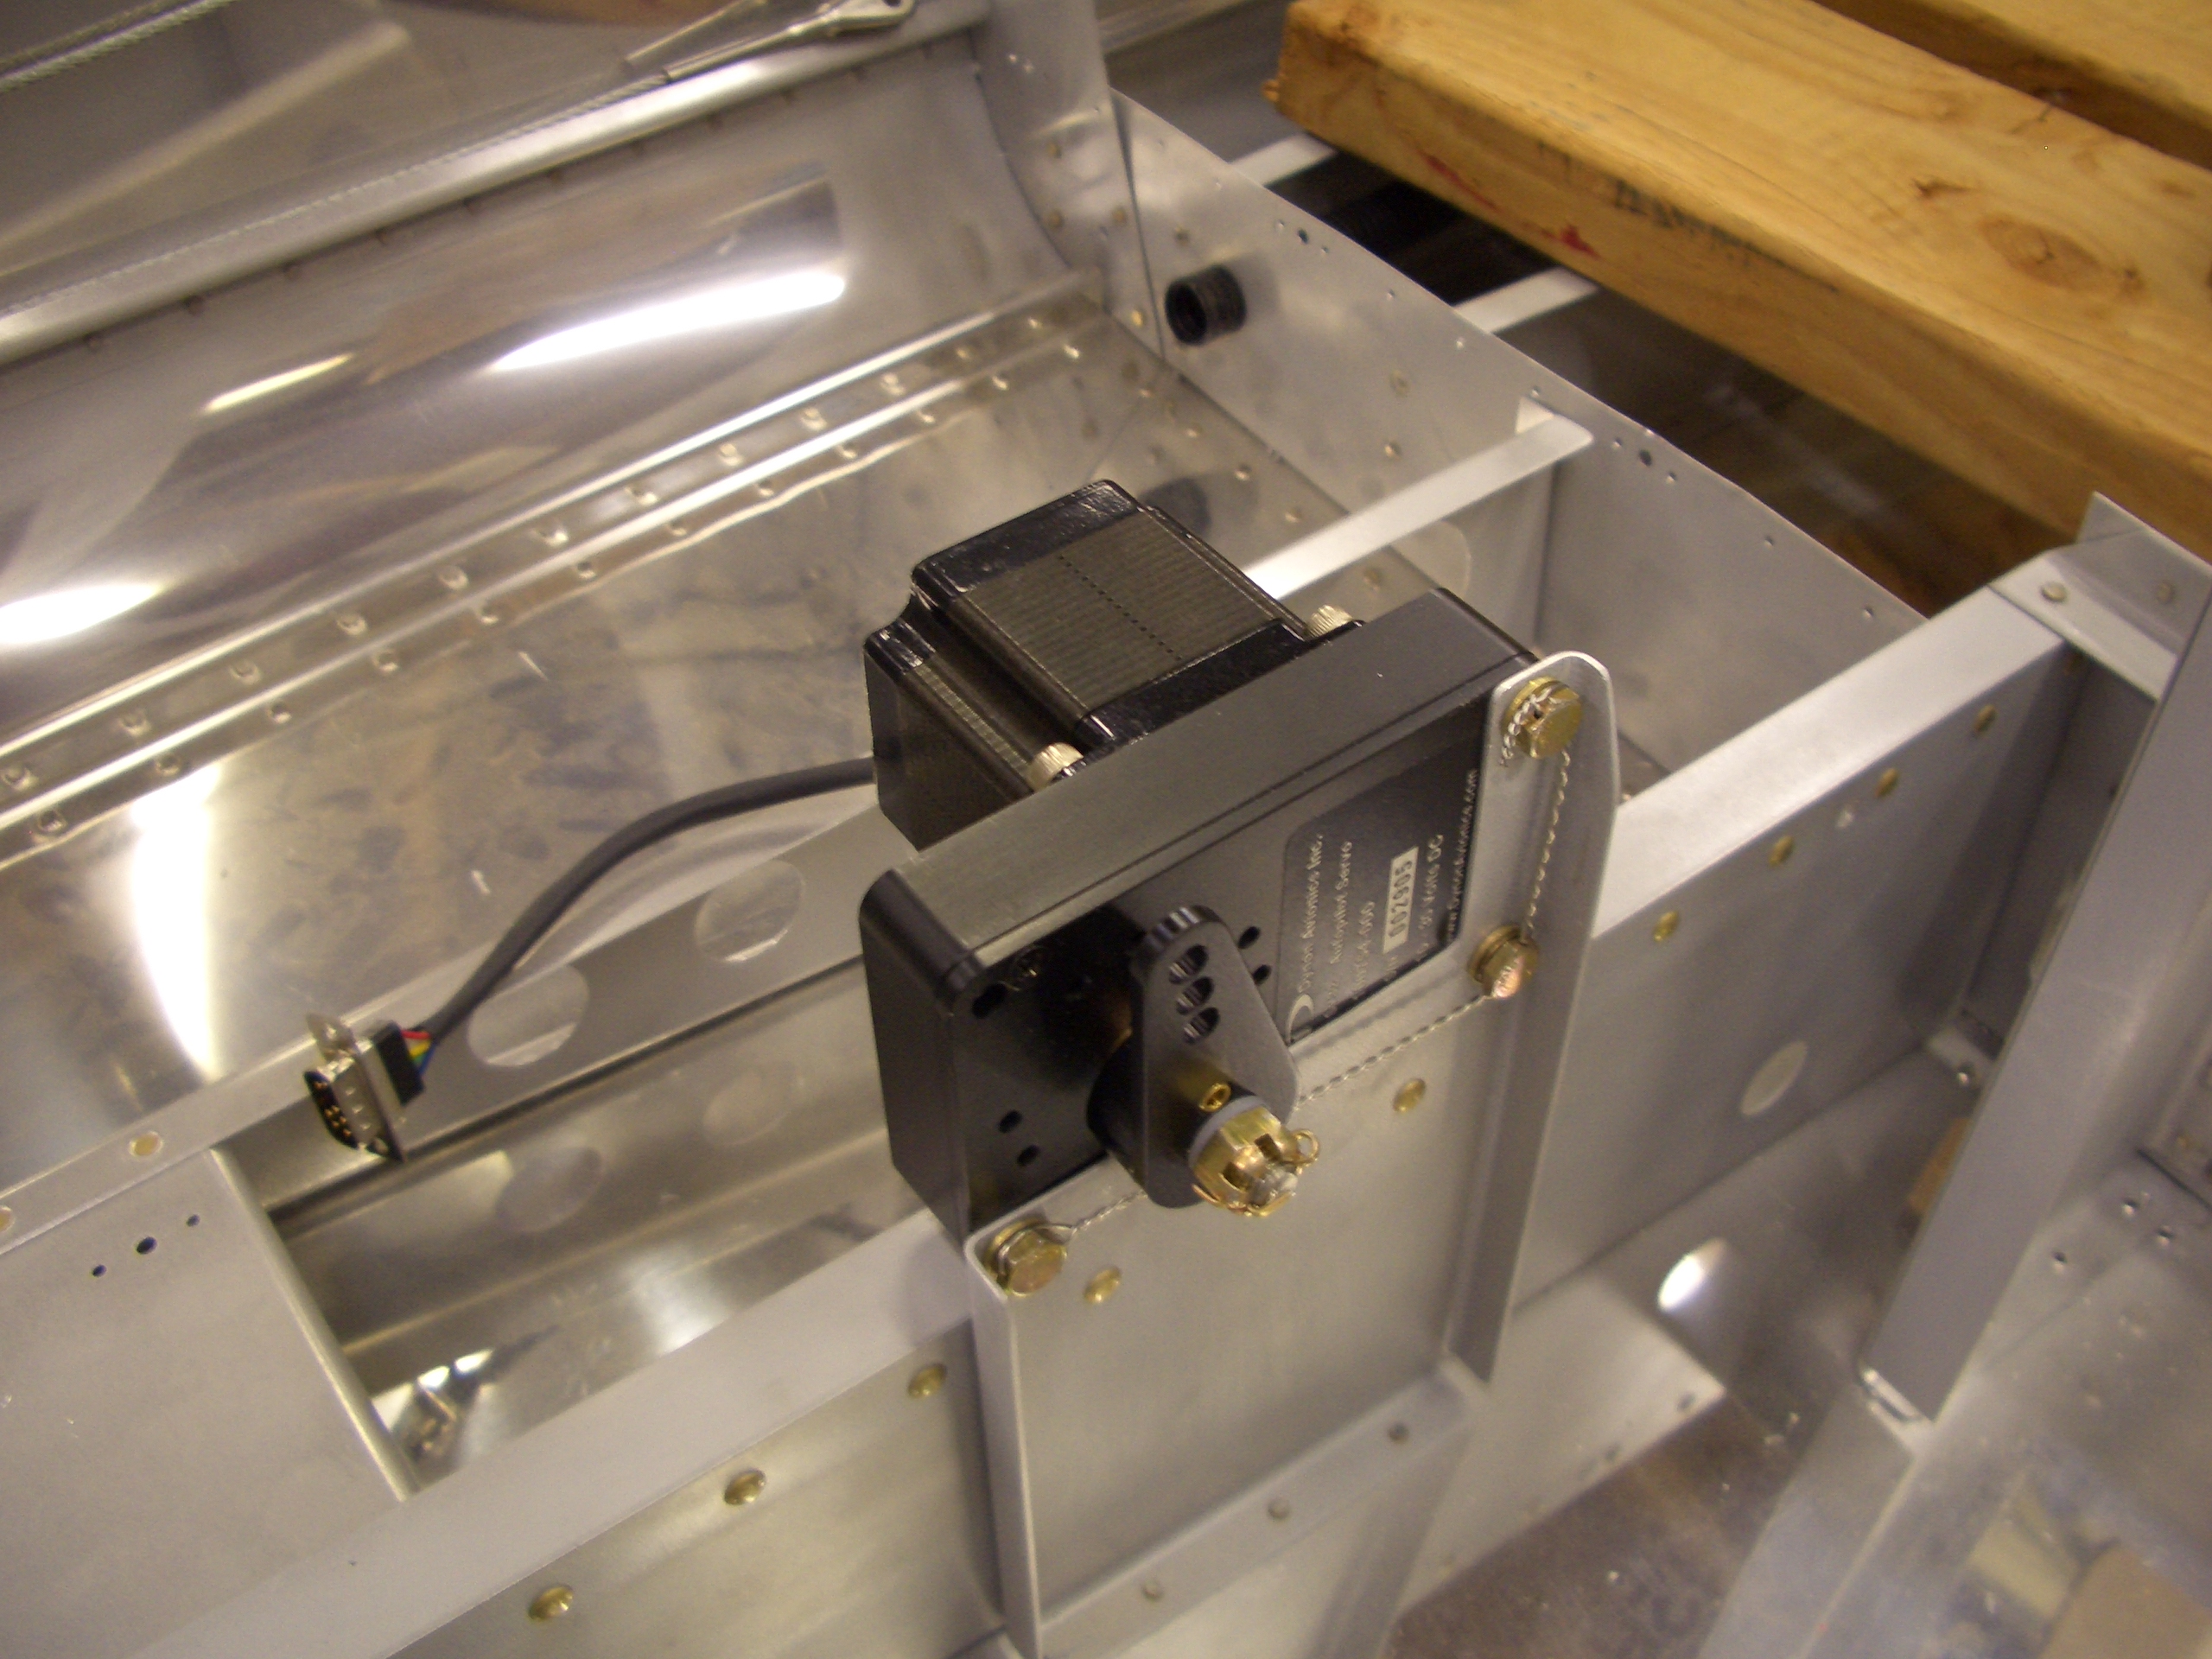
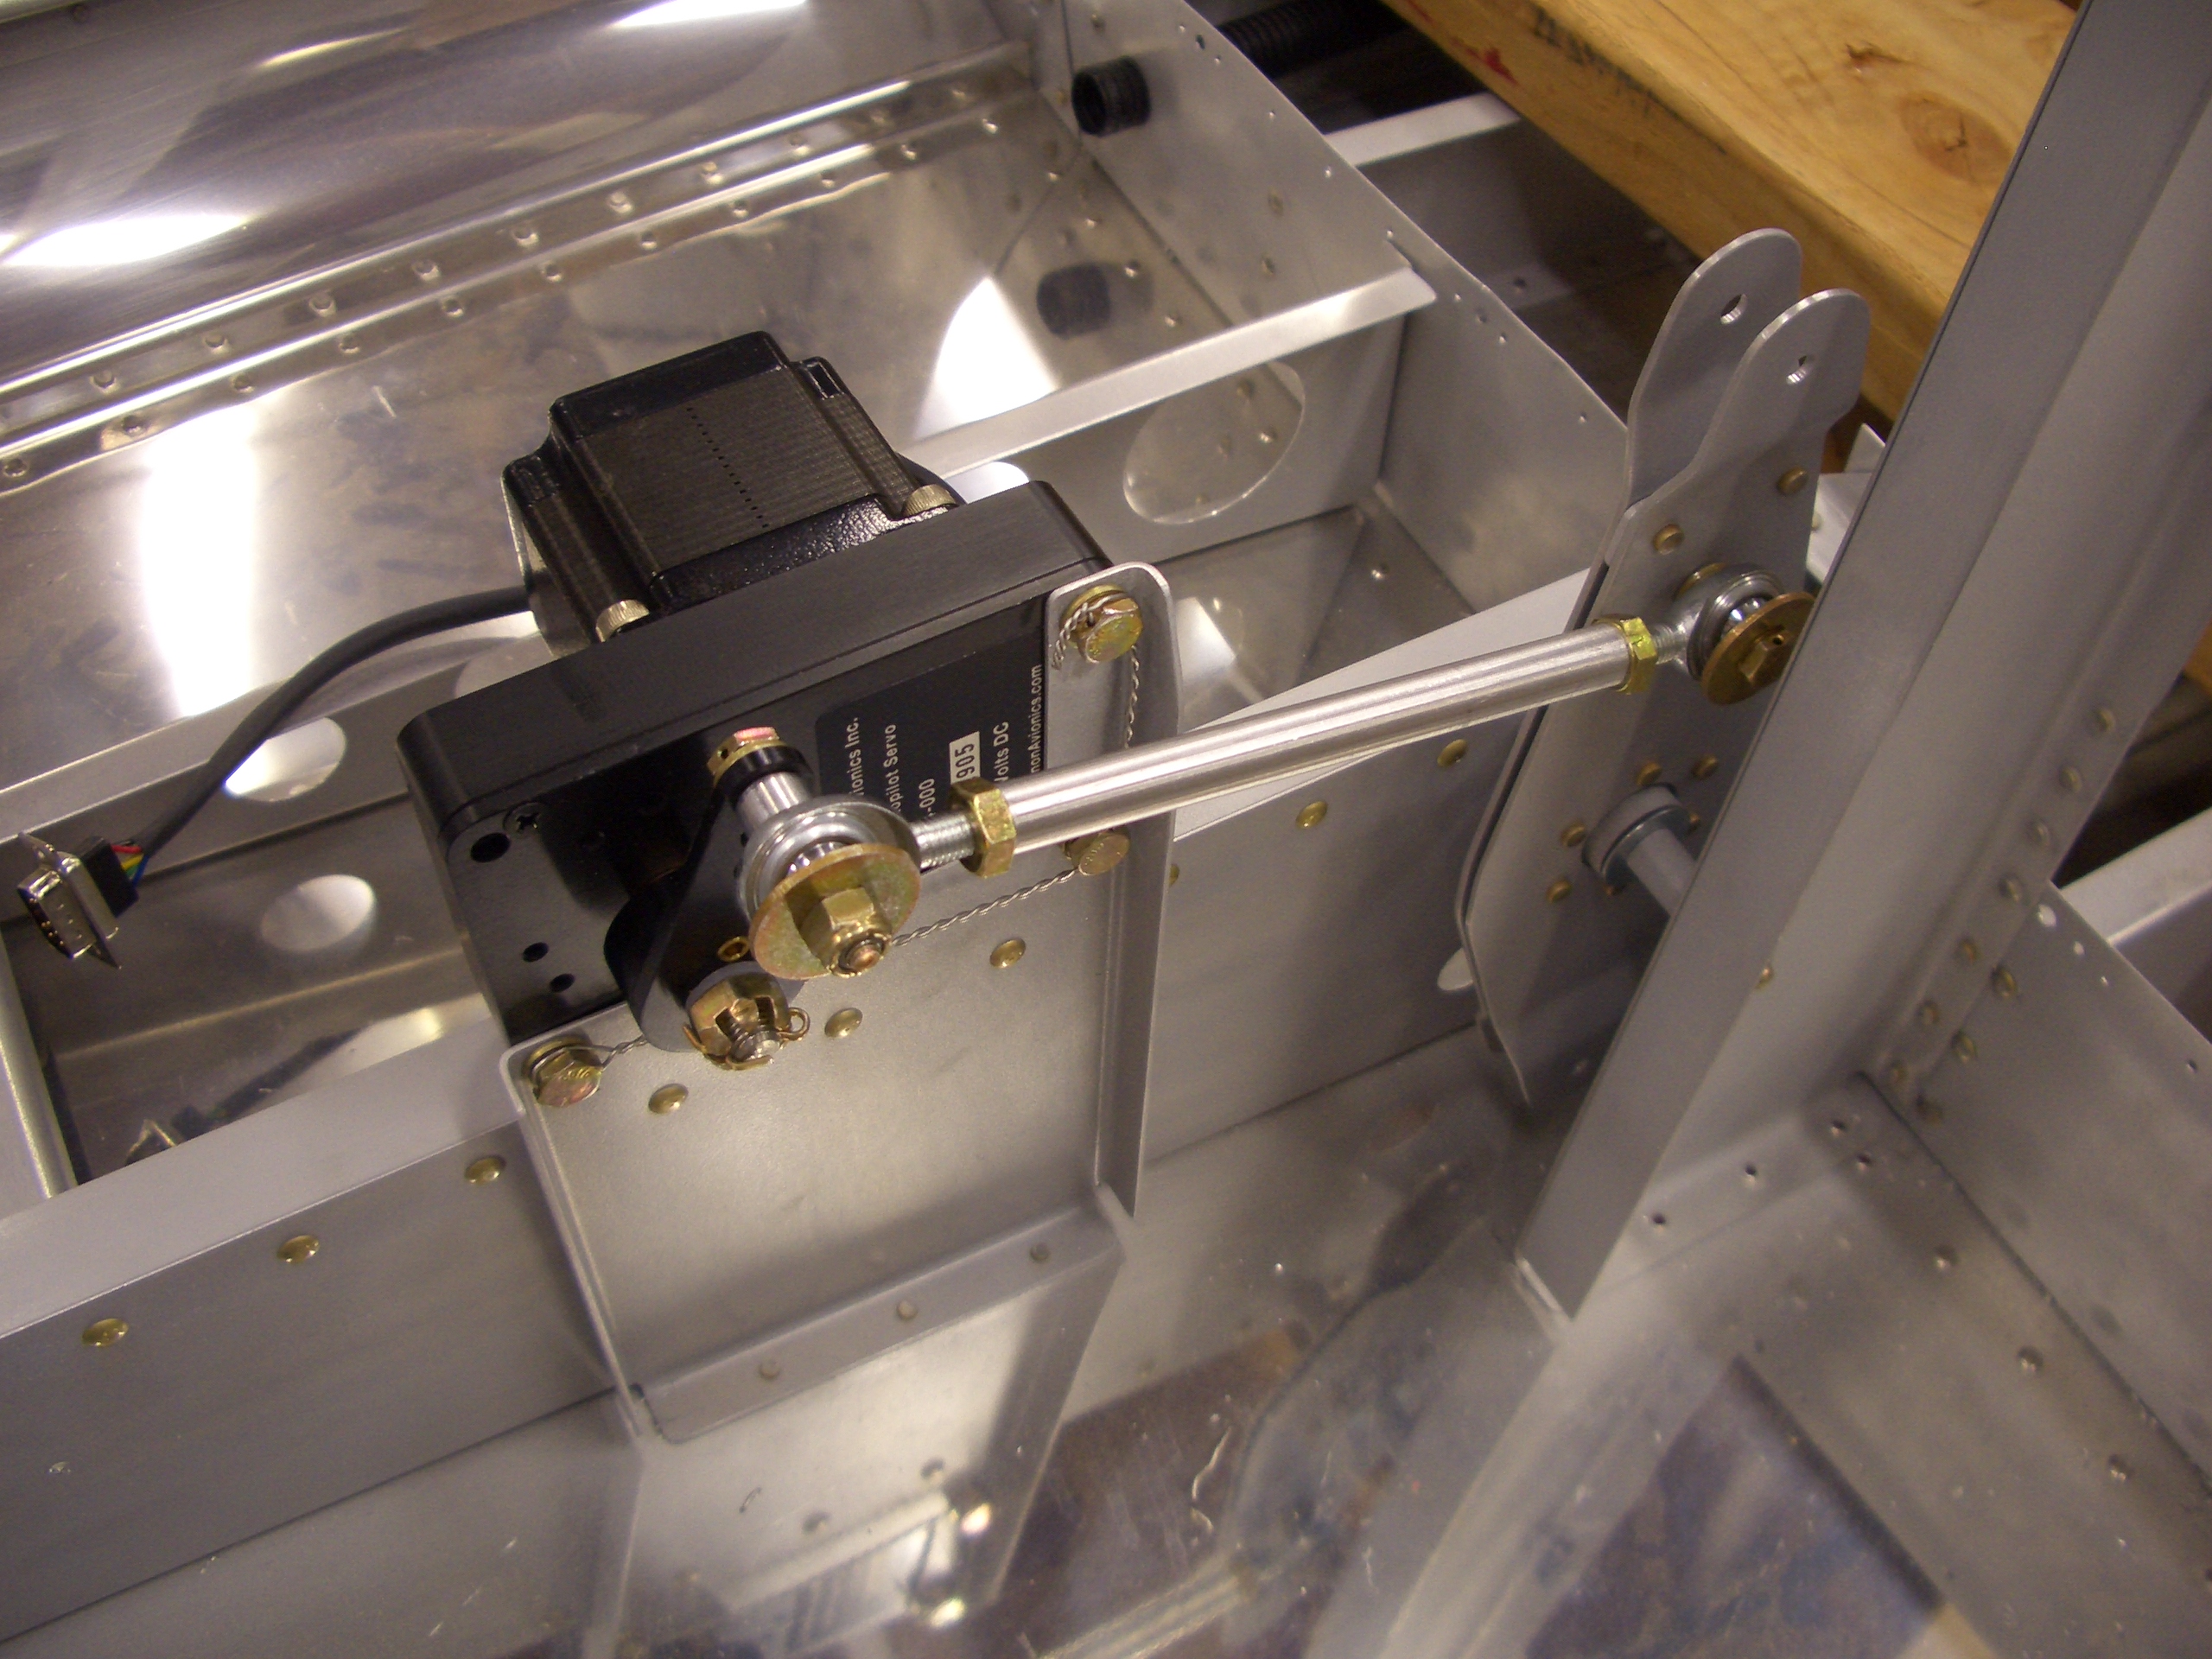
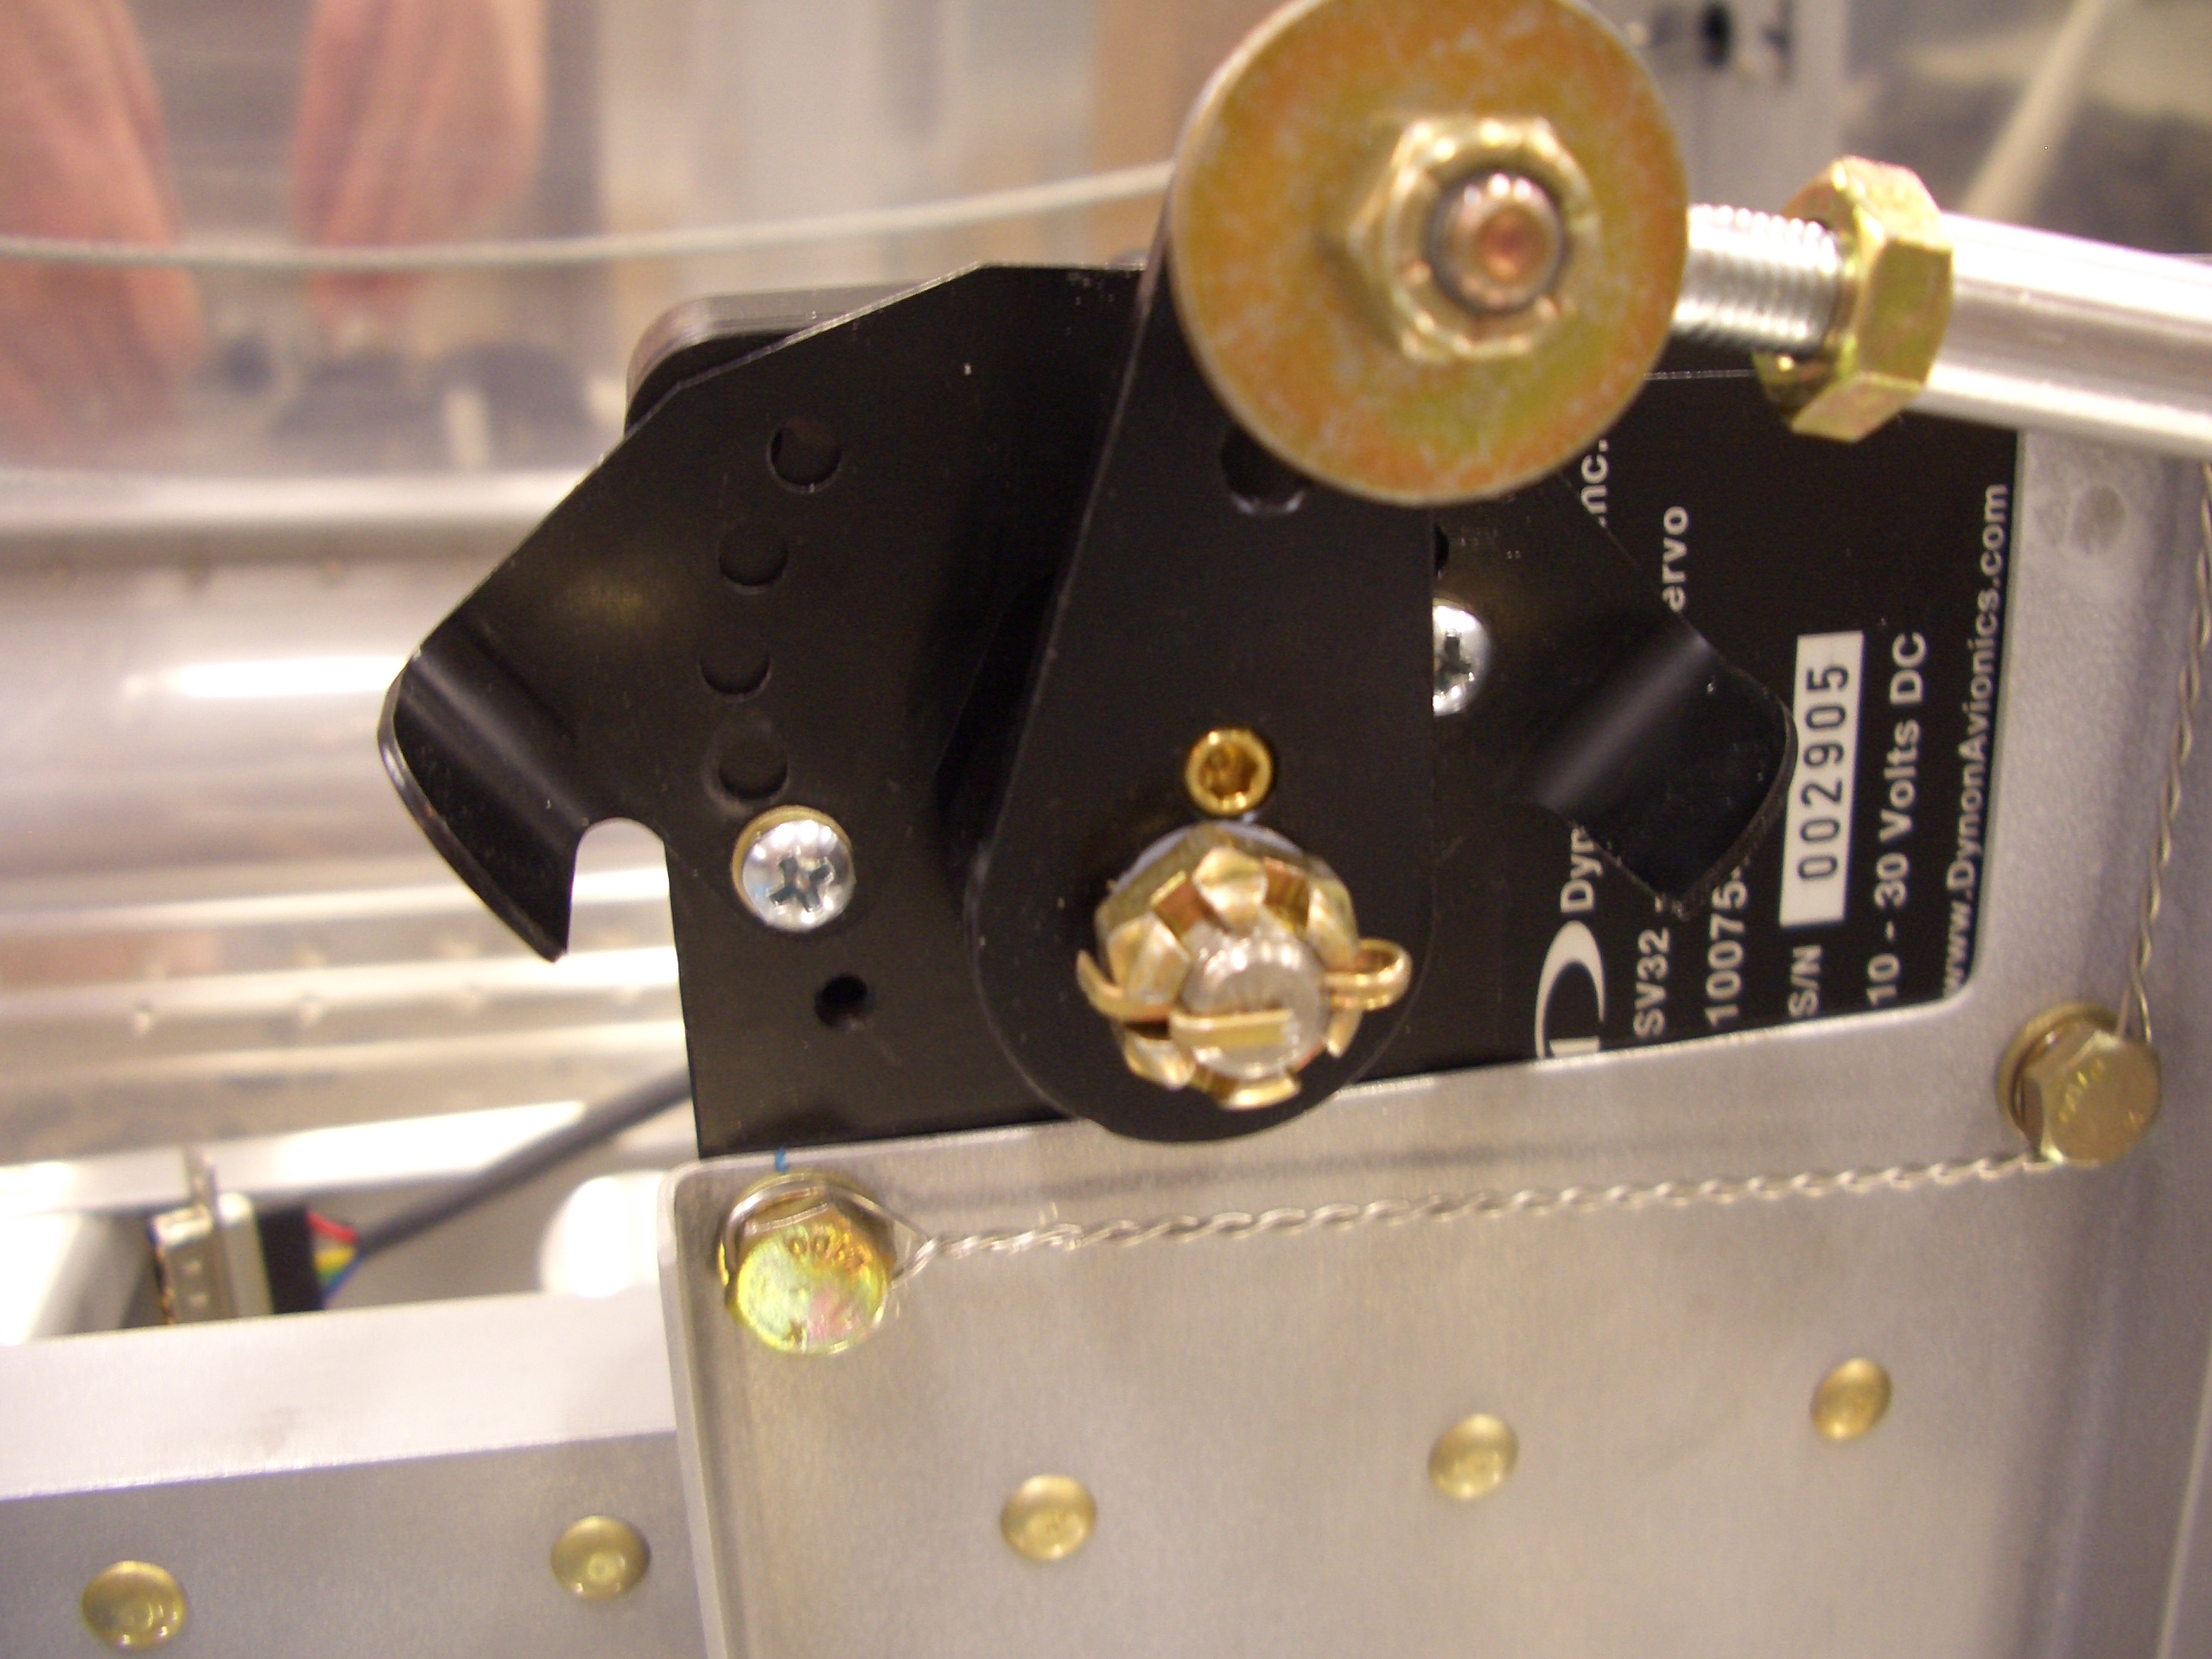
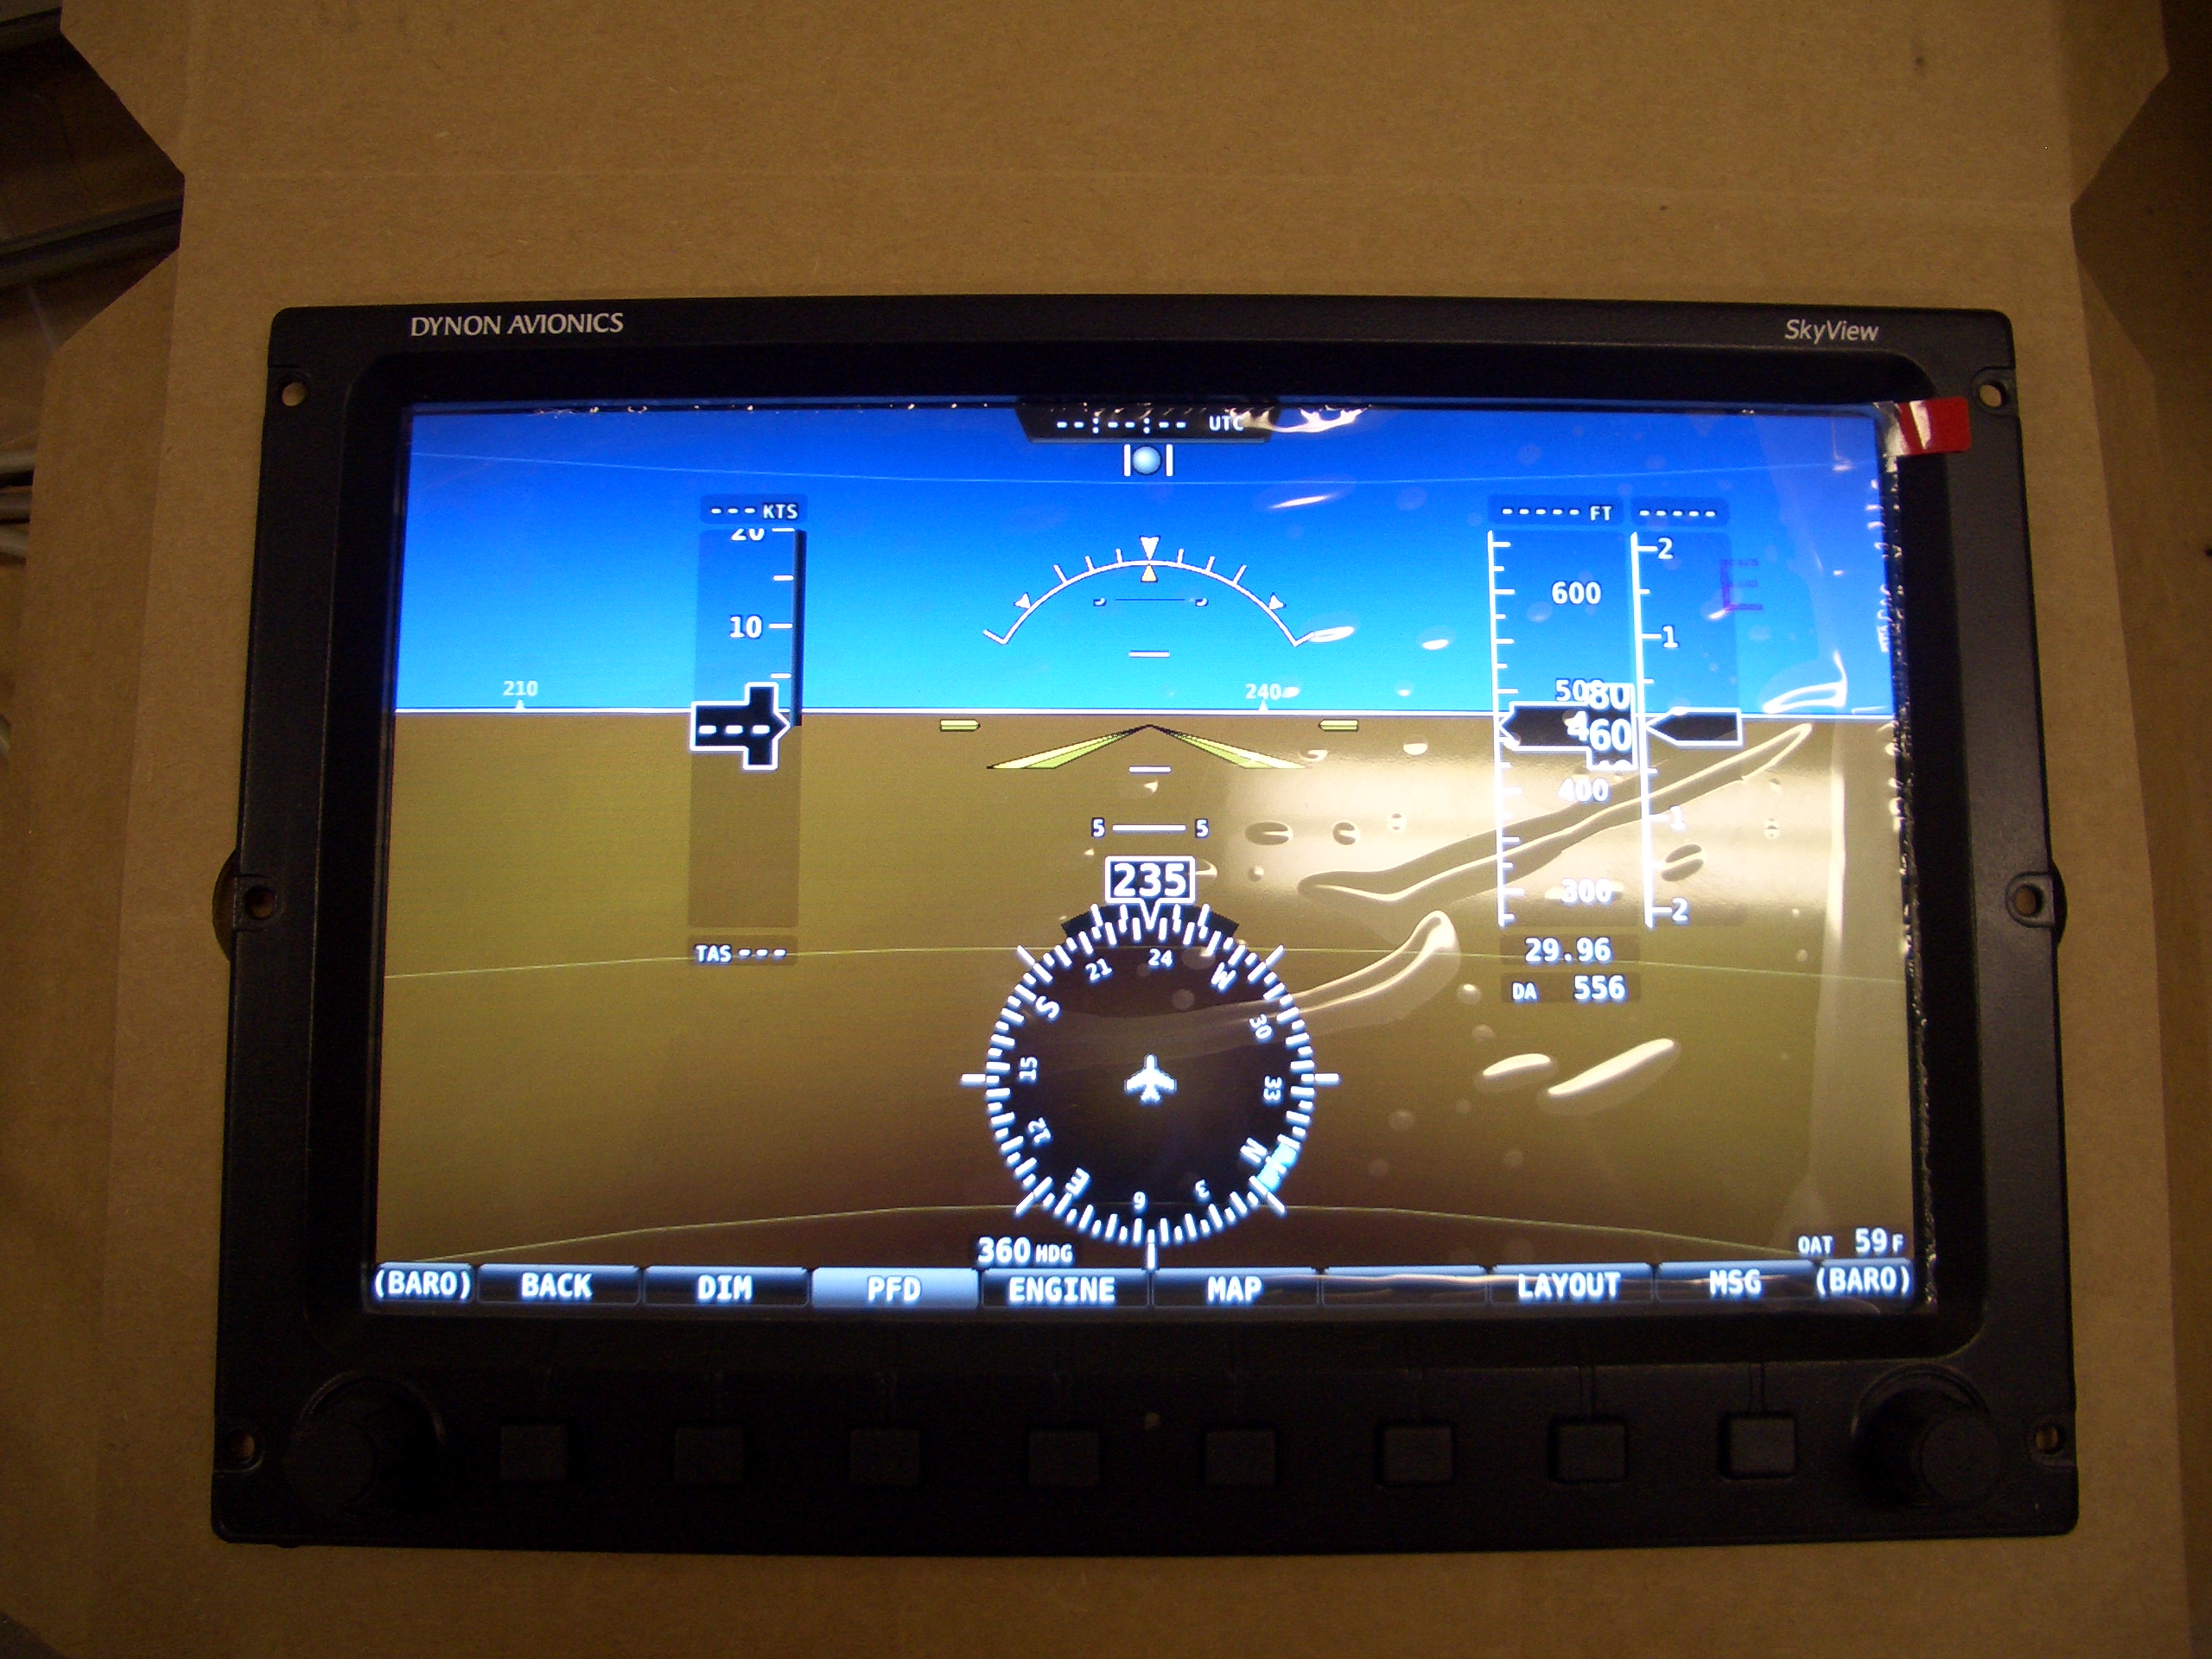
EFIS: I have been really impressed with the preliminary info about the Dynon SkyView system, but I wanted to take a close look at Dynon, Advanced Flight Systems, and Grand Rapids. The Advanced and Grand Rapids systems are available now and look very nice, but I don’t need my avionics for a while, so that isn’t a big factor for me. The Dynon system is not yet shipping, but it looks like it will be even nicer than Advanced or Grand Rapids by the time I need to buy anything. I really like the modular aspect to the system which not only makes it easier to install and upgrade, it makes it easier to extend in the future. Given that it still has a ways to go before it has all of the promised functionality, I want to wait before making a final decision, but at this point, I’m about 95% sure I will go with the Dynon SkyView system.