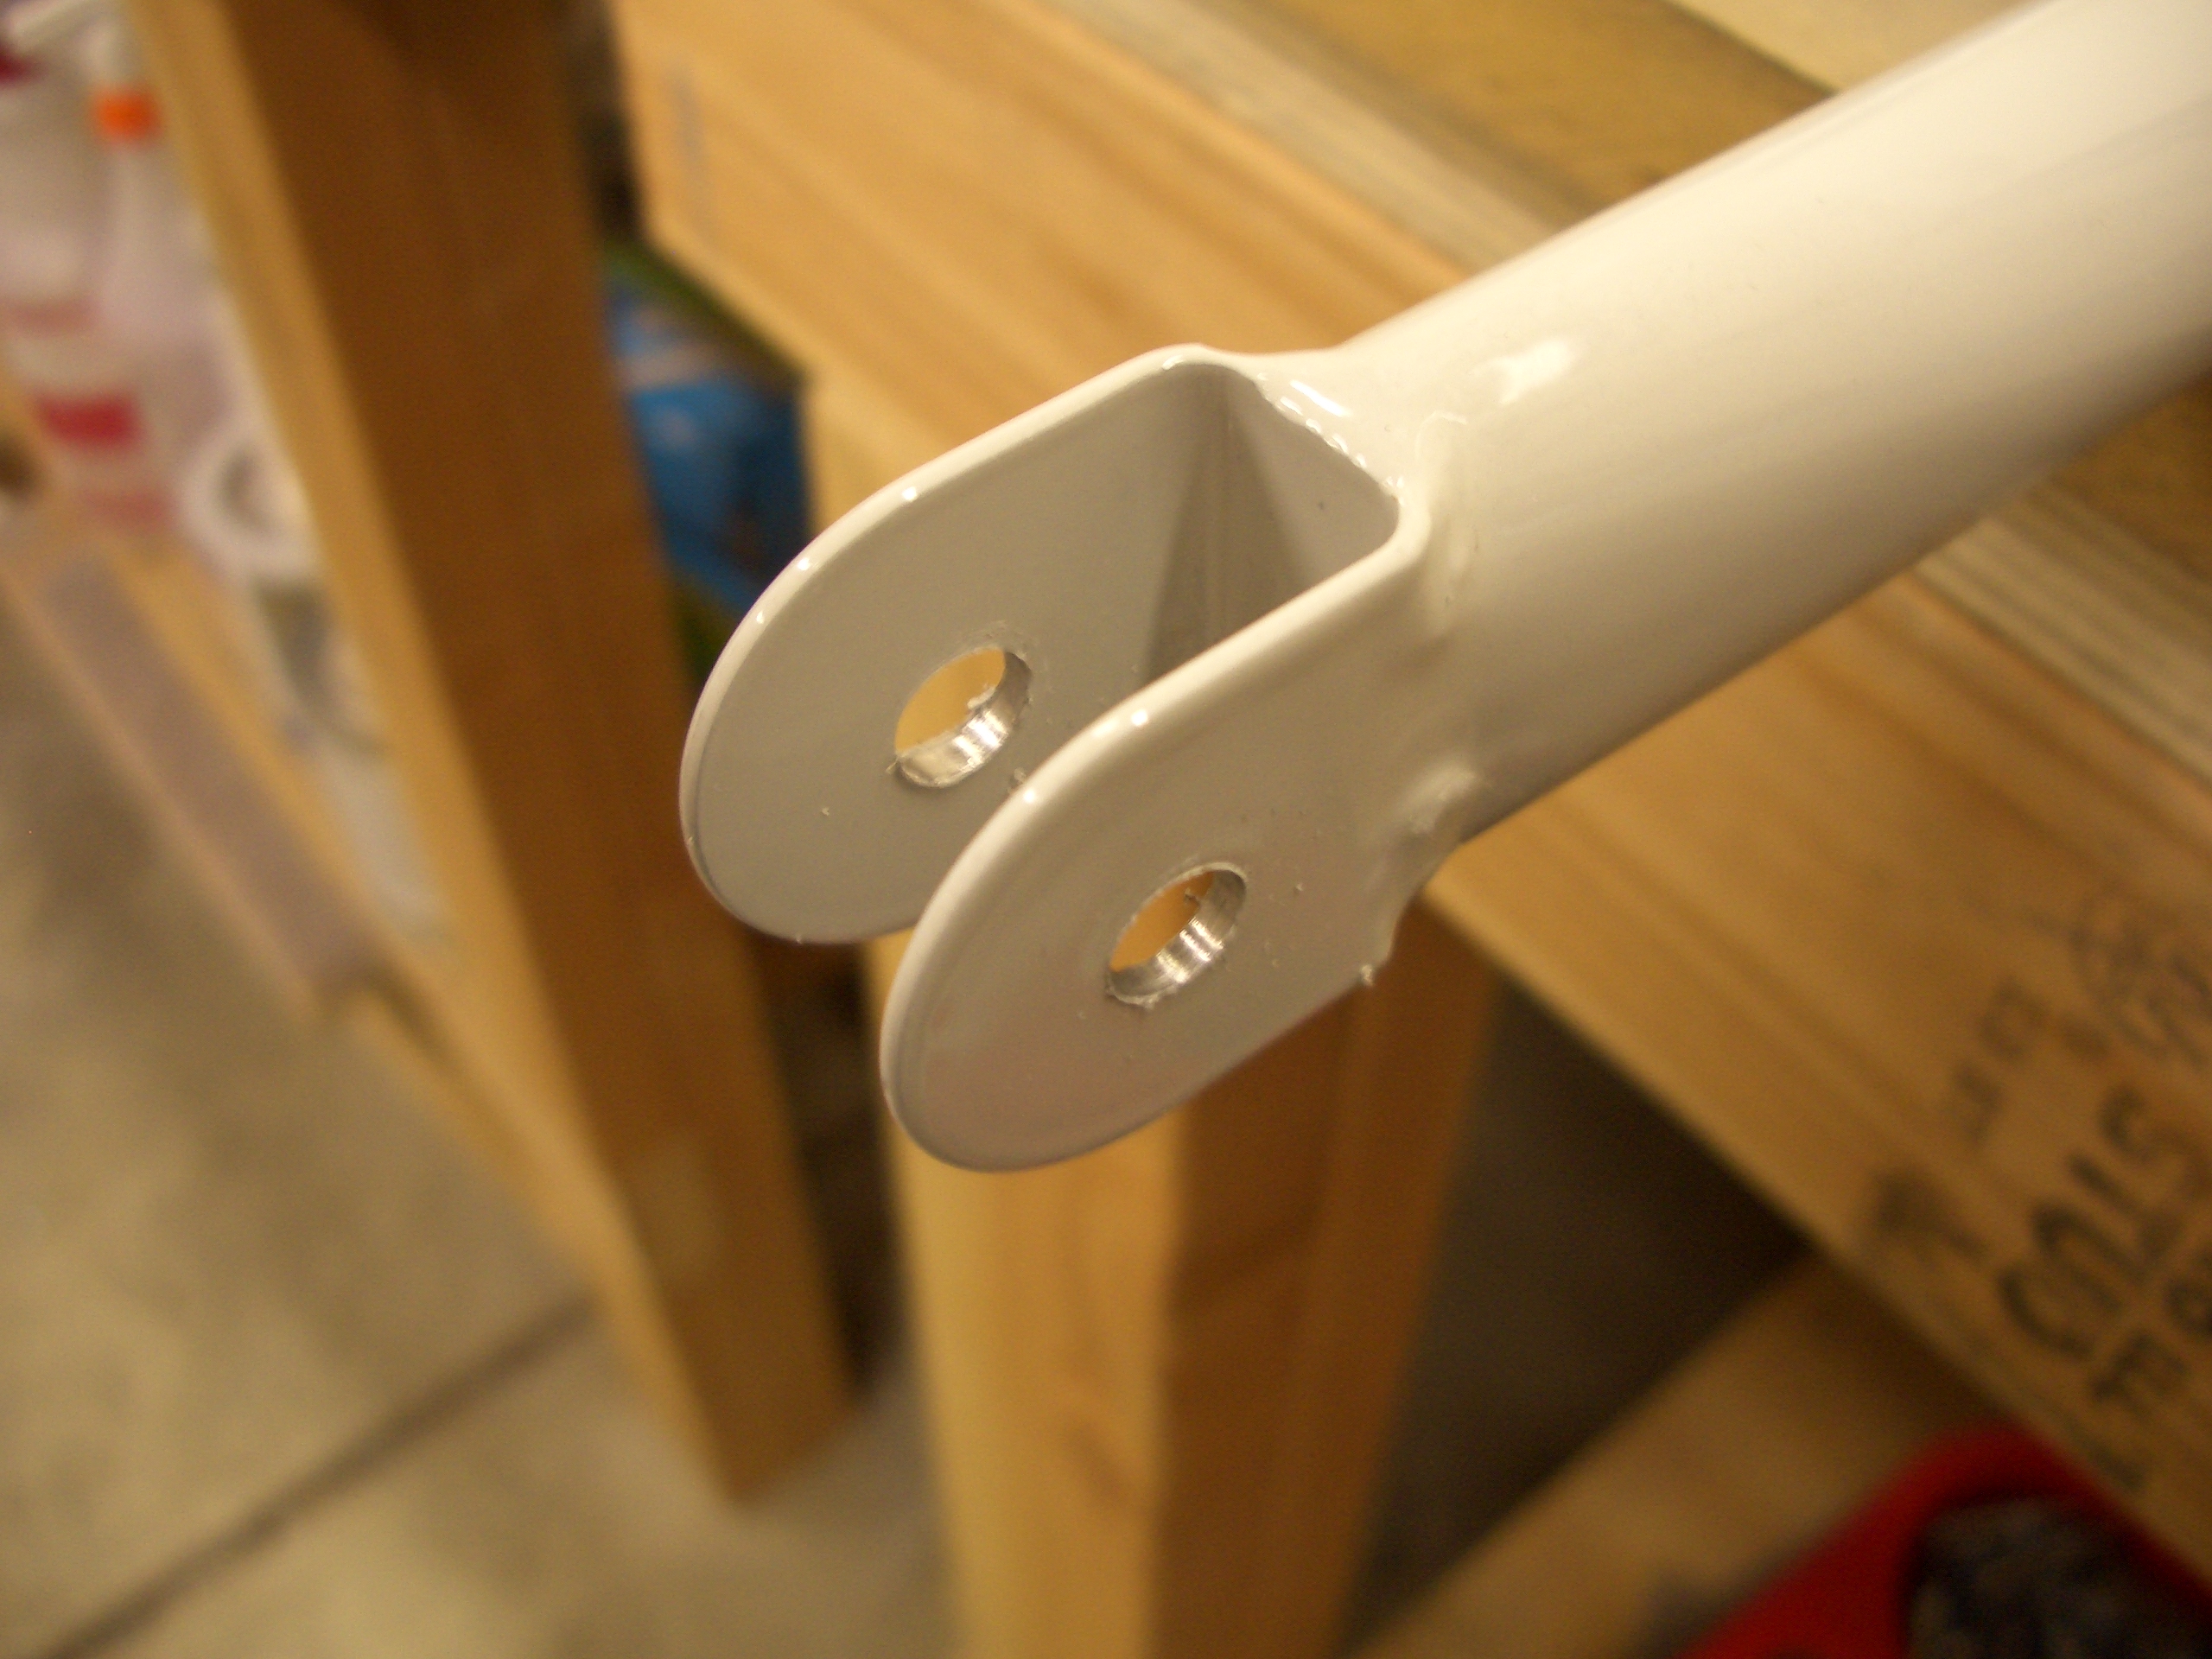
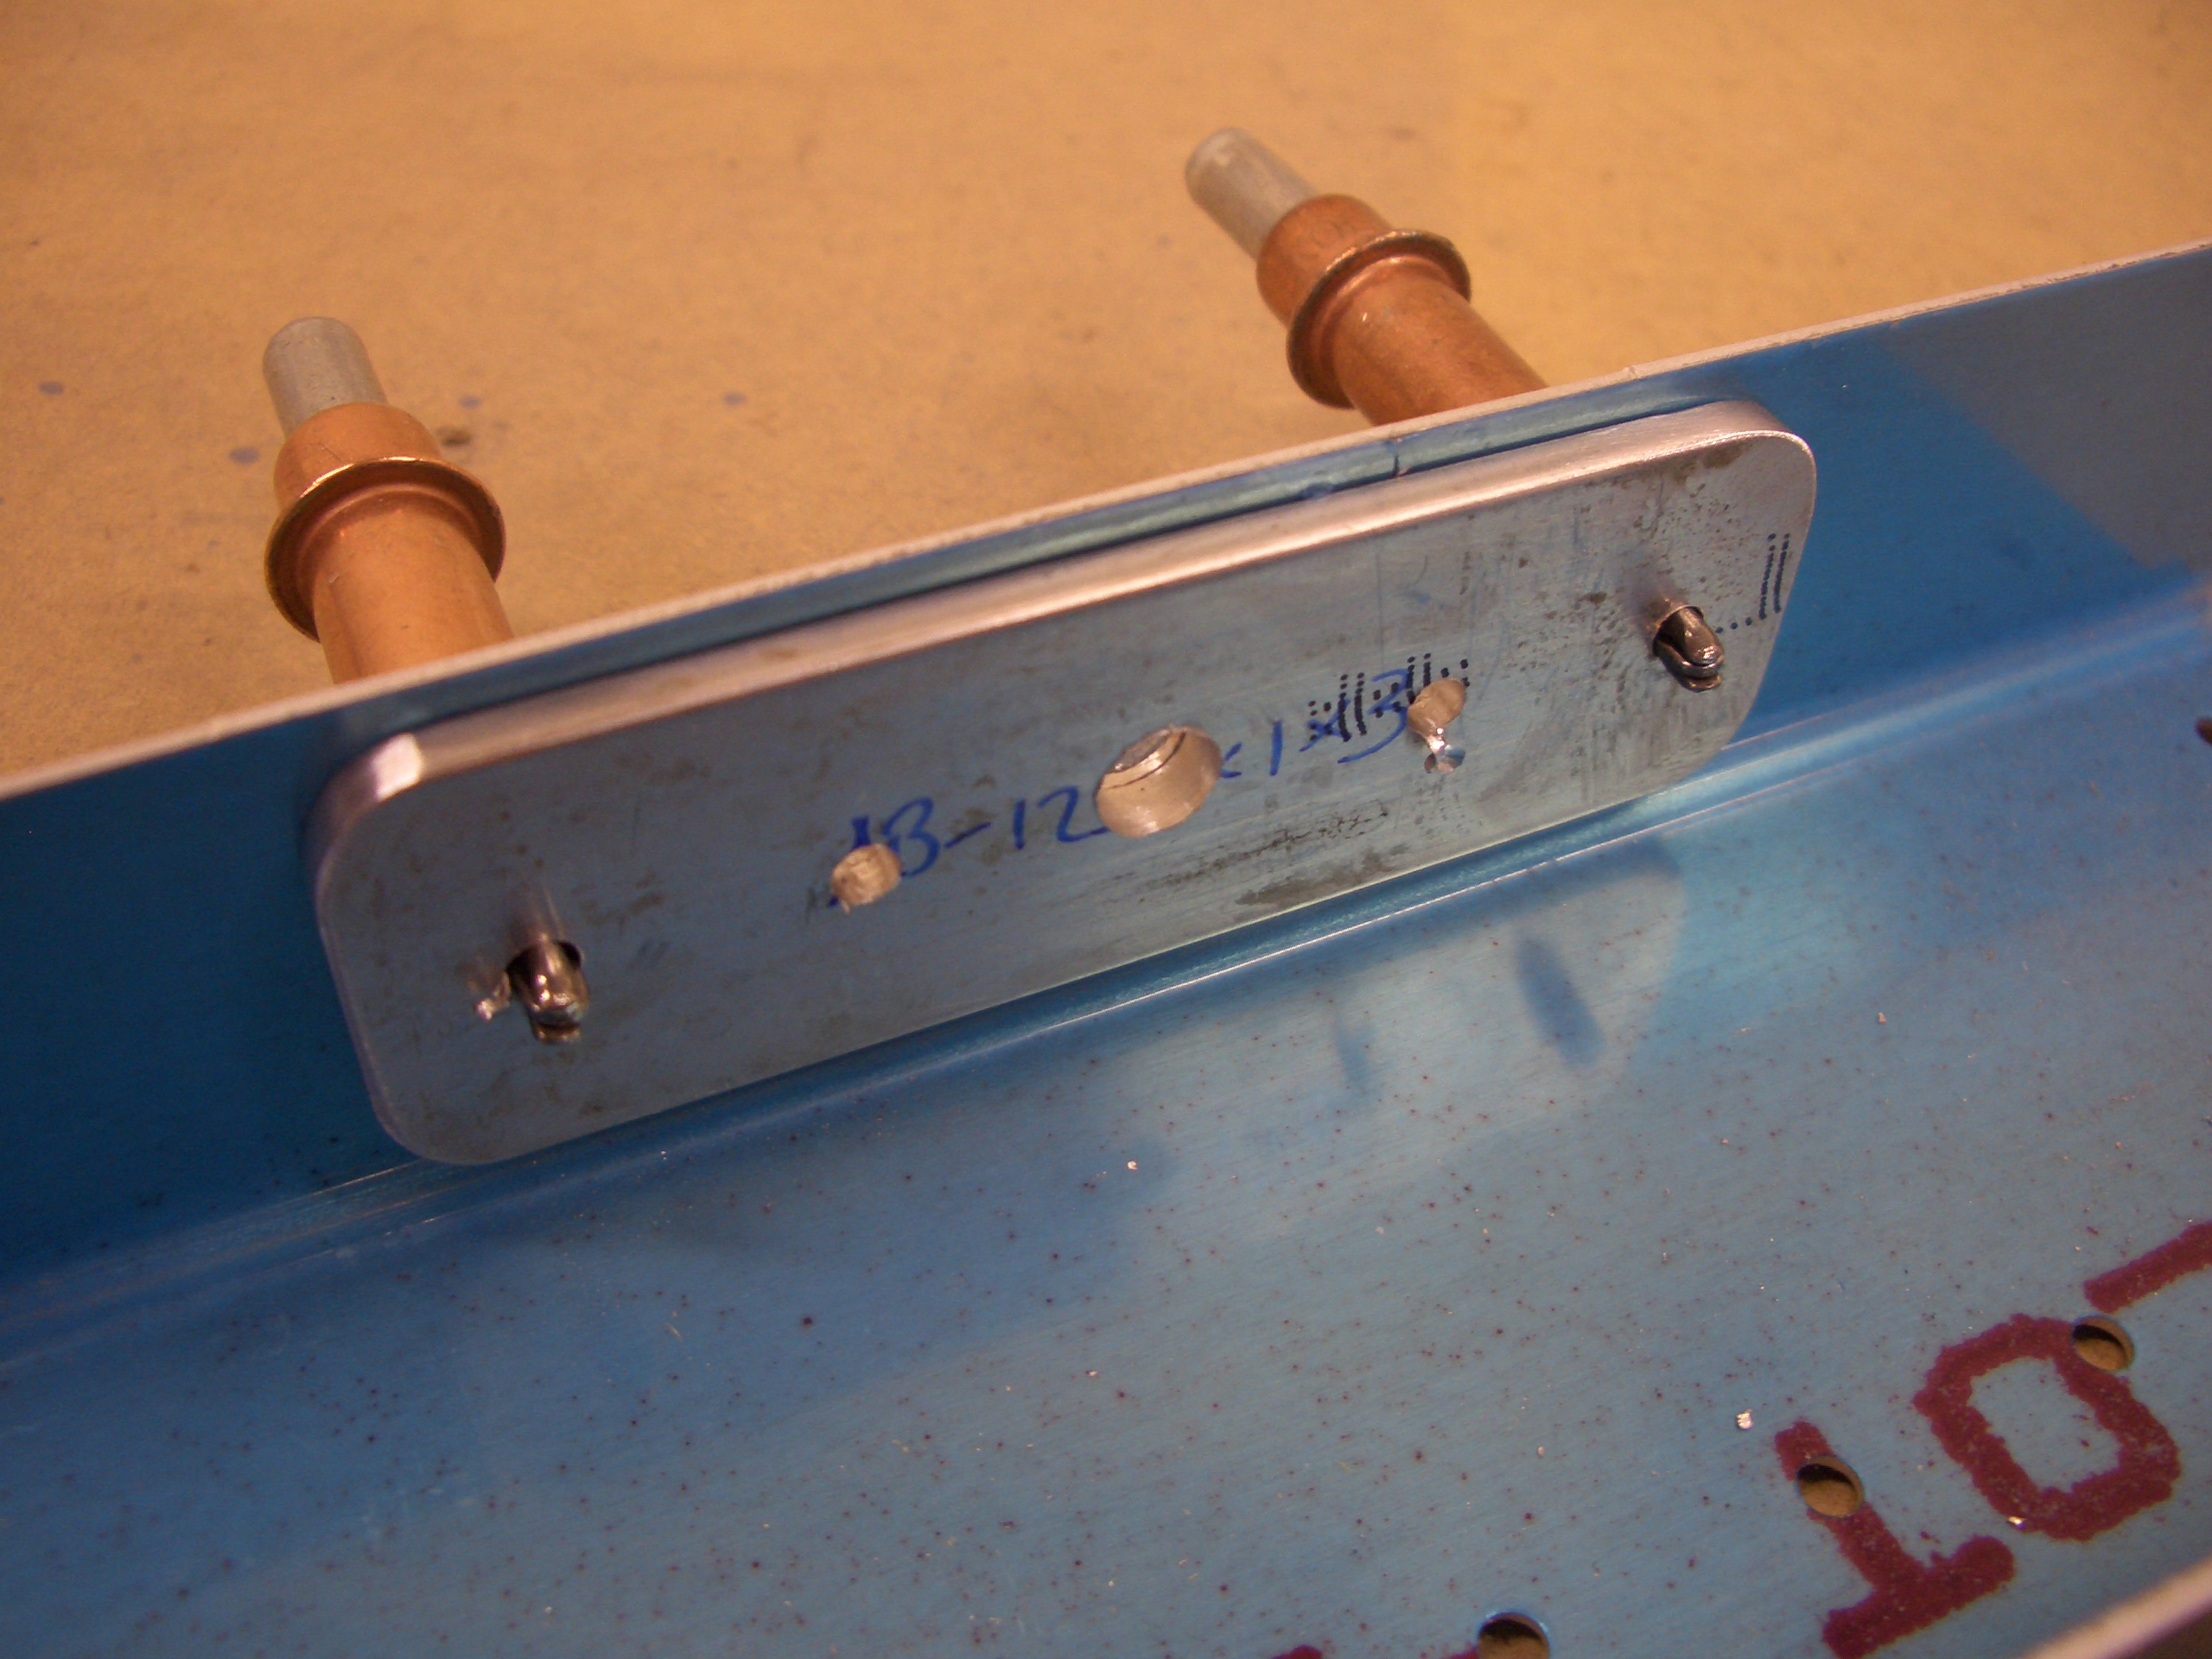
The next step in the plans is to fit the forward tunnel cover, but since that sits against the flap cover, I decided I wanted to install the flaps first to ensure the cover fits as well as possible. First up, I drilled and reamed all three ends of the flap weldment to 1/4″.

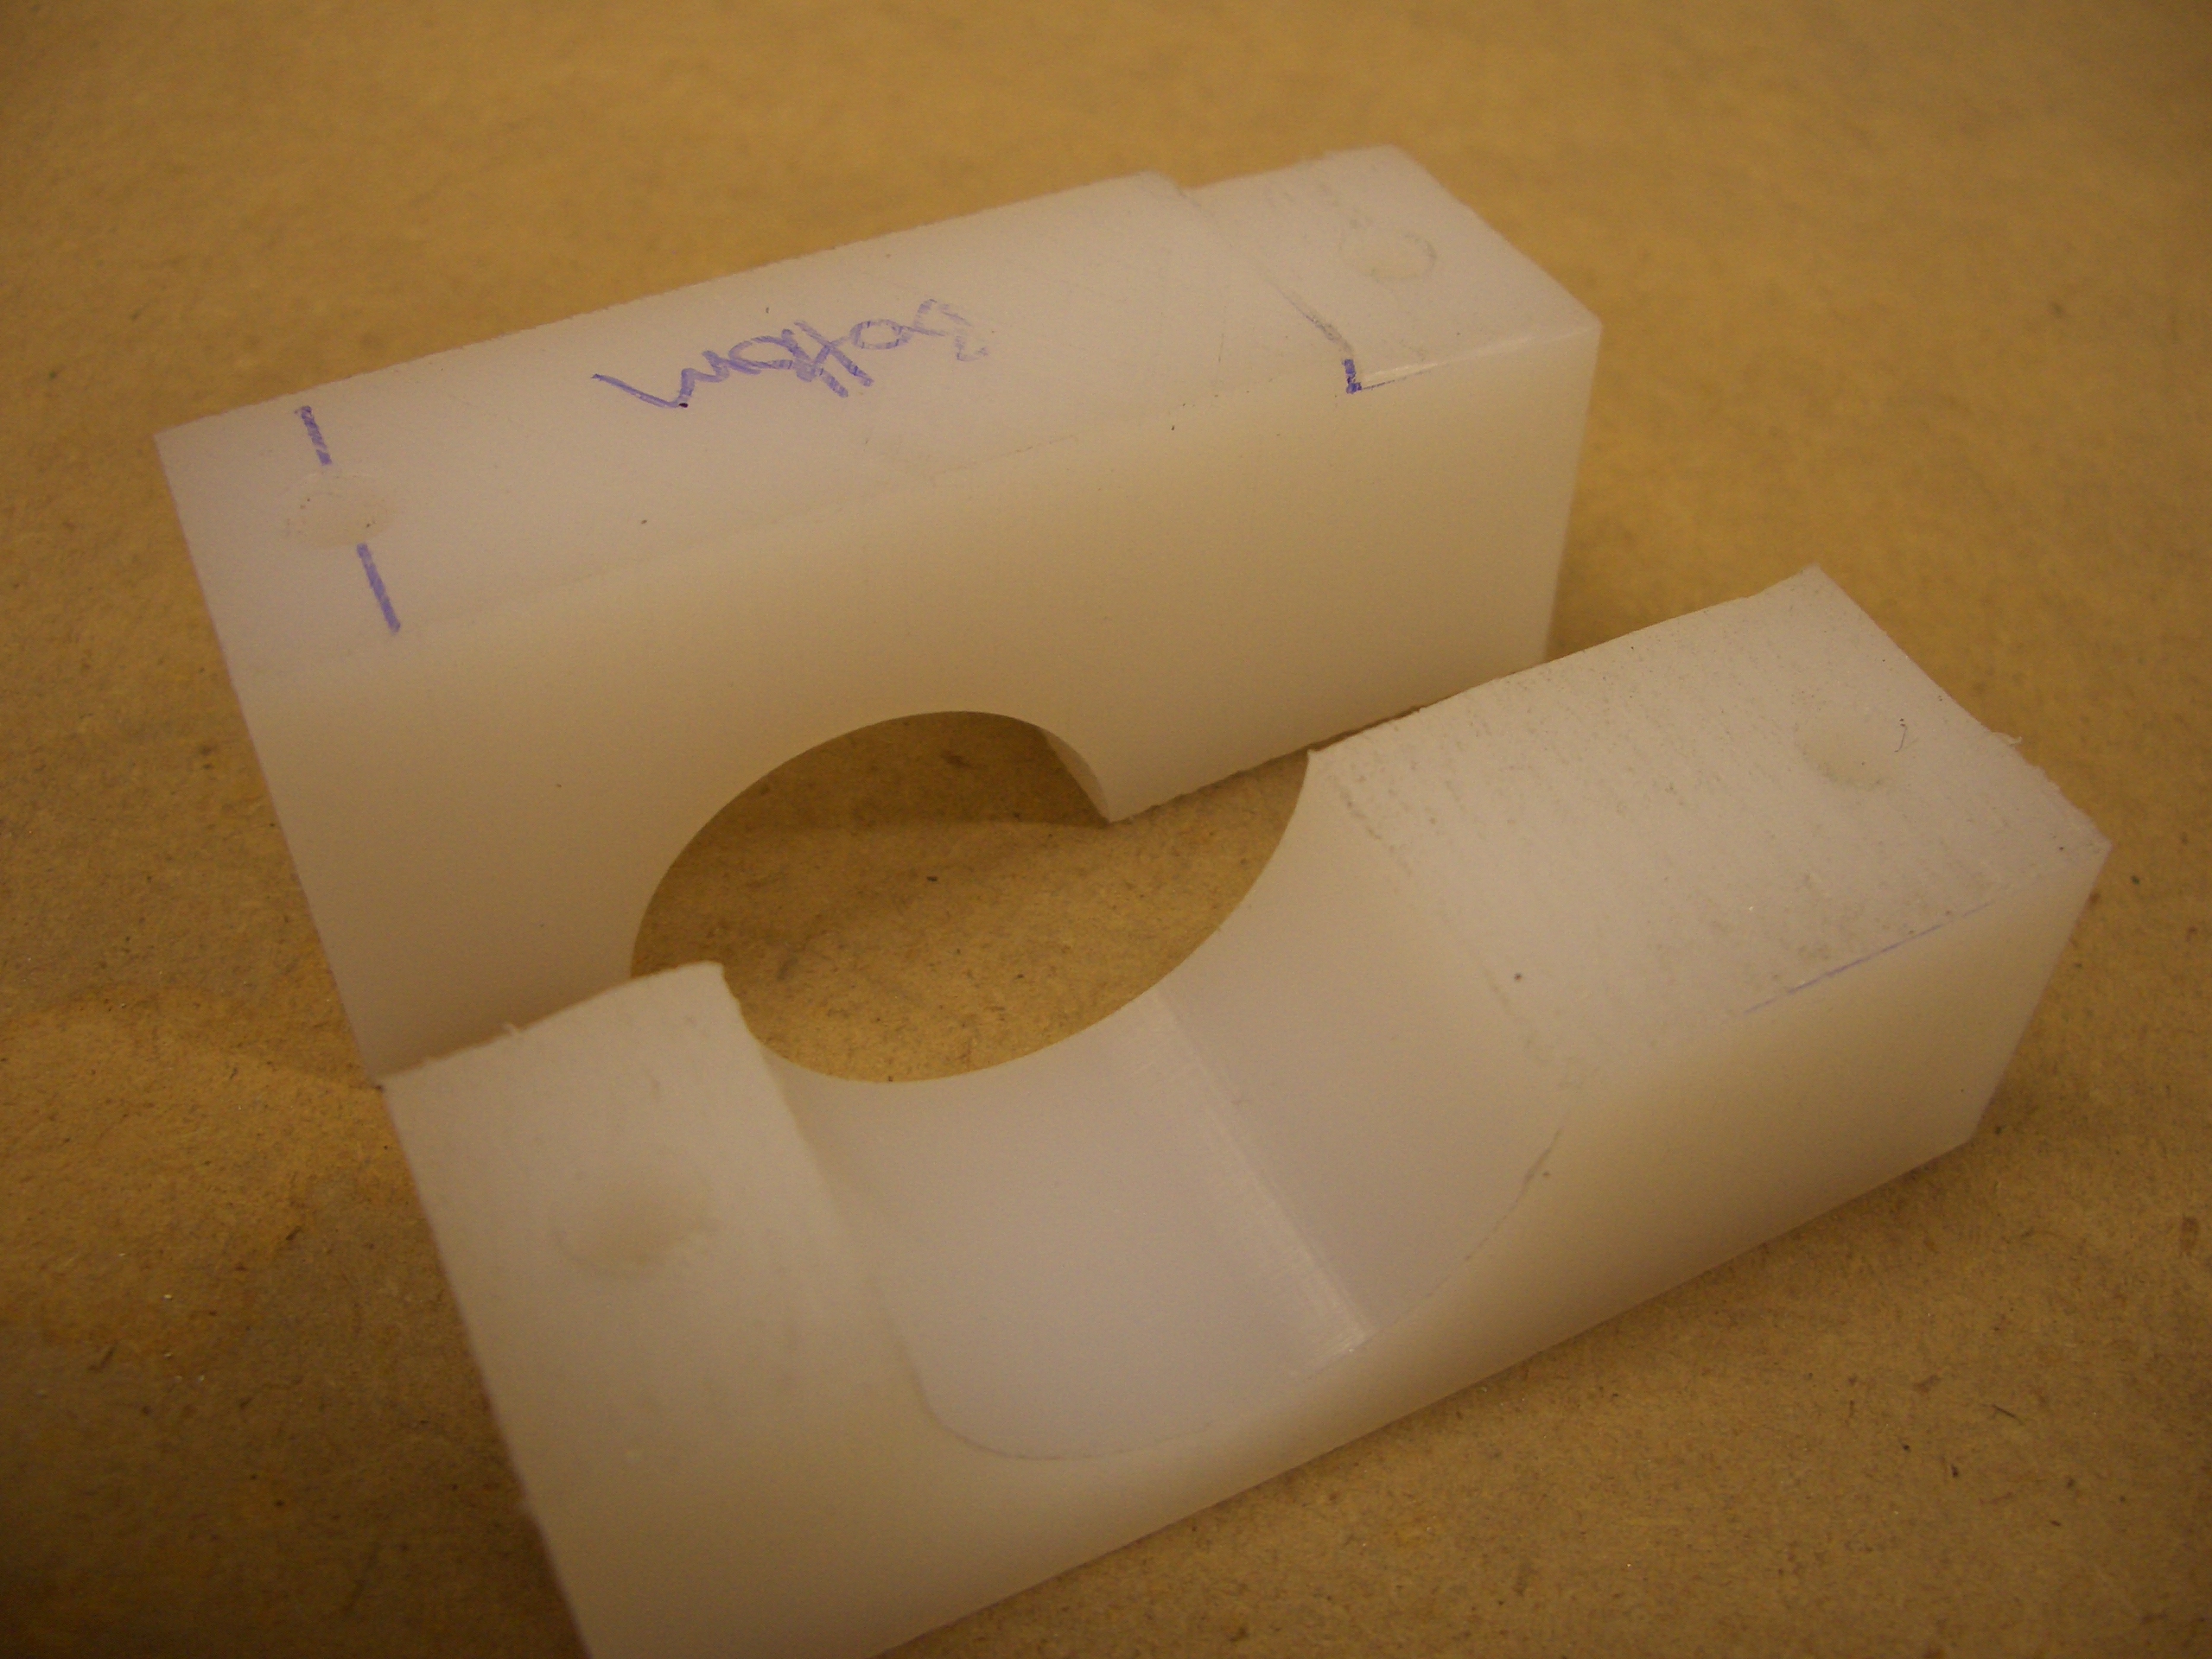
The center flap bearing block needs to be notched to fit over the seat pans and cut in half so that it can be installed around the flap weldment.

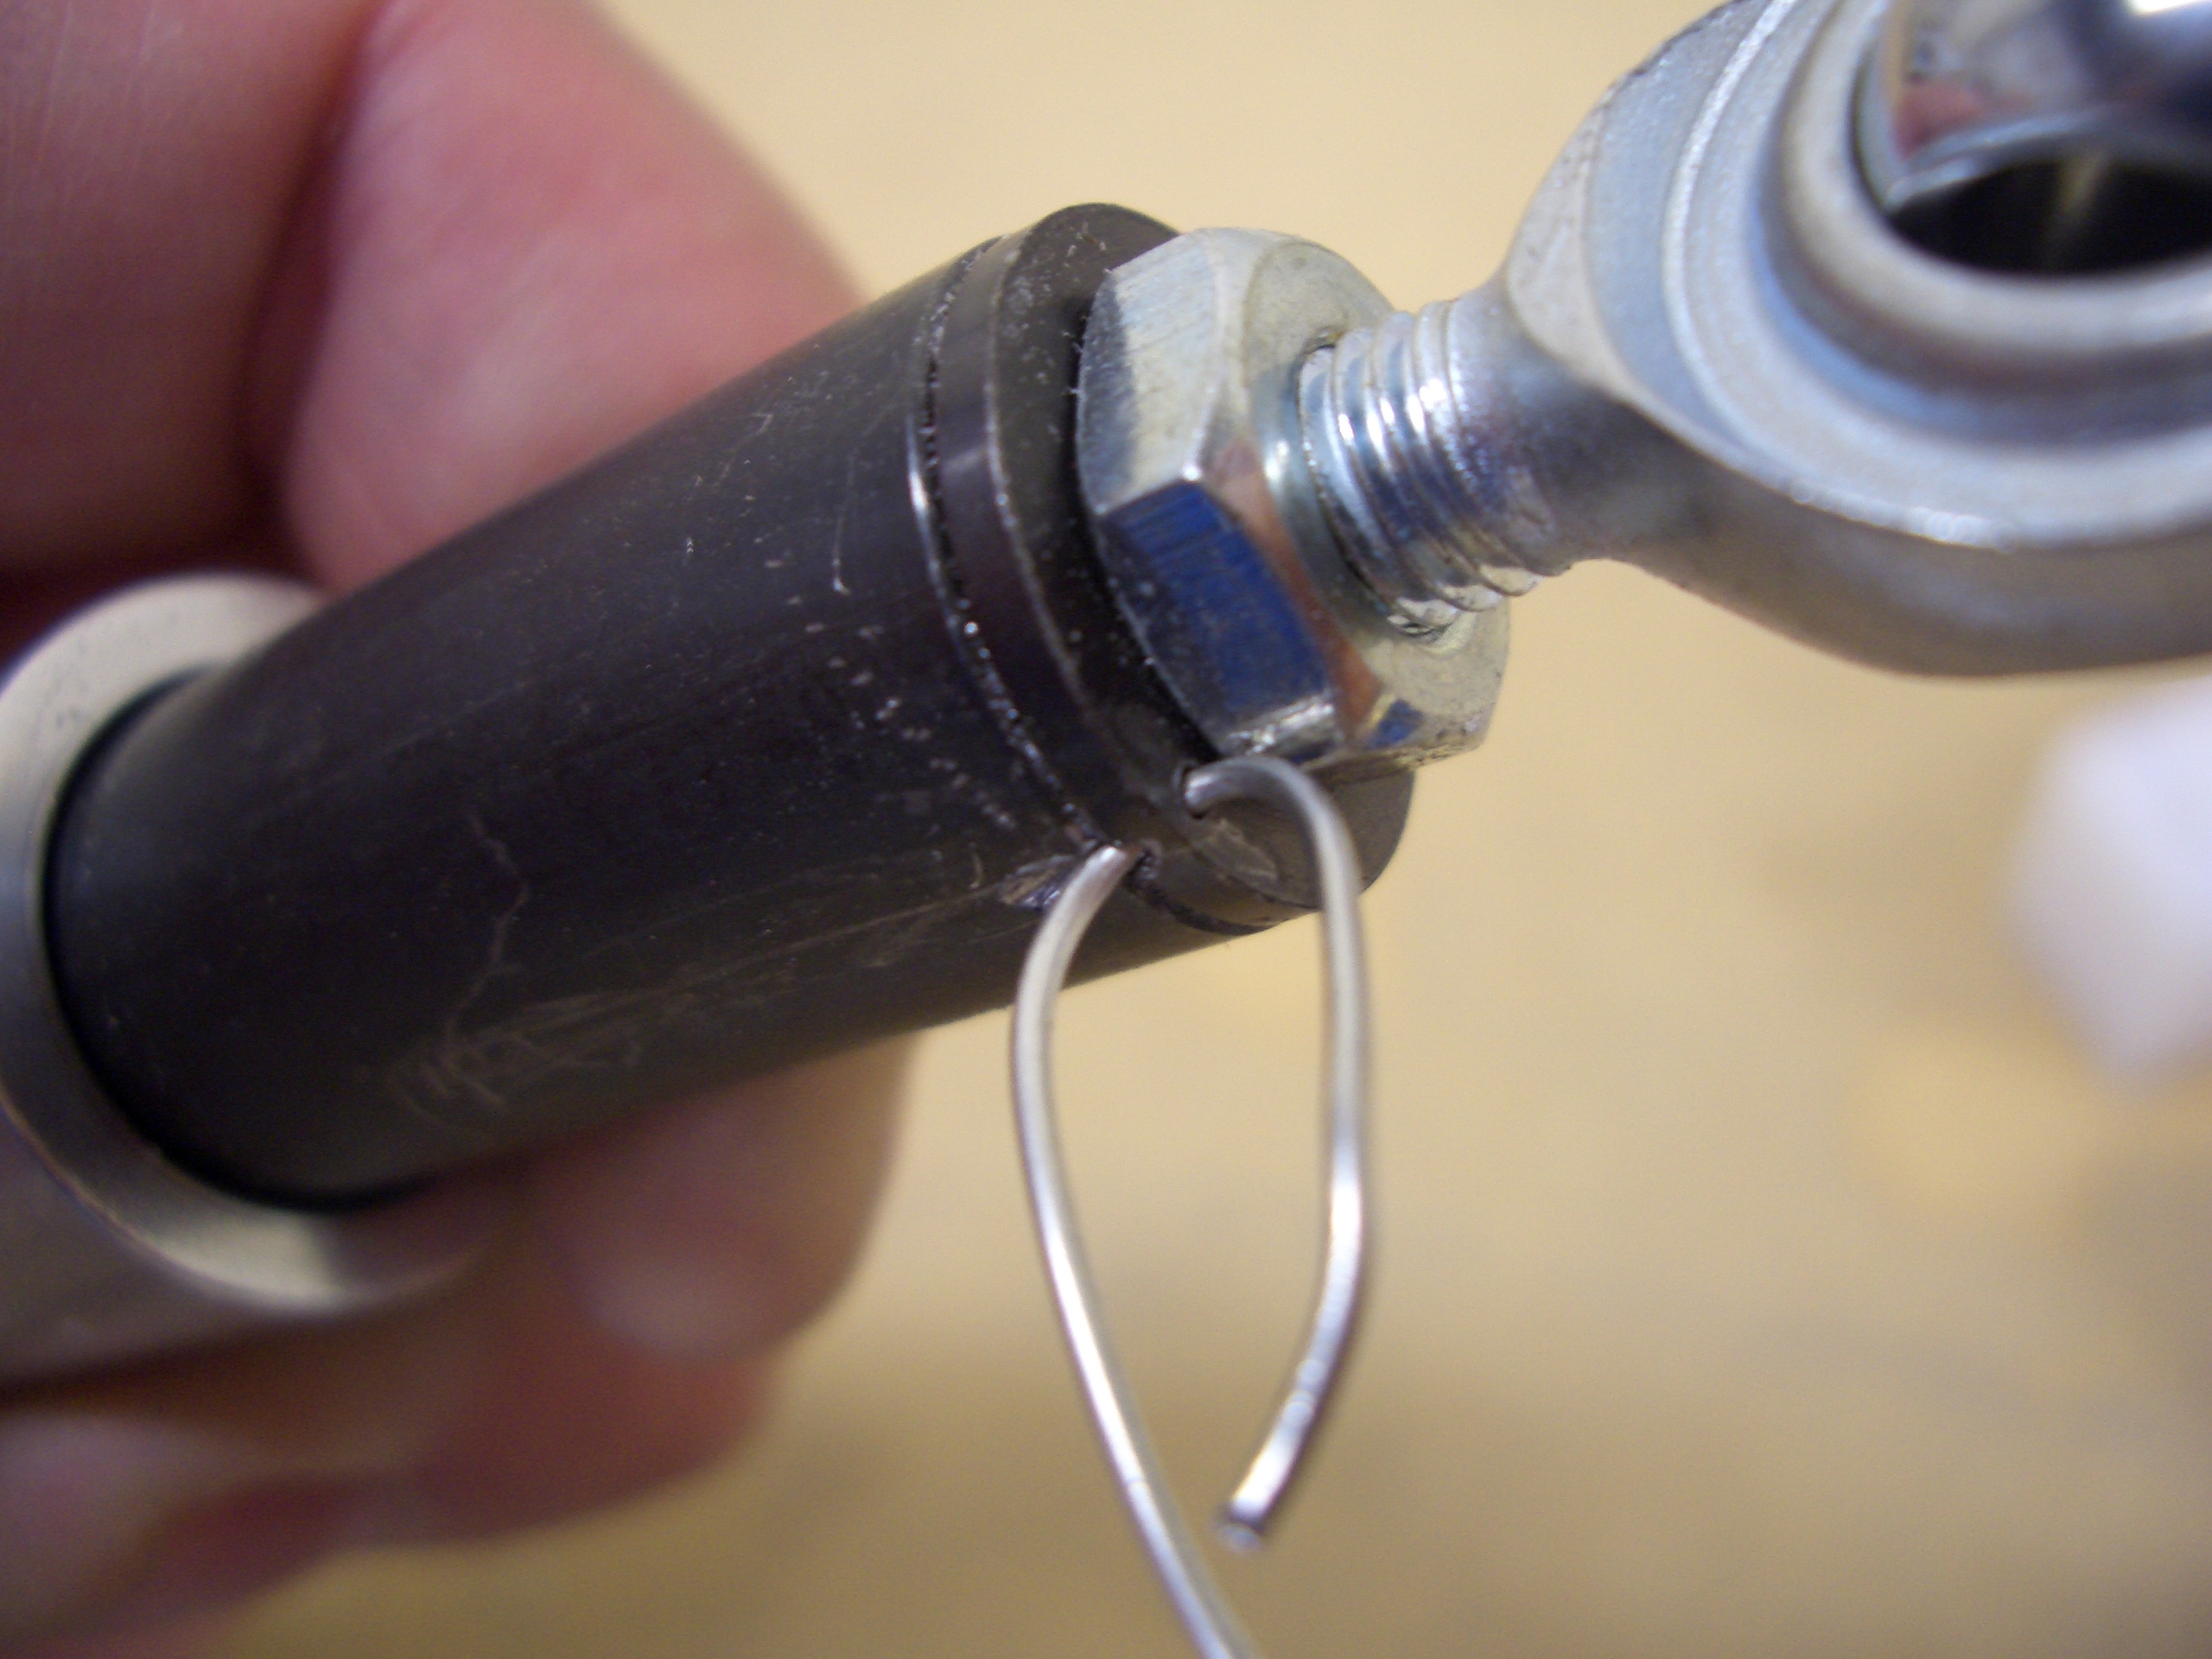
Van’s published a service bulletin a number of years ago after several people had the jam nut on the flap motor rod end back out and the flap motor disconnected from the flaps. The plans now specify that the end of the flap motor push tube needs a small hole drilled in it so that it can be safety wired around the bolt that goes through the rod end. This is actually a pretty hokey way to fix the problem as it subjects the safety wire to repeated flexing which can fatigue it and allow it to break. There is an alternate approach that another builder came up with described
here. This looks like a much safer approach.

Next up, I installed the flap weldment into the plane so that the center bearing block could be used as a guide to drill the floor and ribs
Here is the lower half of the center bearing after drilling. I went ahead and drilled through the rear tunnel cover and then marked around the bearing since the tunnel cover must be notched to wrap around the bearing.
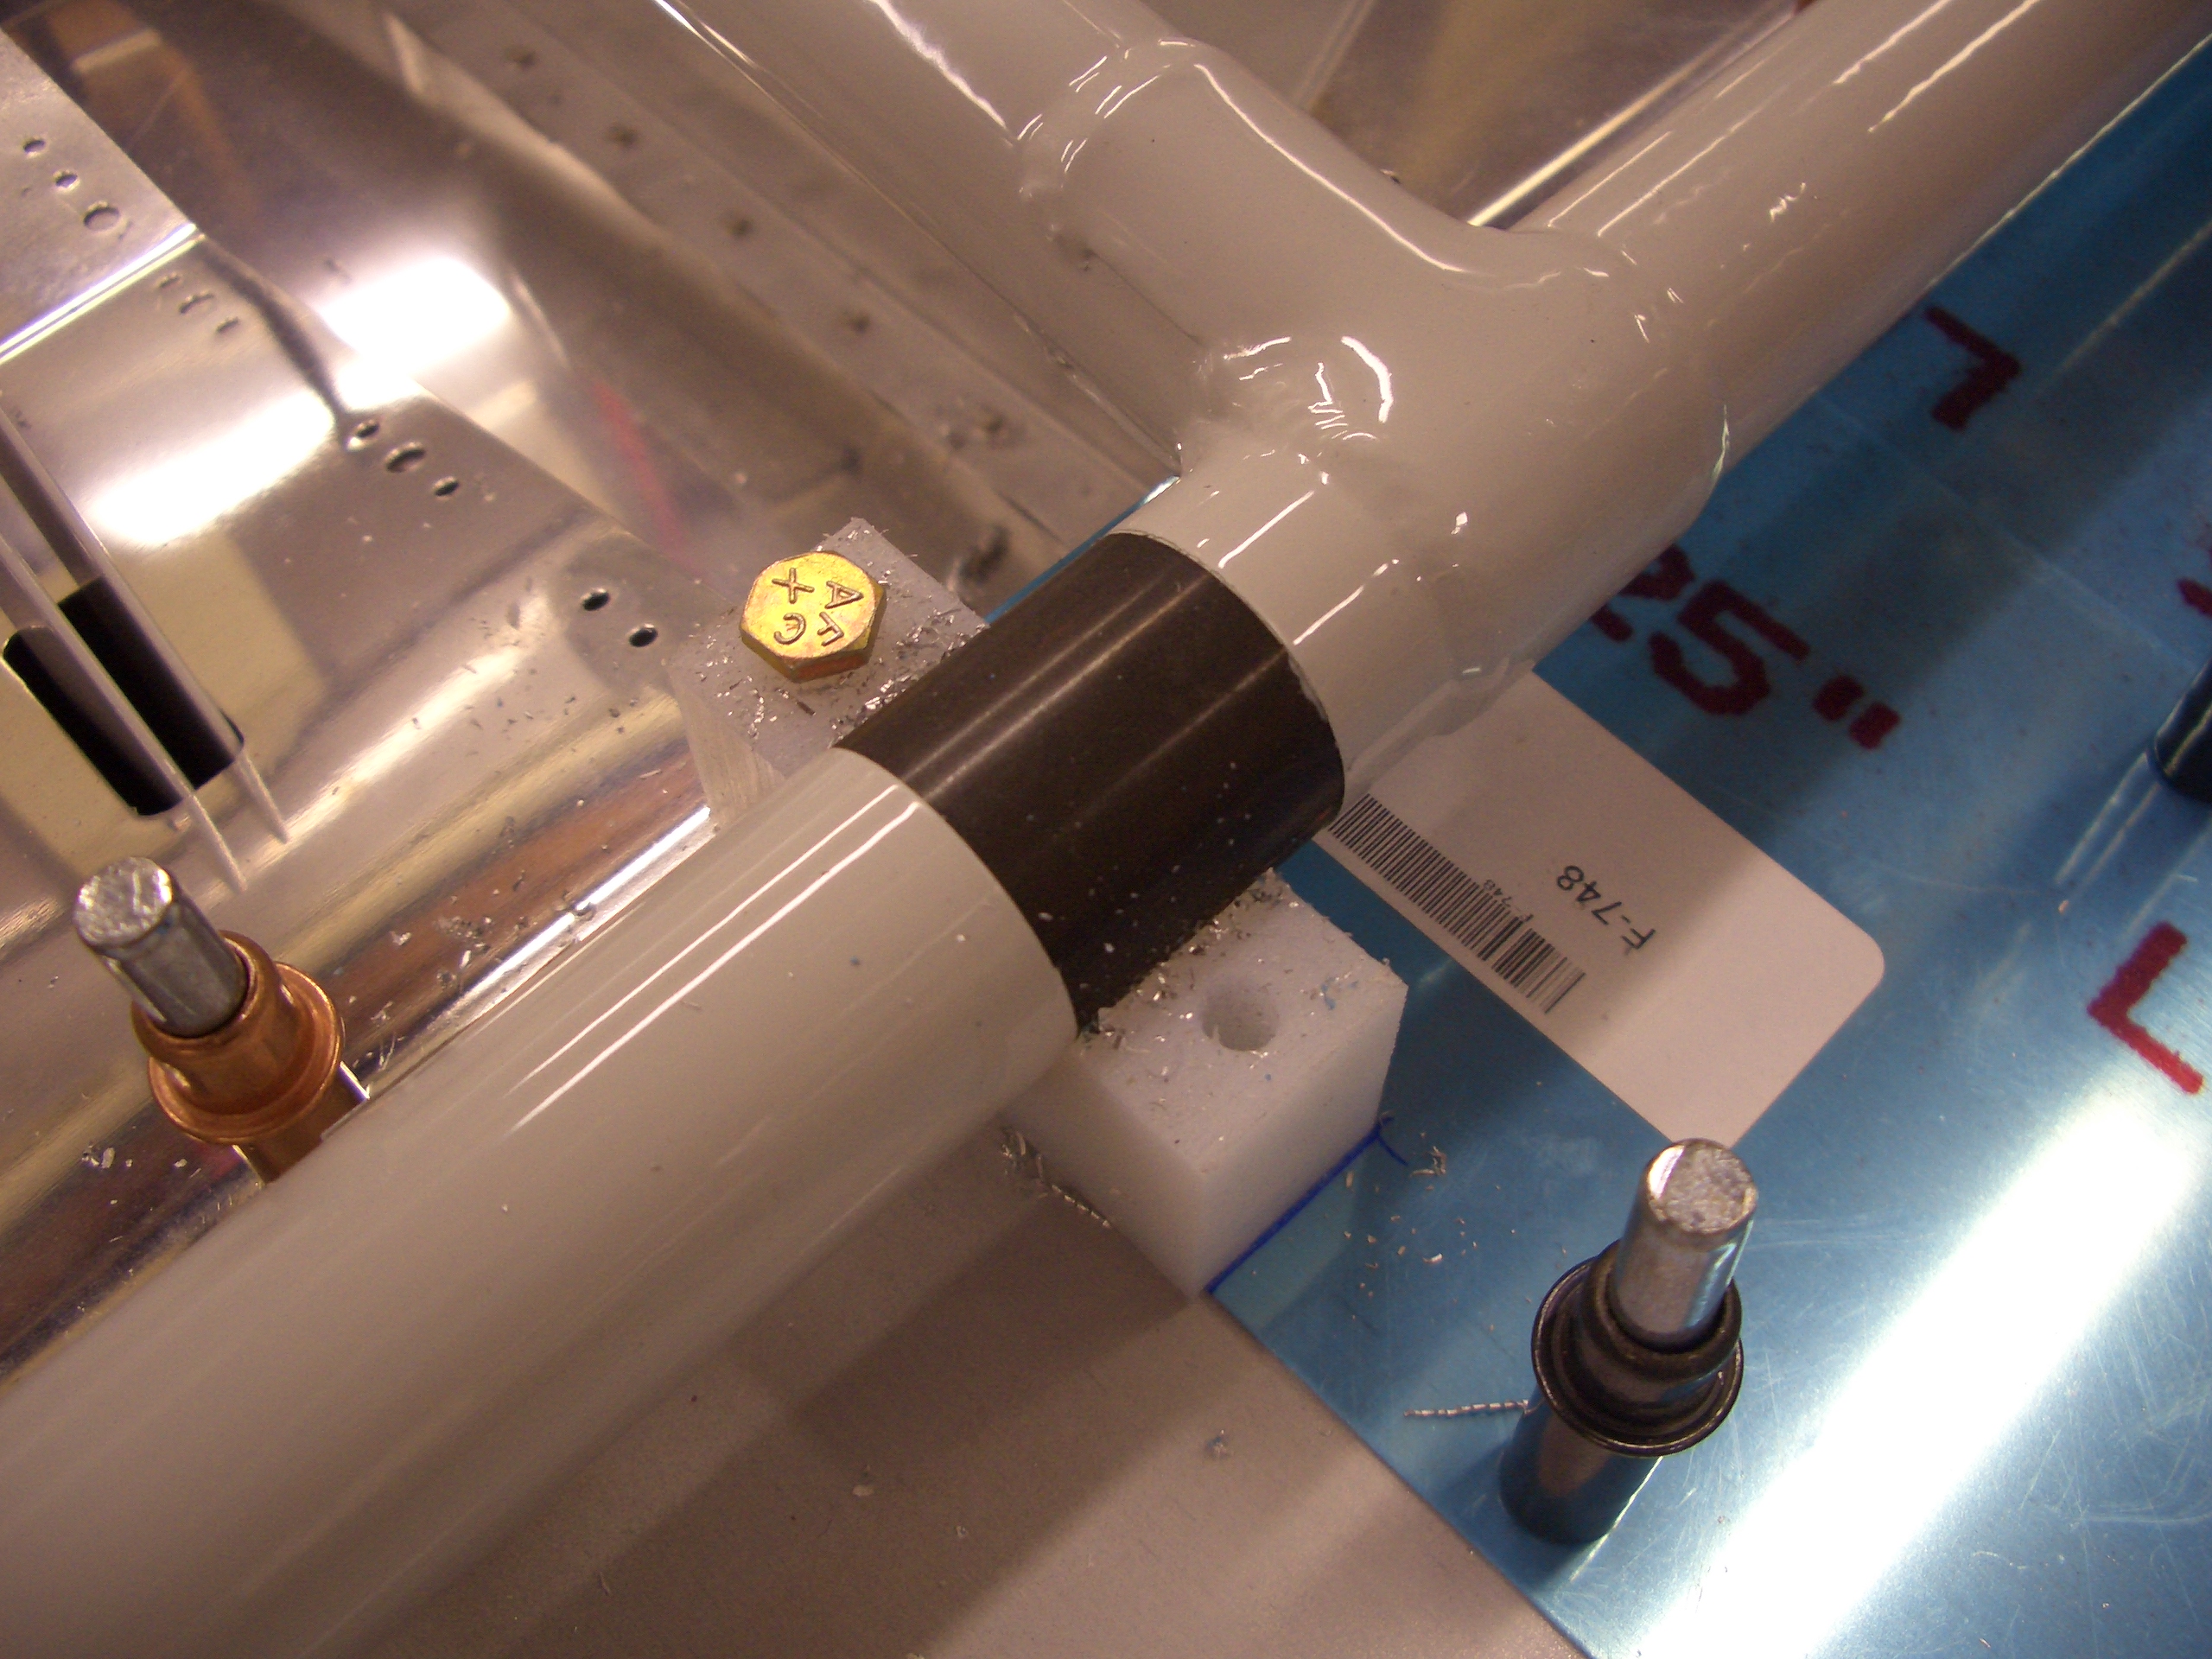
The side of the flap support need to be reinforced where the upper end of the flap motor mounts. I match drilled this to the channel and reamed the center hole out to 1/4″.

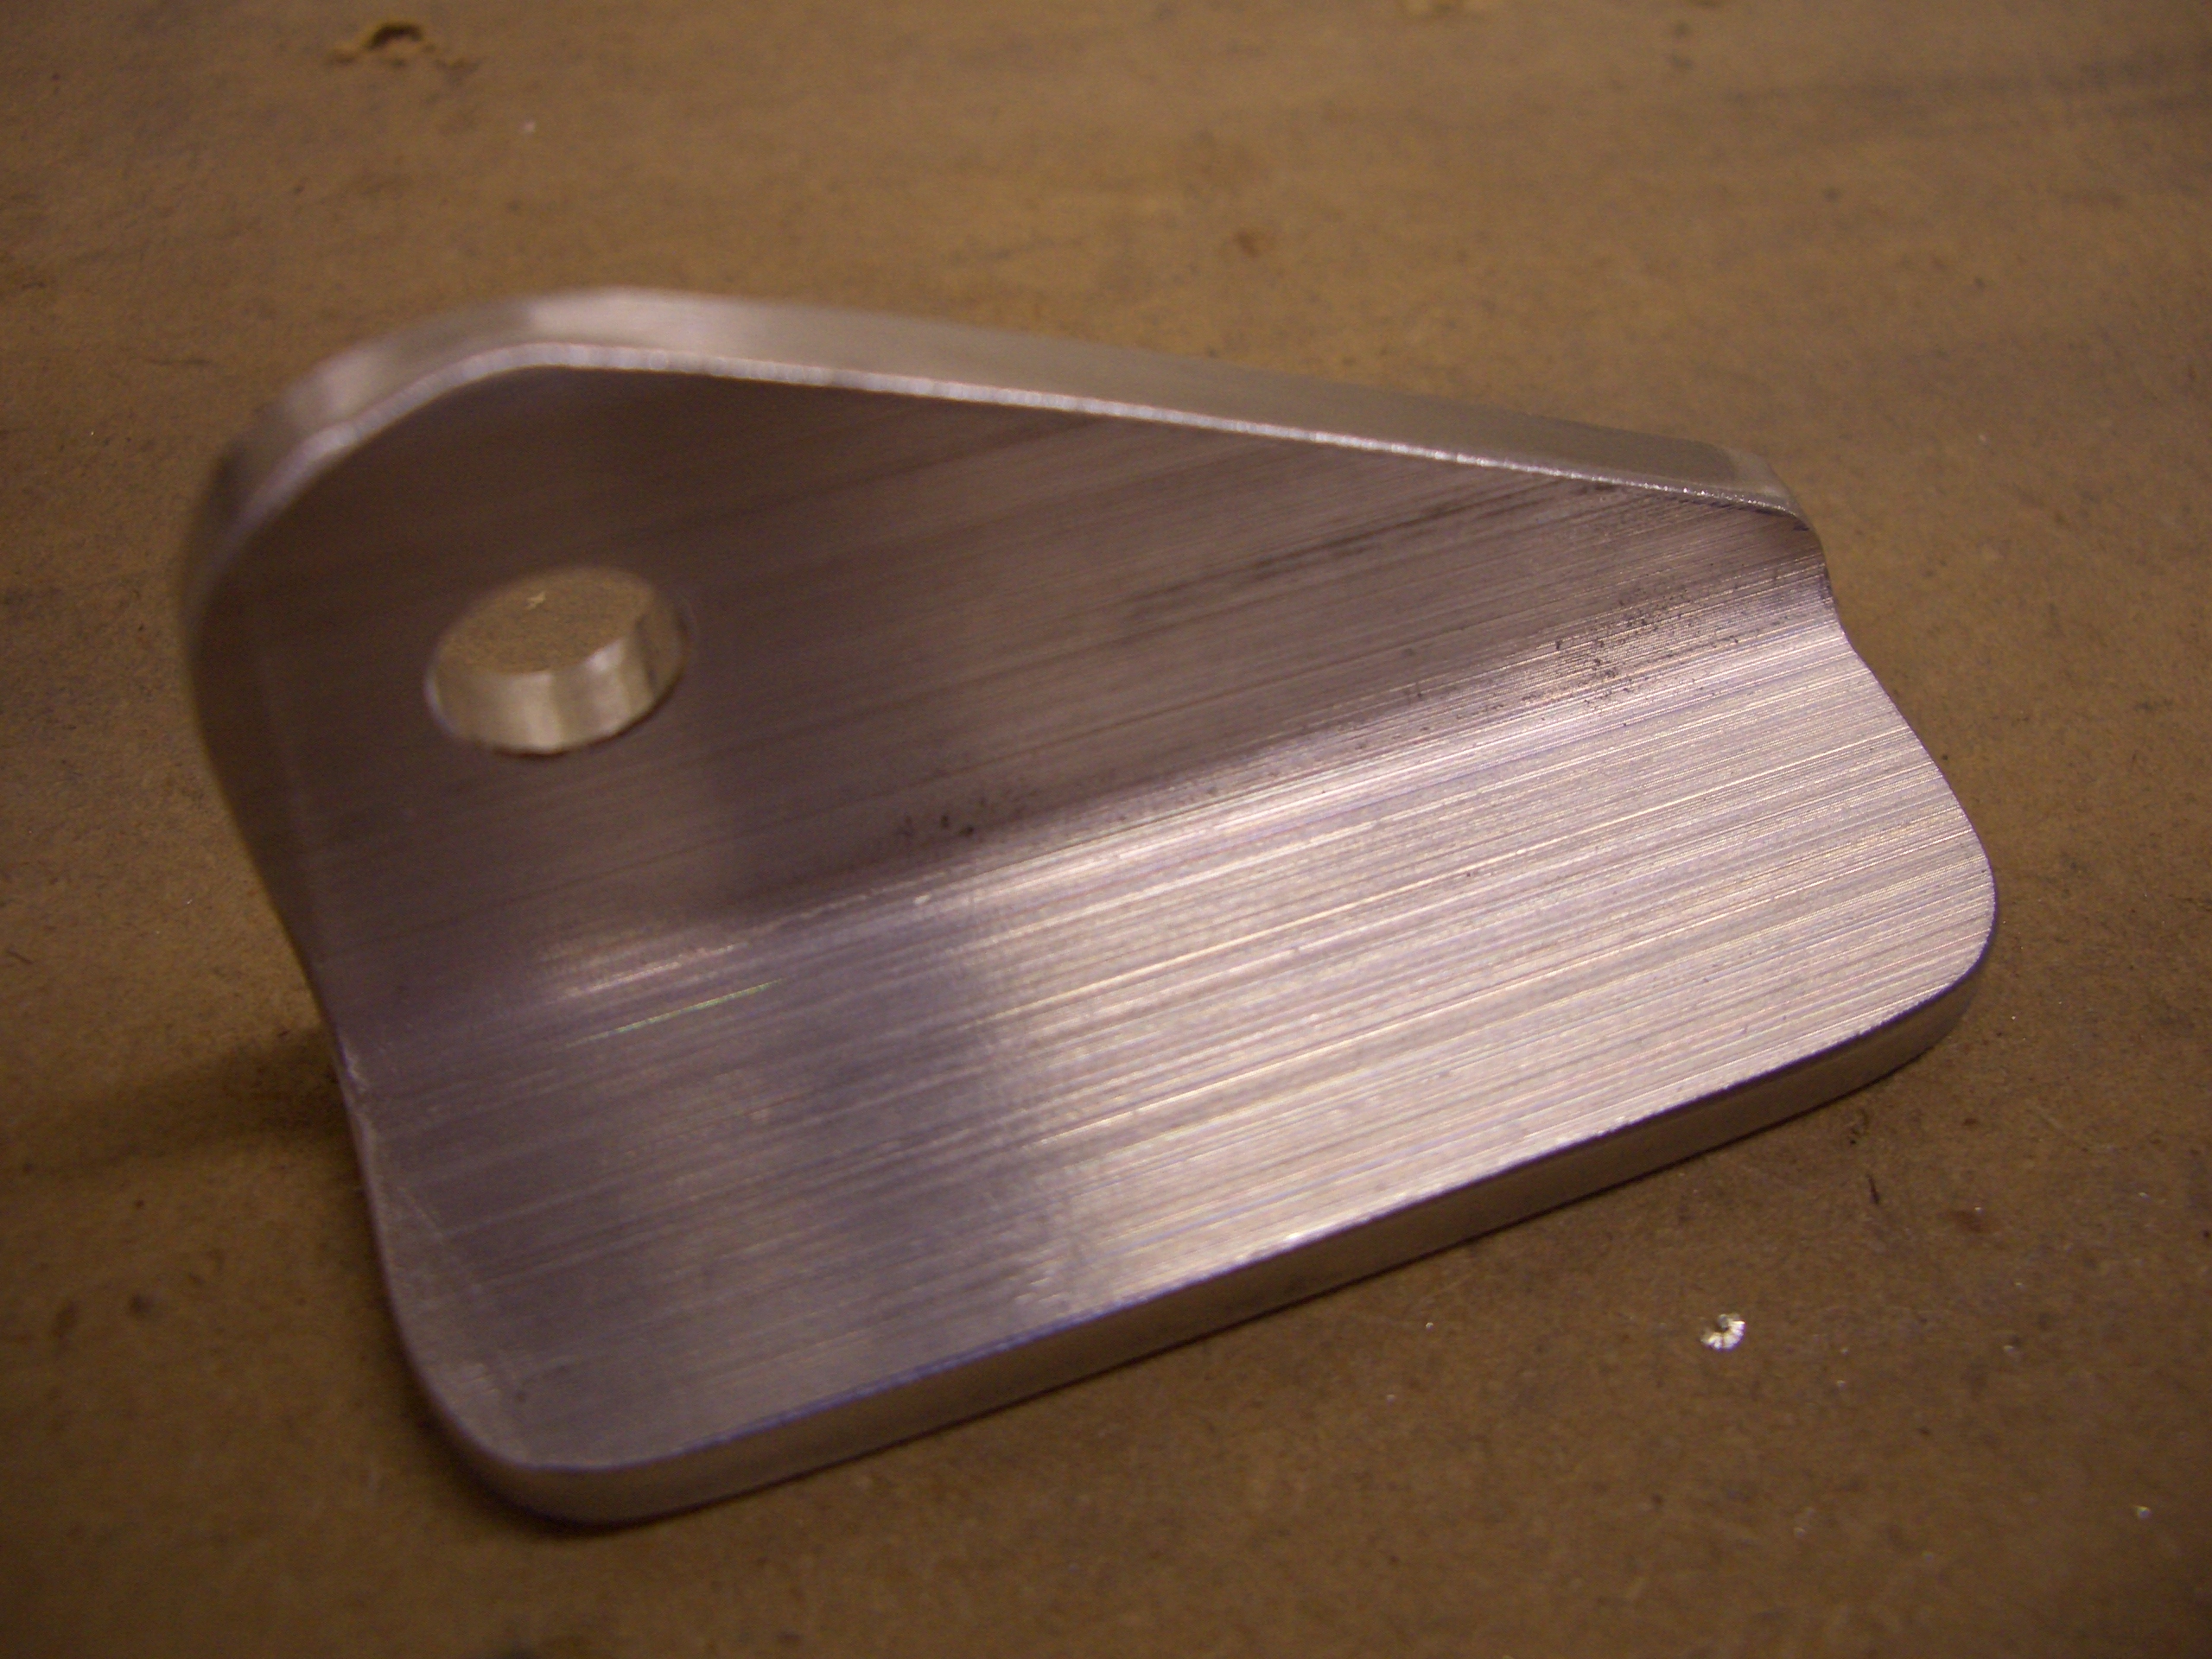
Next, I fabricated this little bracket which holes the other end of the flap motor mount bolt.