
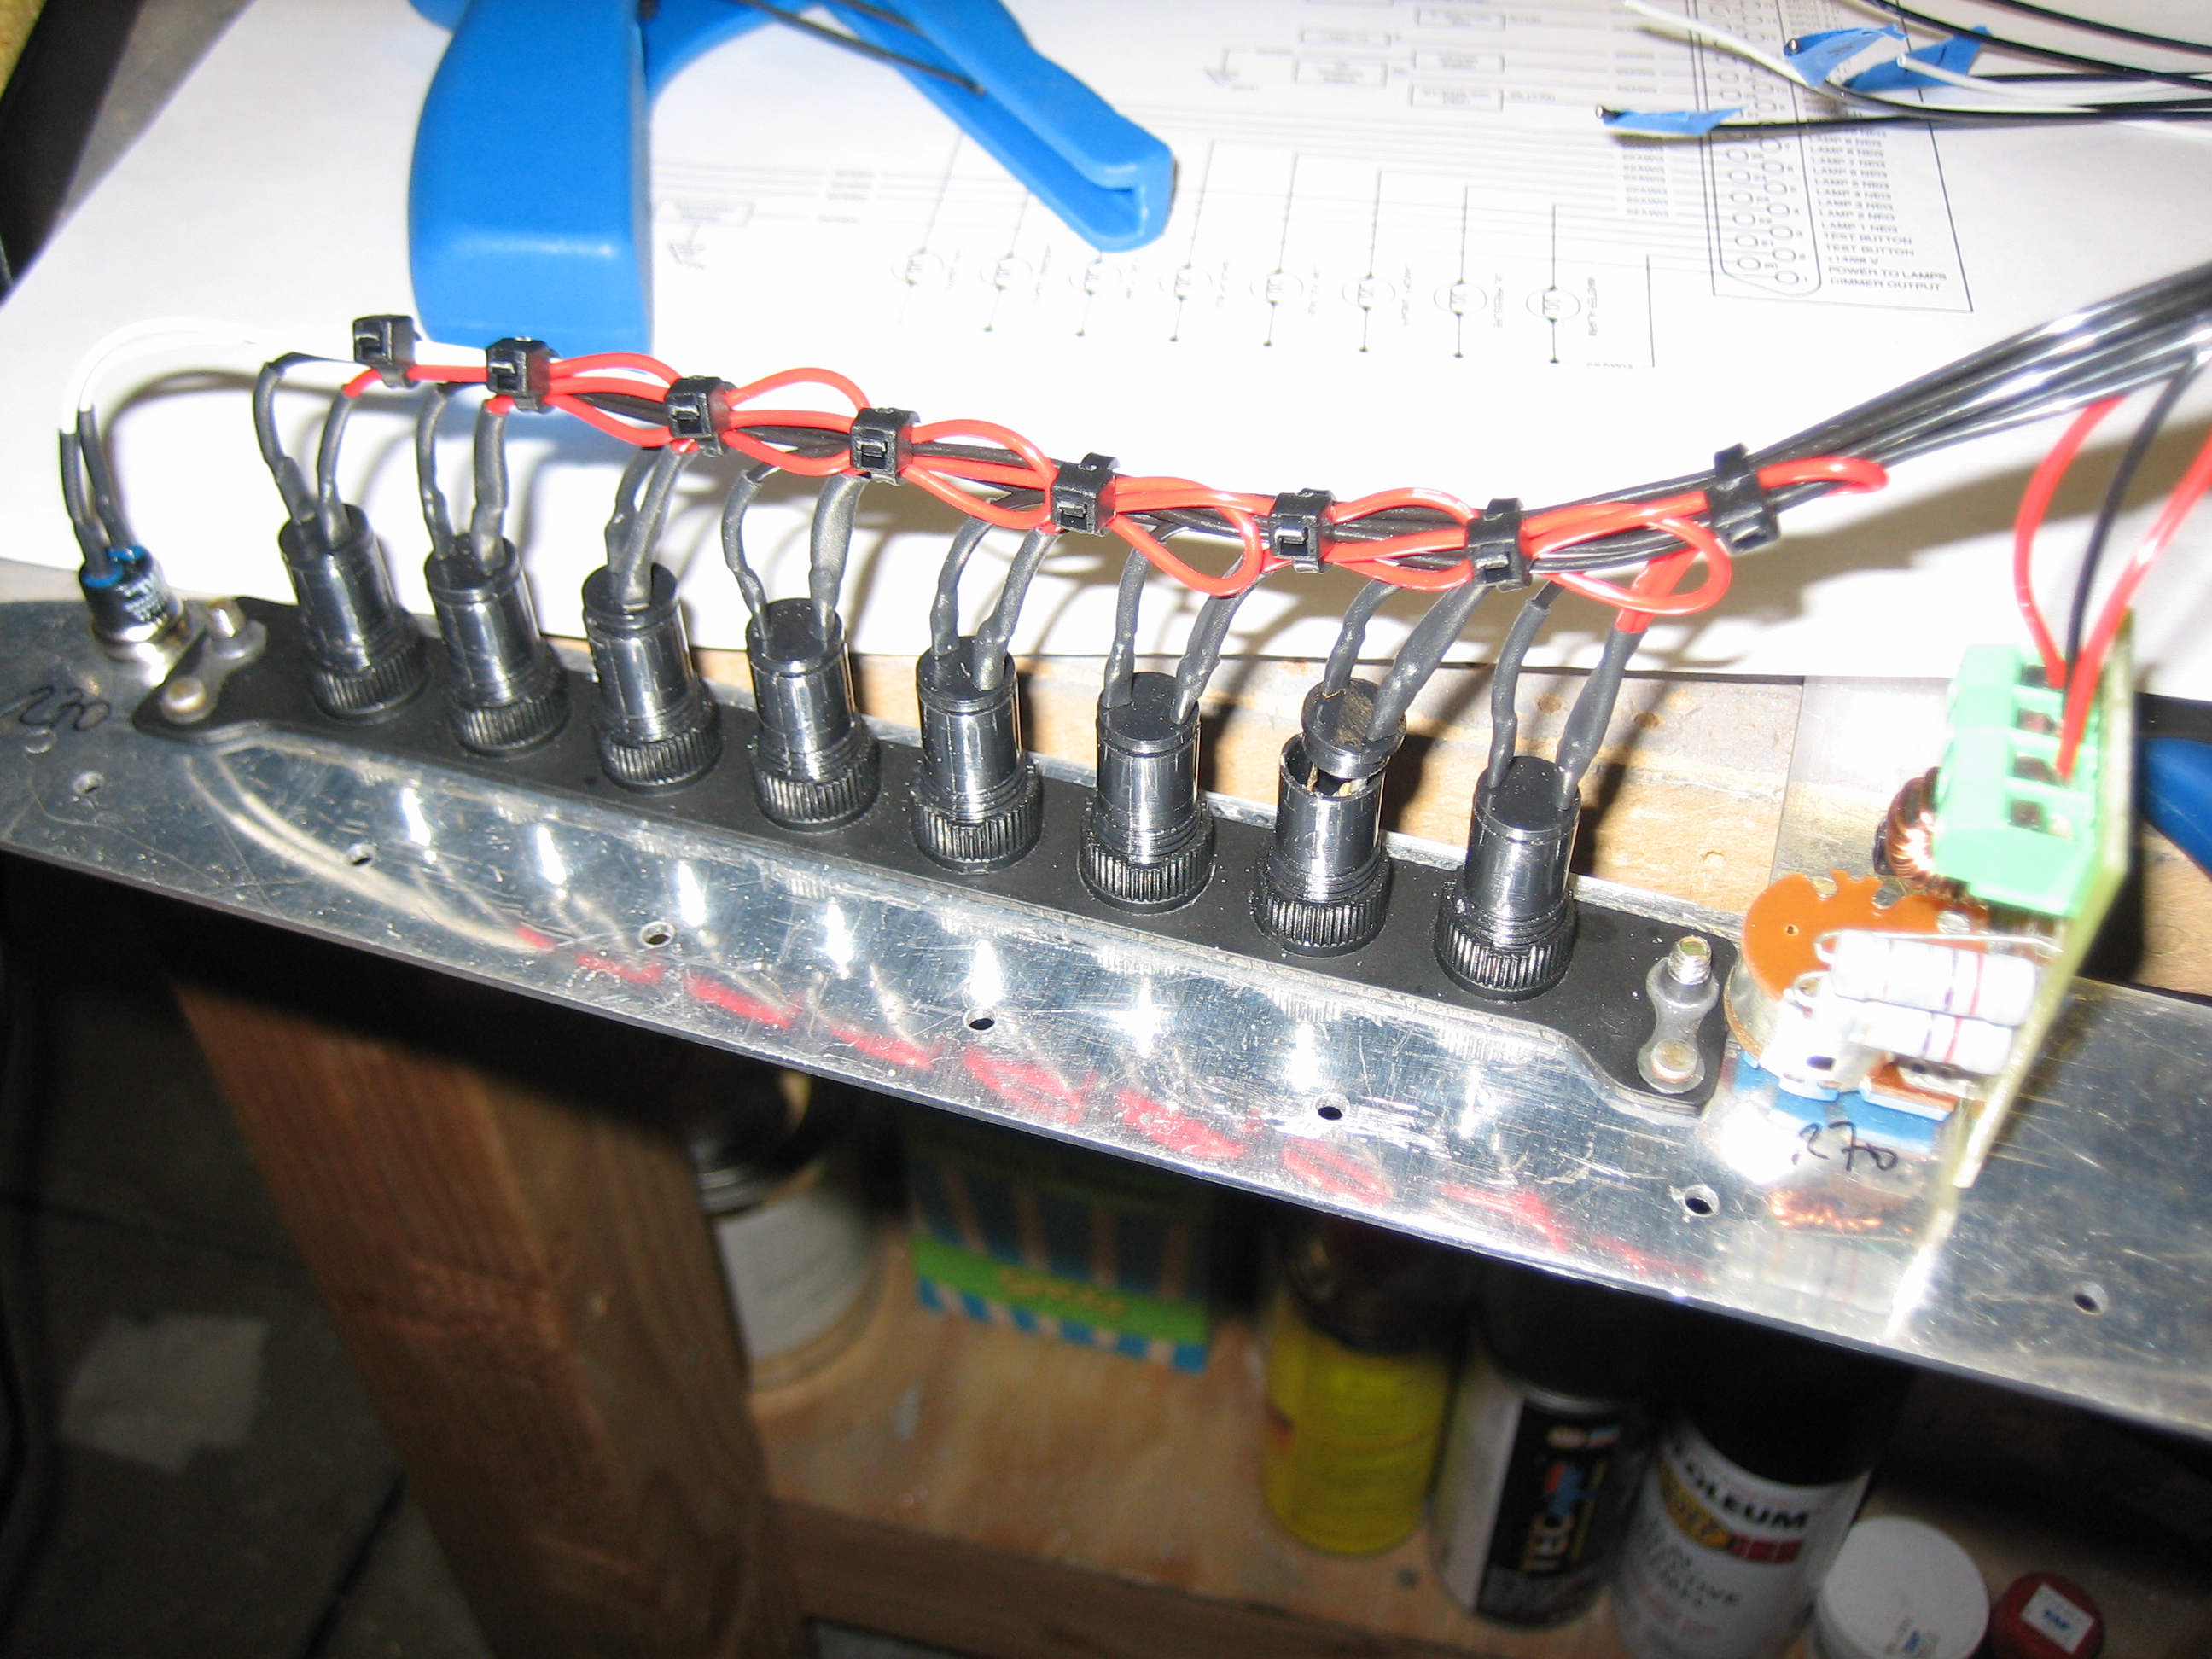
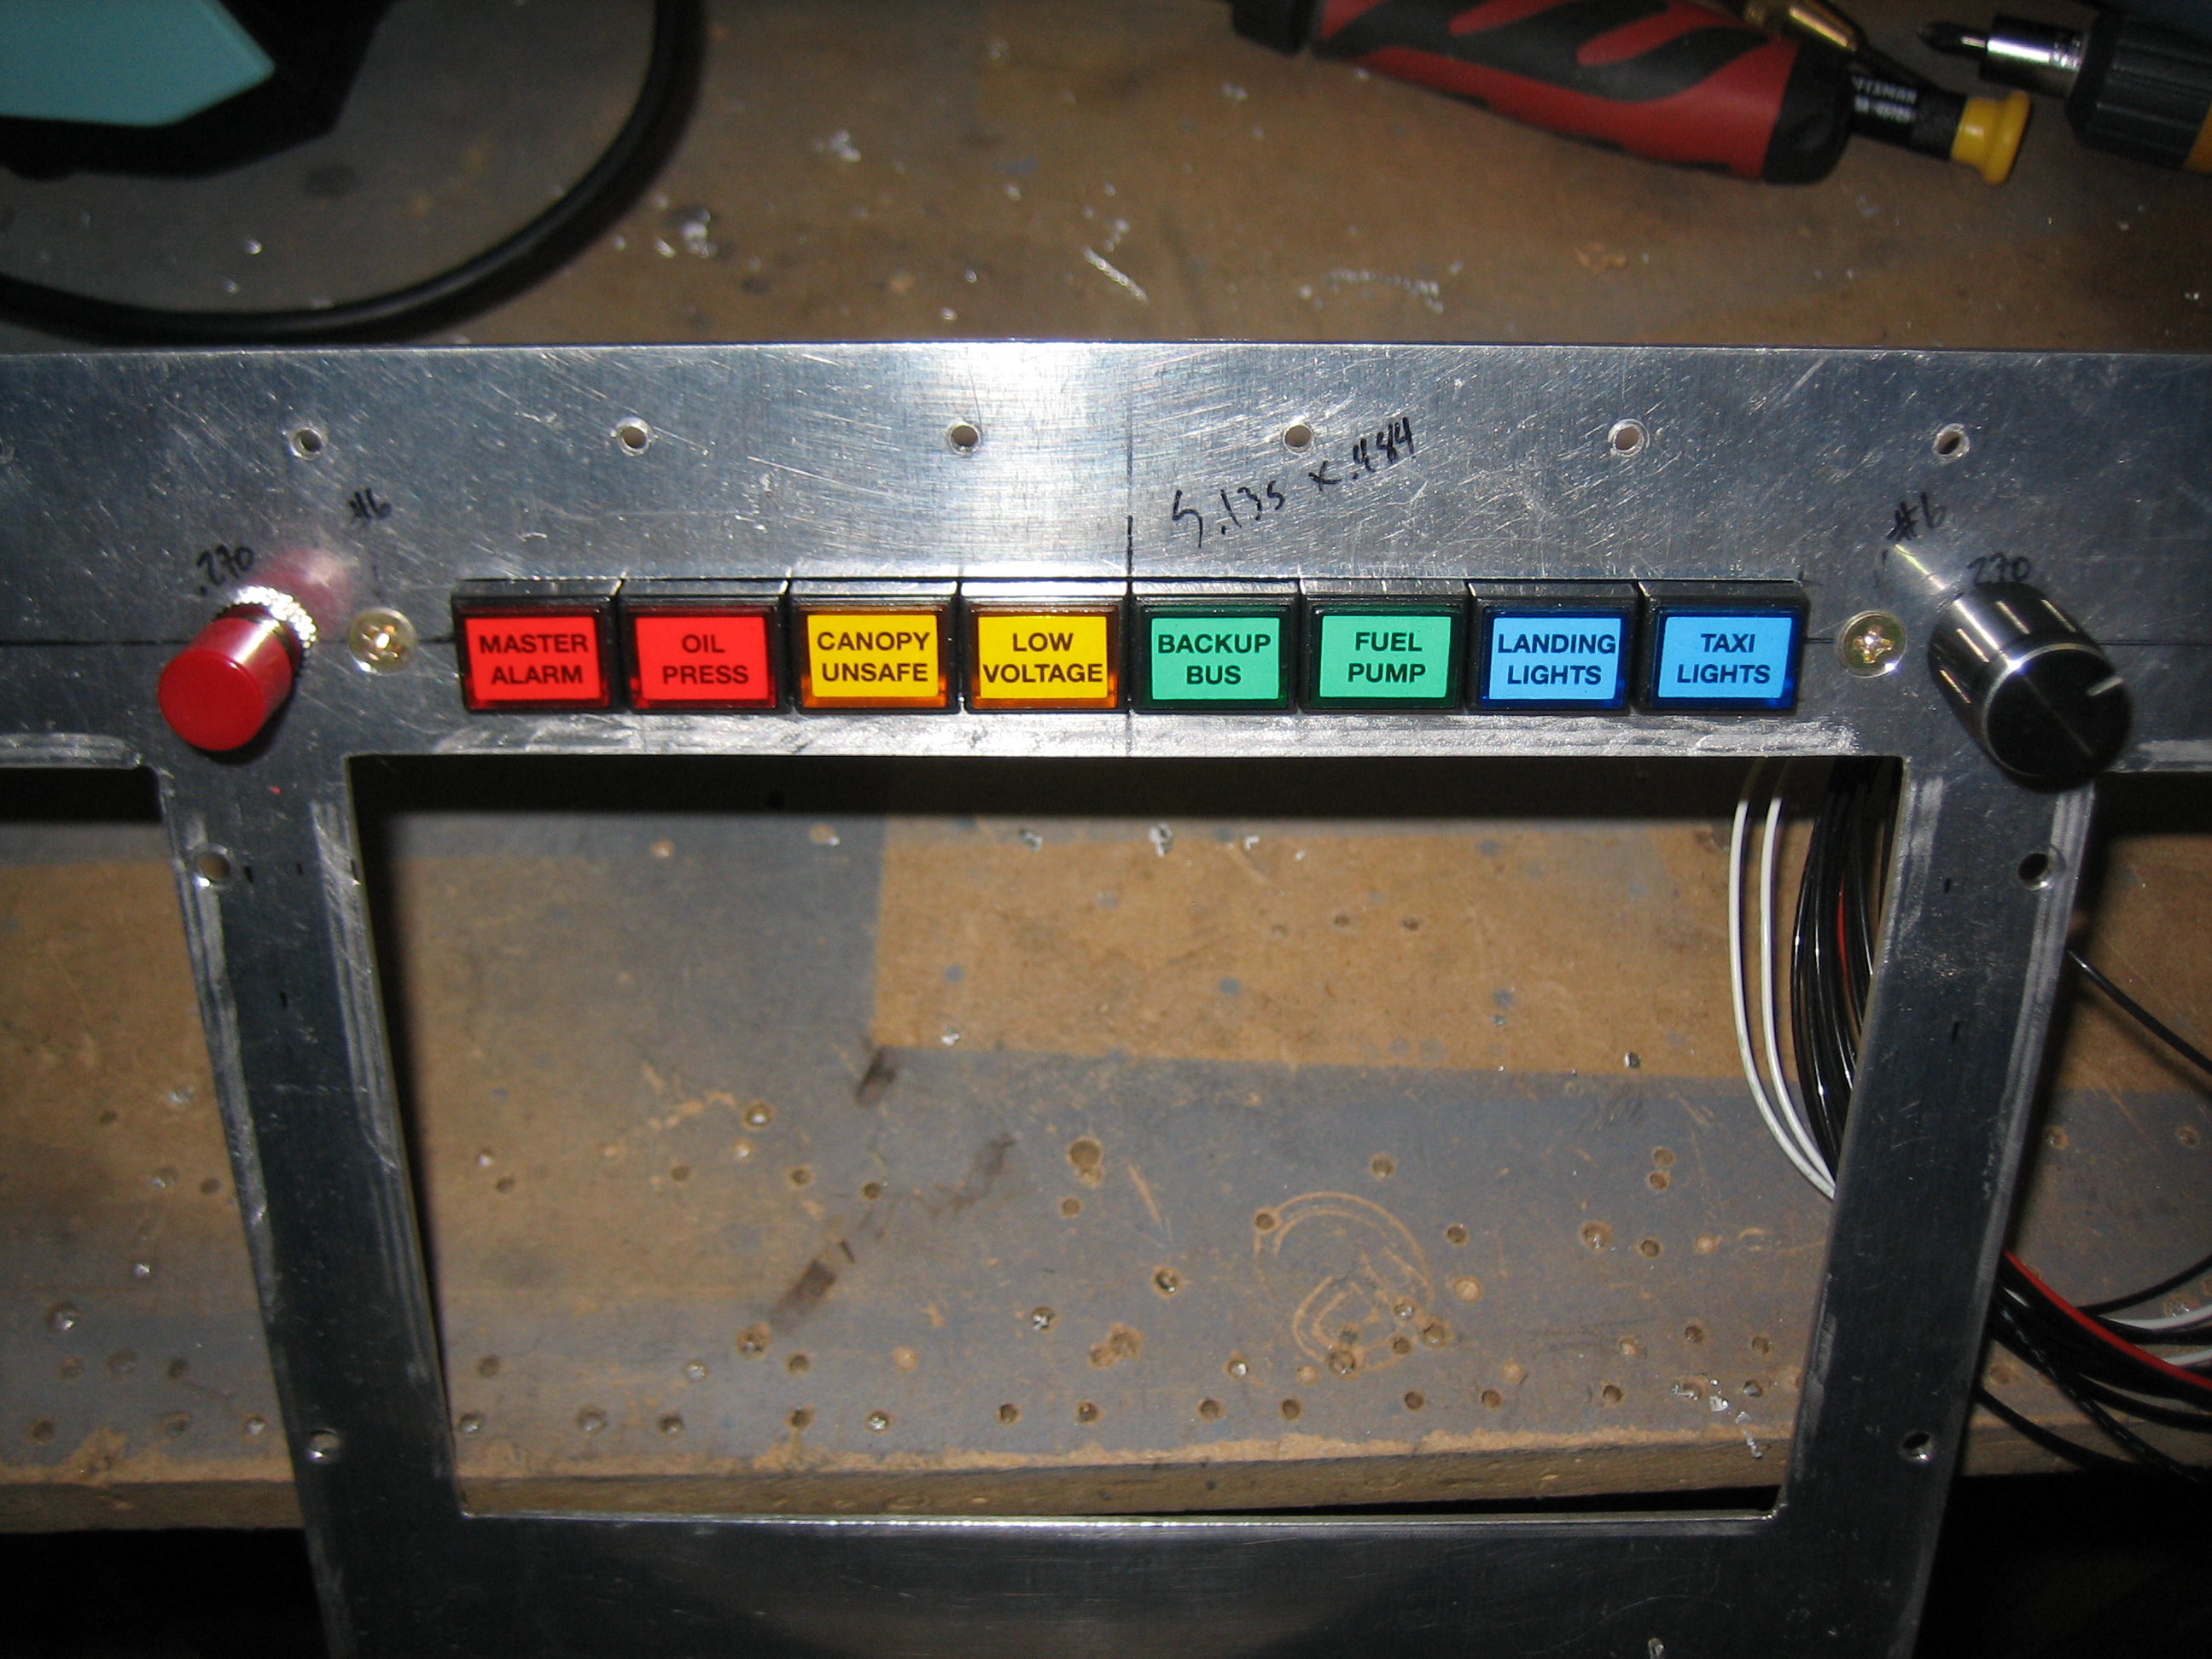
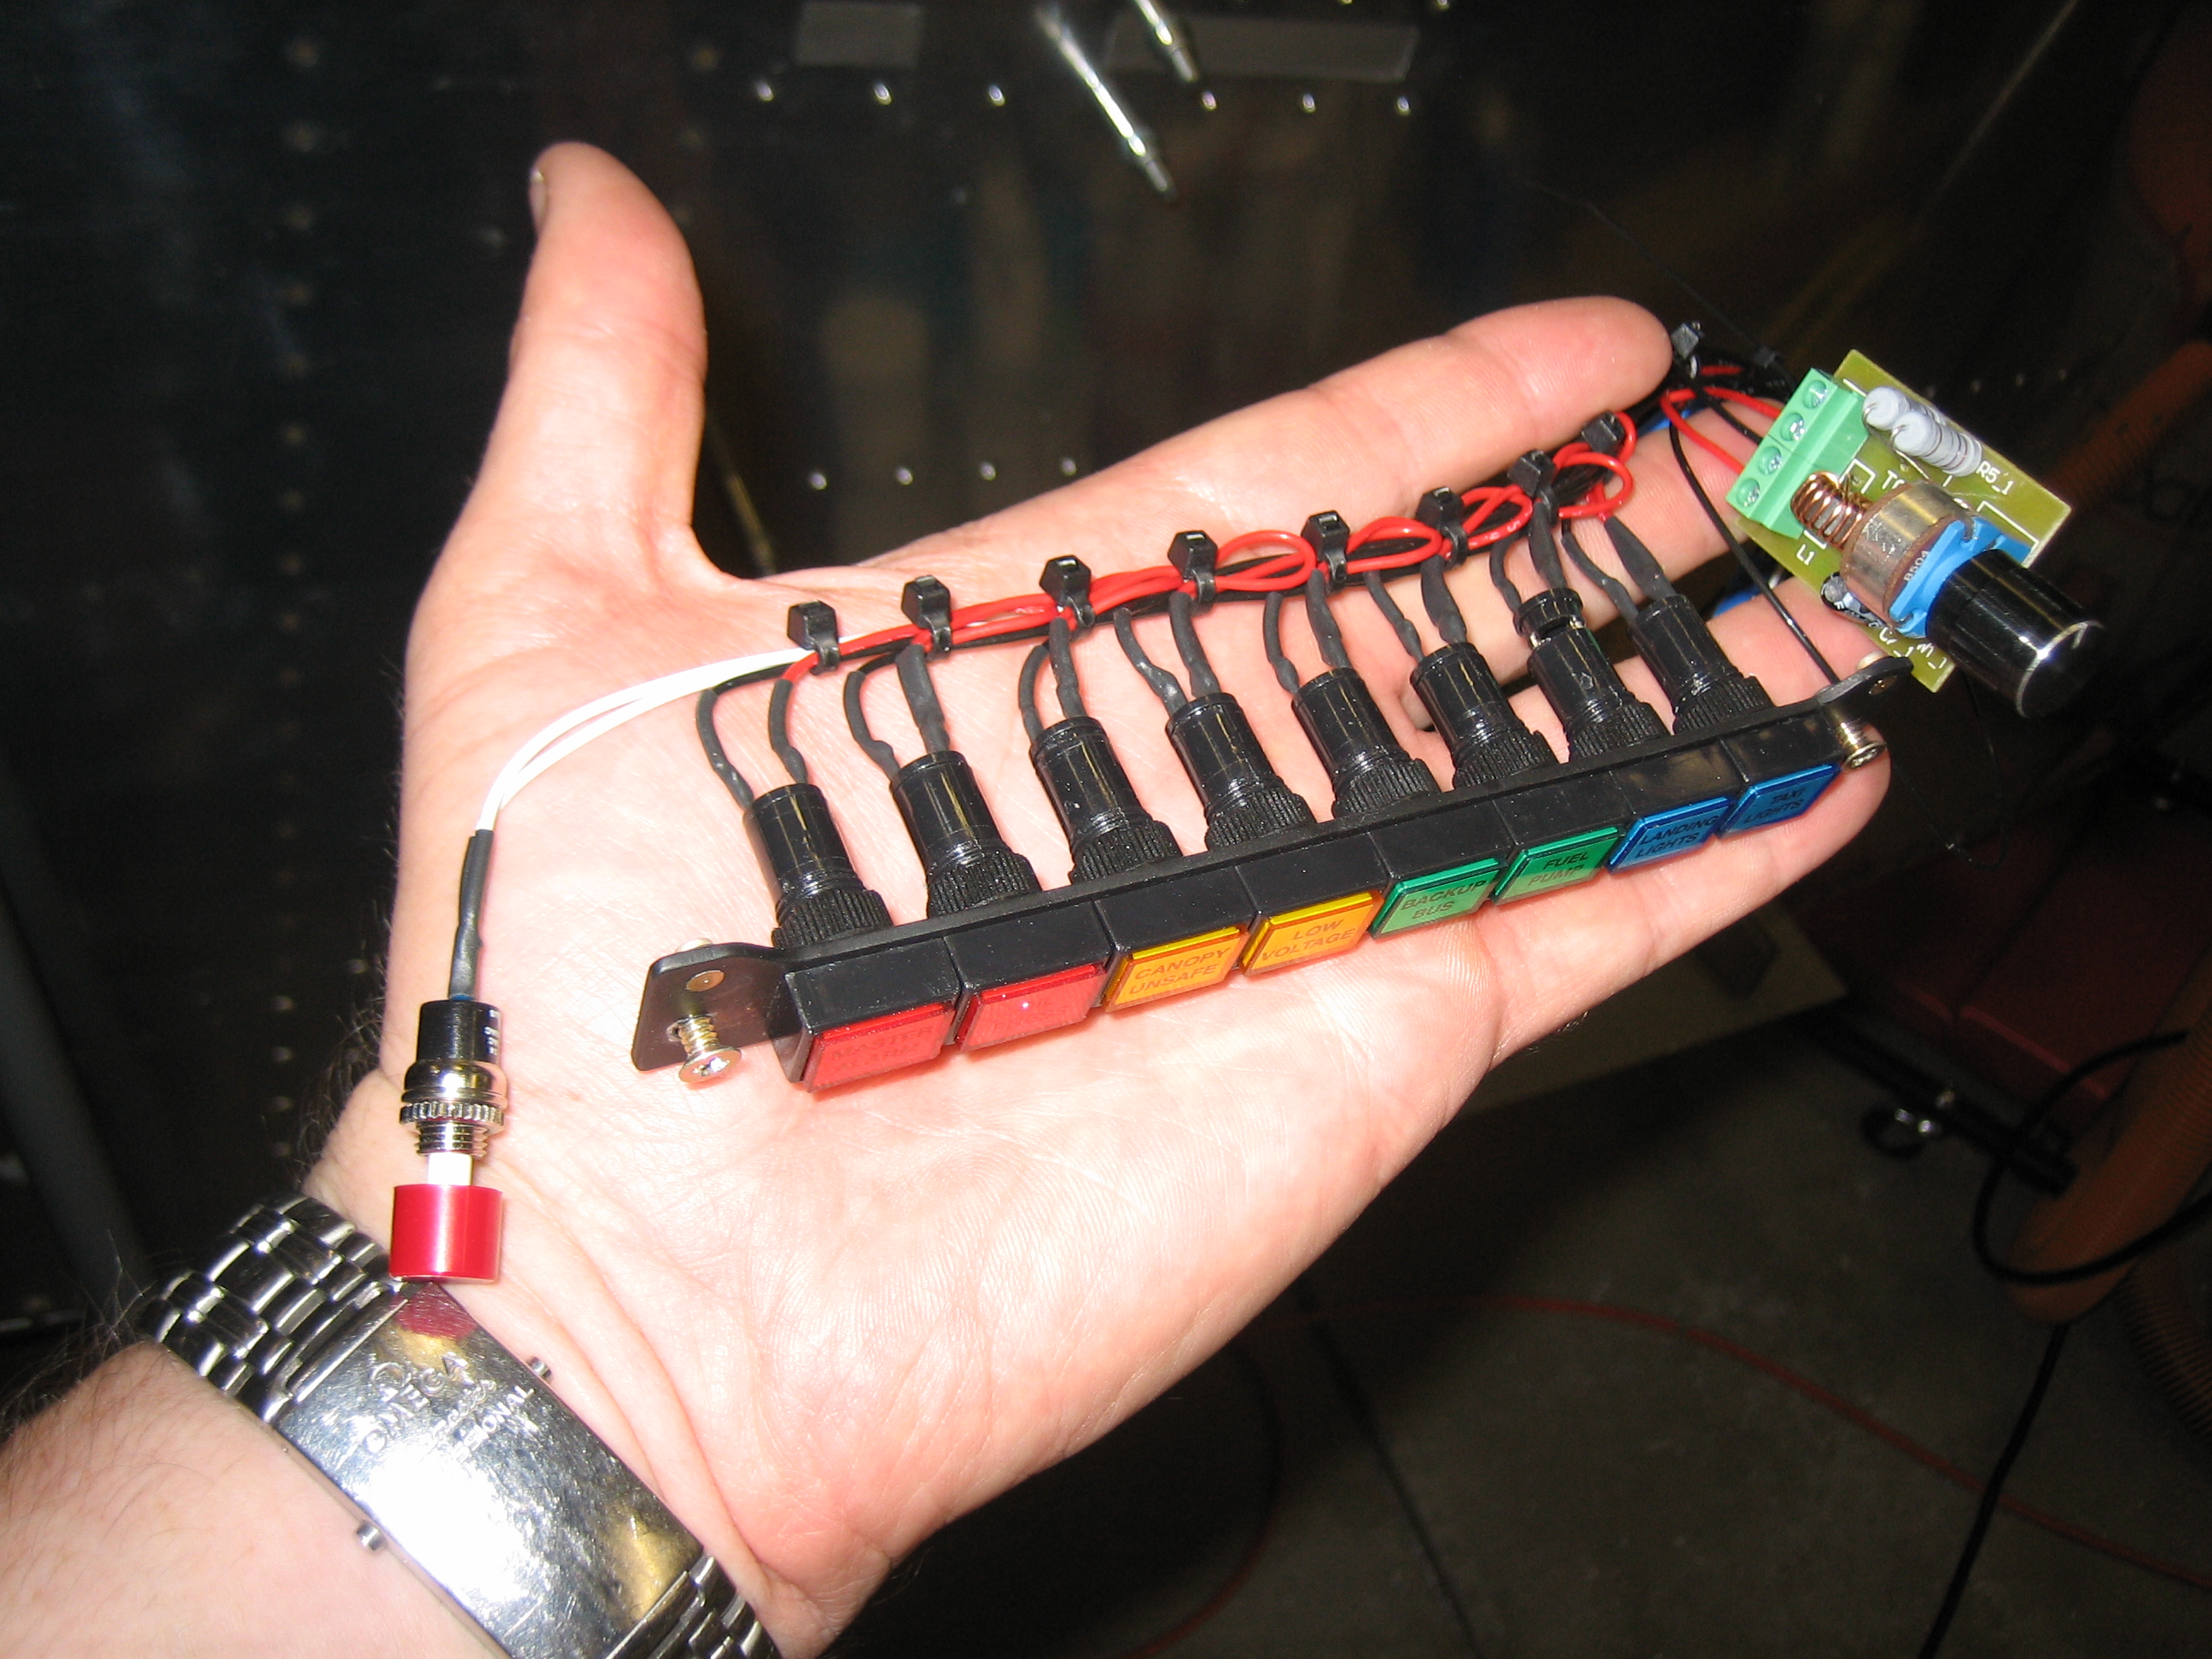
I soldered wires on all of the annunciator lights and push-to-test button and bundled everything up. I had to rotate the dimmer to clear the radio stack.
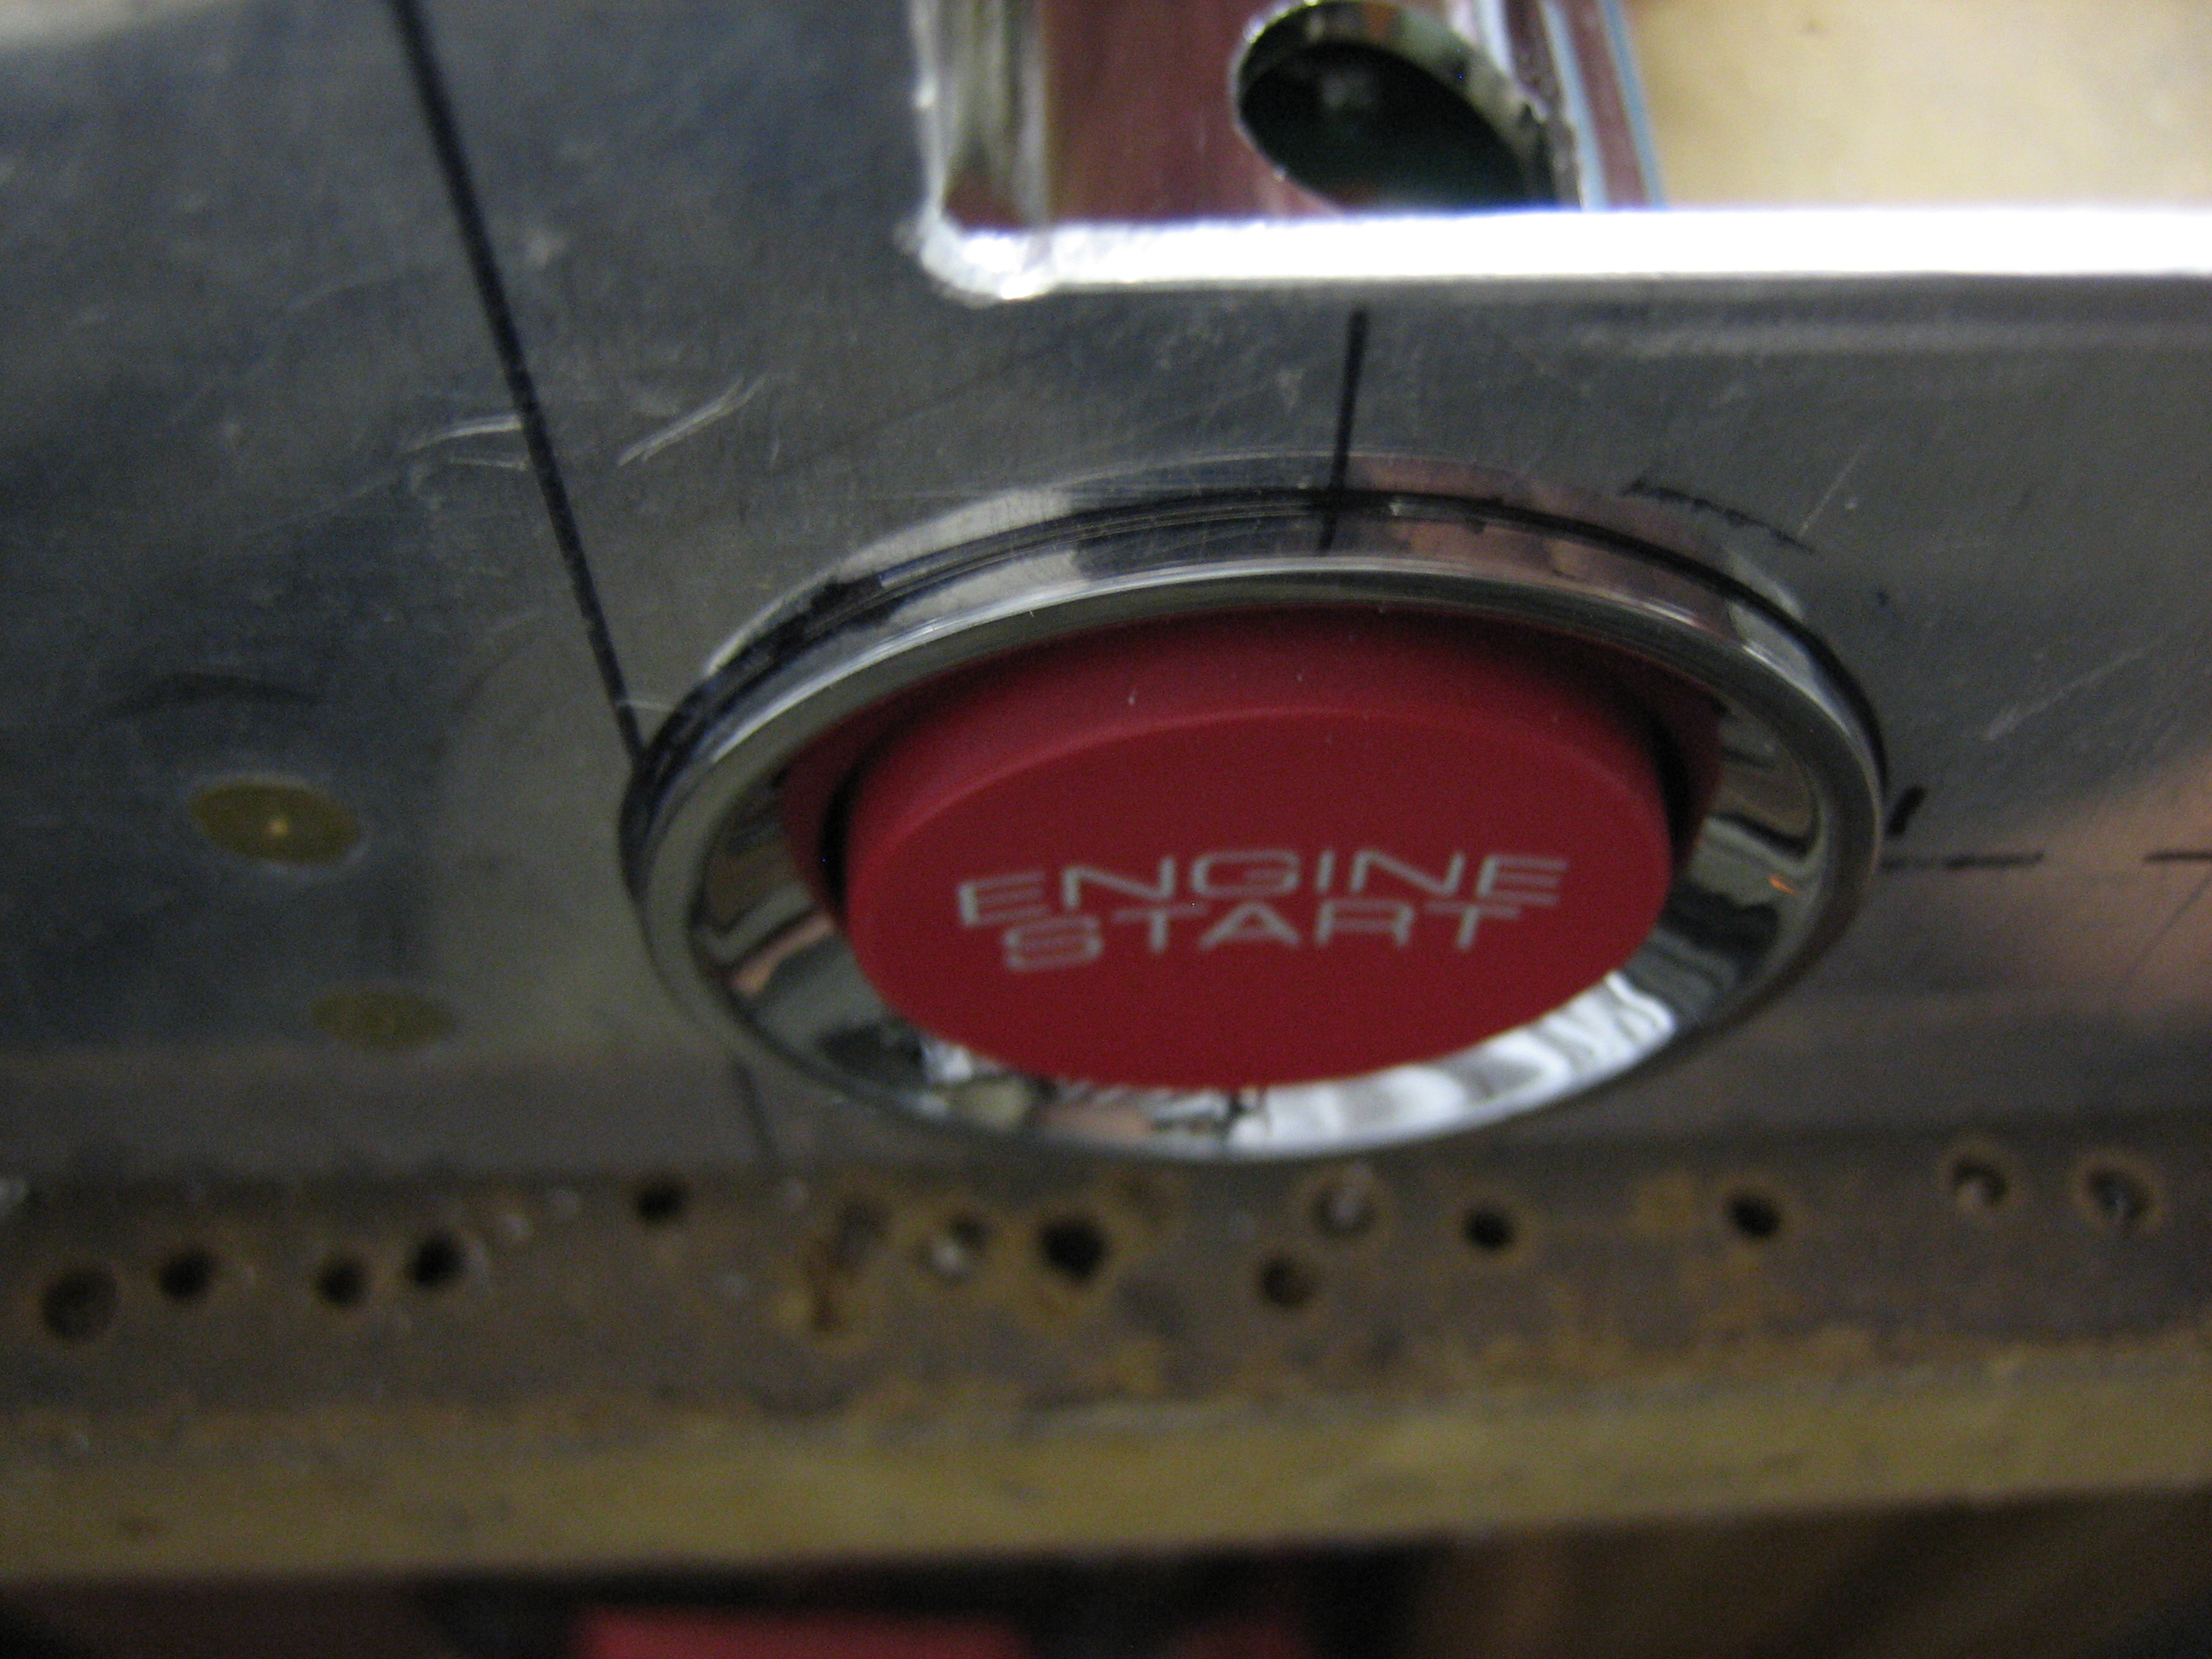
I’ll replace the red button cap with a black one, but other than that, this is done.
By mounting the lights from the back, all of this can come out as a unit when the panel is removed for painting.
I figured out how to secure the start engine button. I riveted a 1/16″ bracket to the instrument panel just to the left of the hole on the back side. The leg that sticks out is bent towards the hole slightly and has a beveled edge.
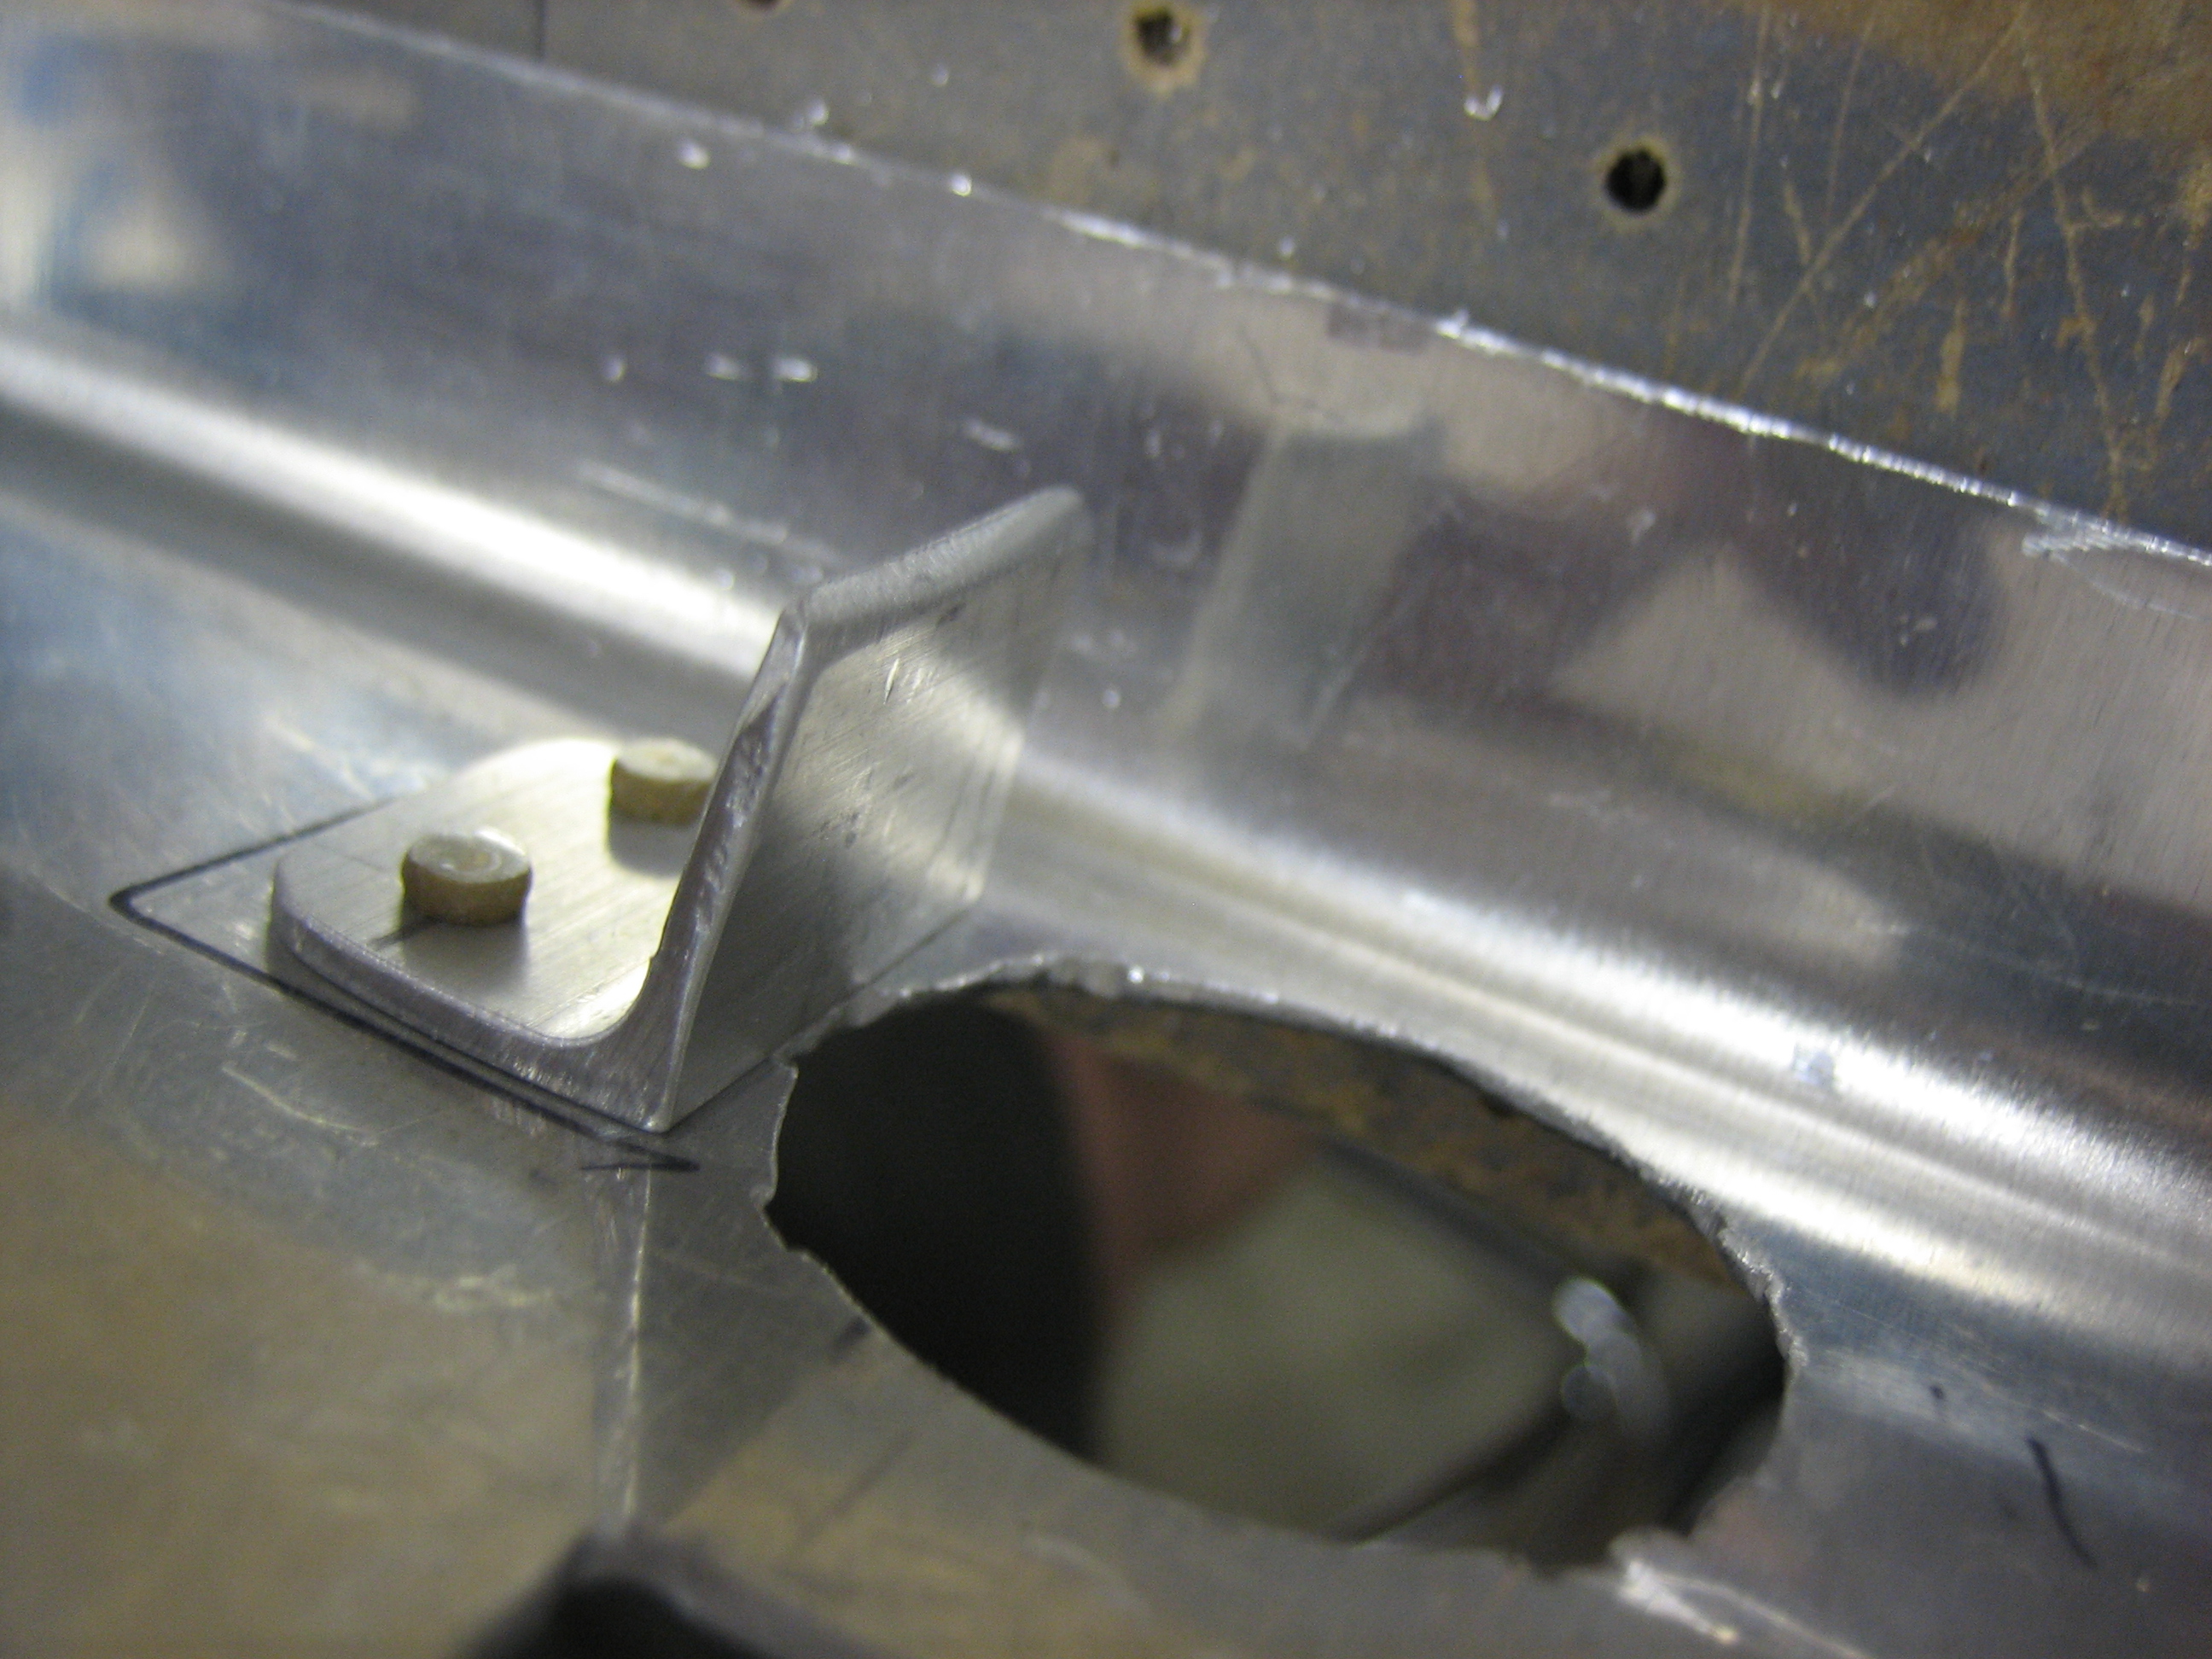
When the button is installed, the bracket catches a nub on the side of the button.
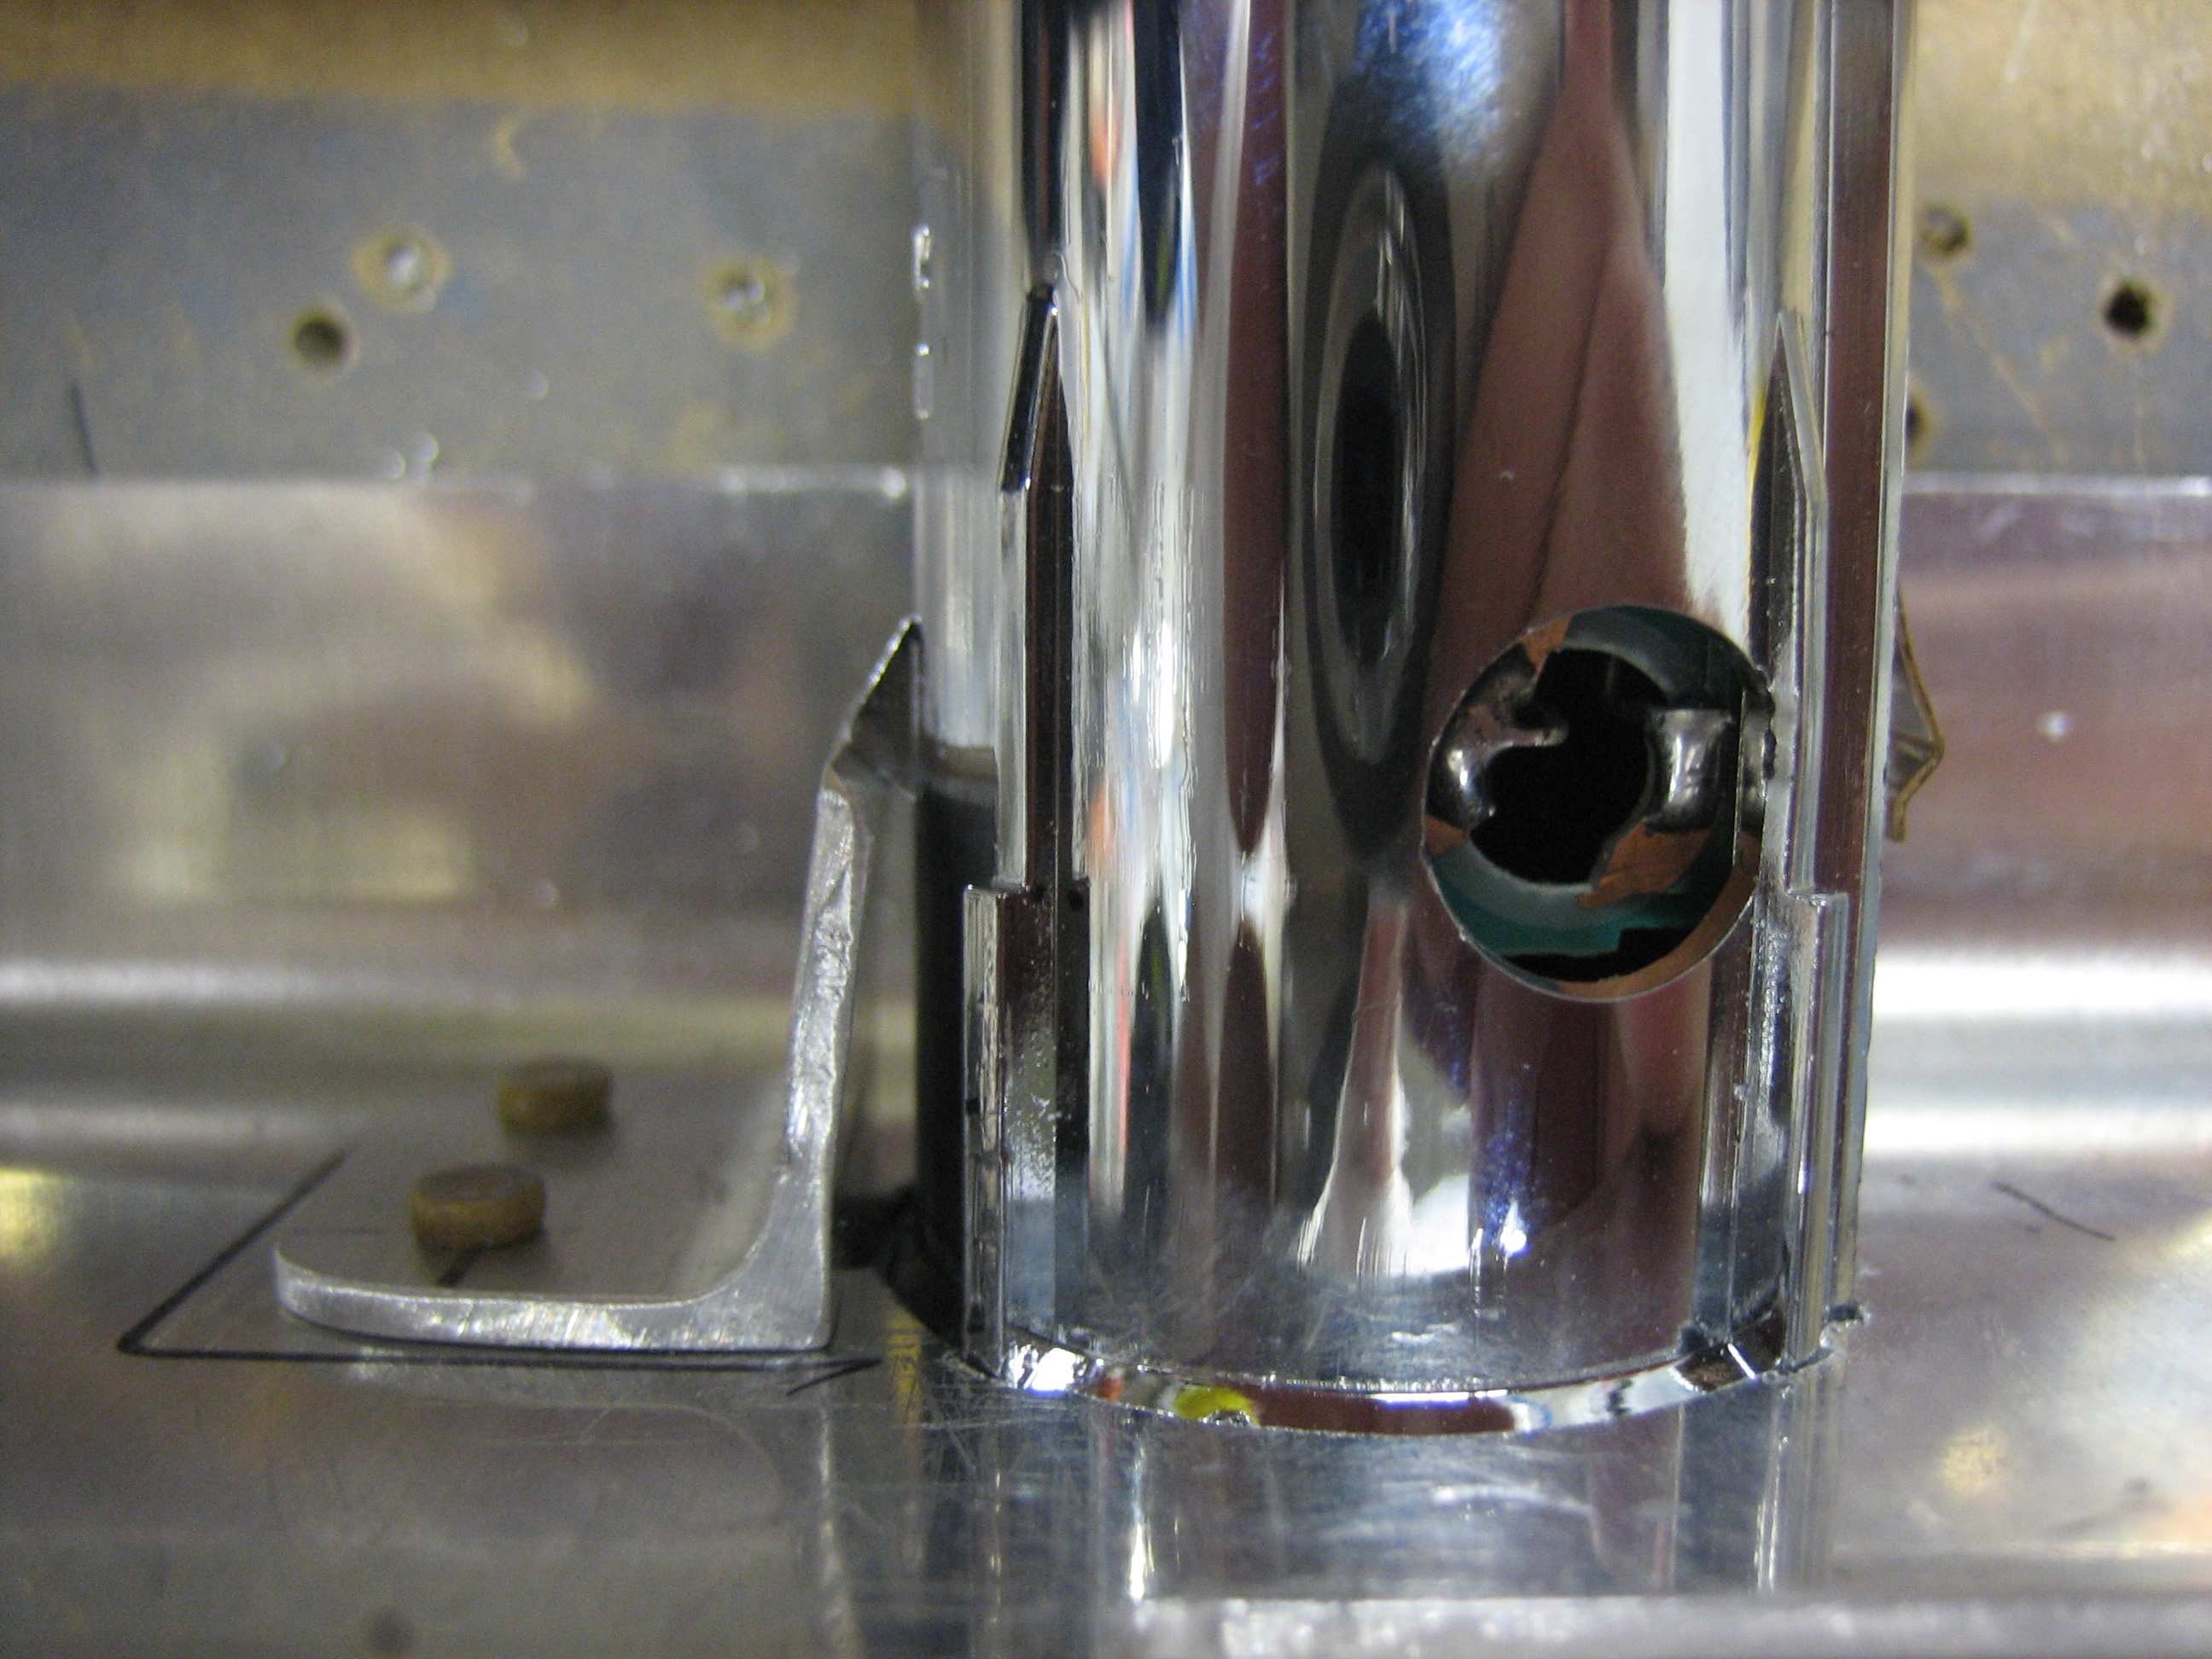
You can see that the button is tight against the panel when hooked behind the bracket.
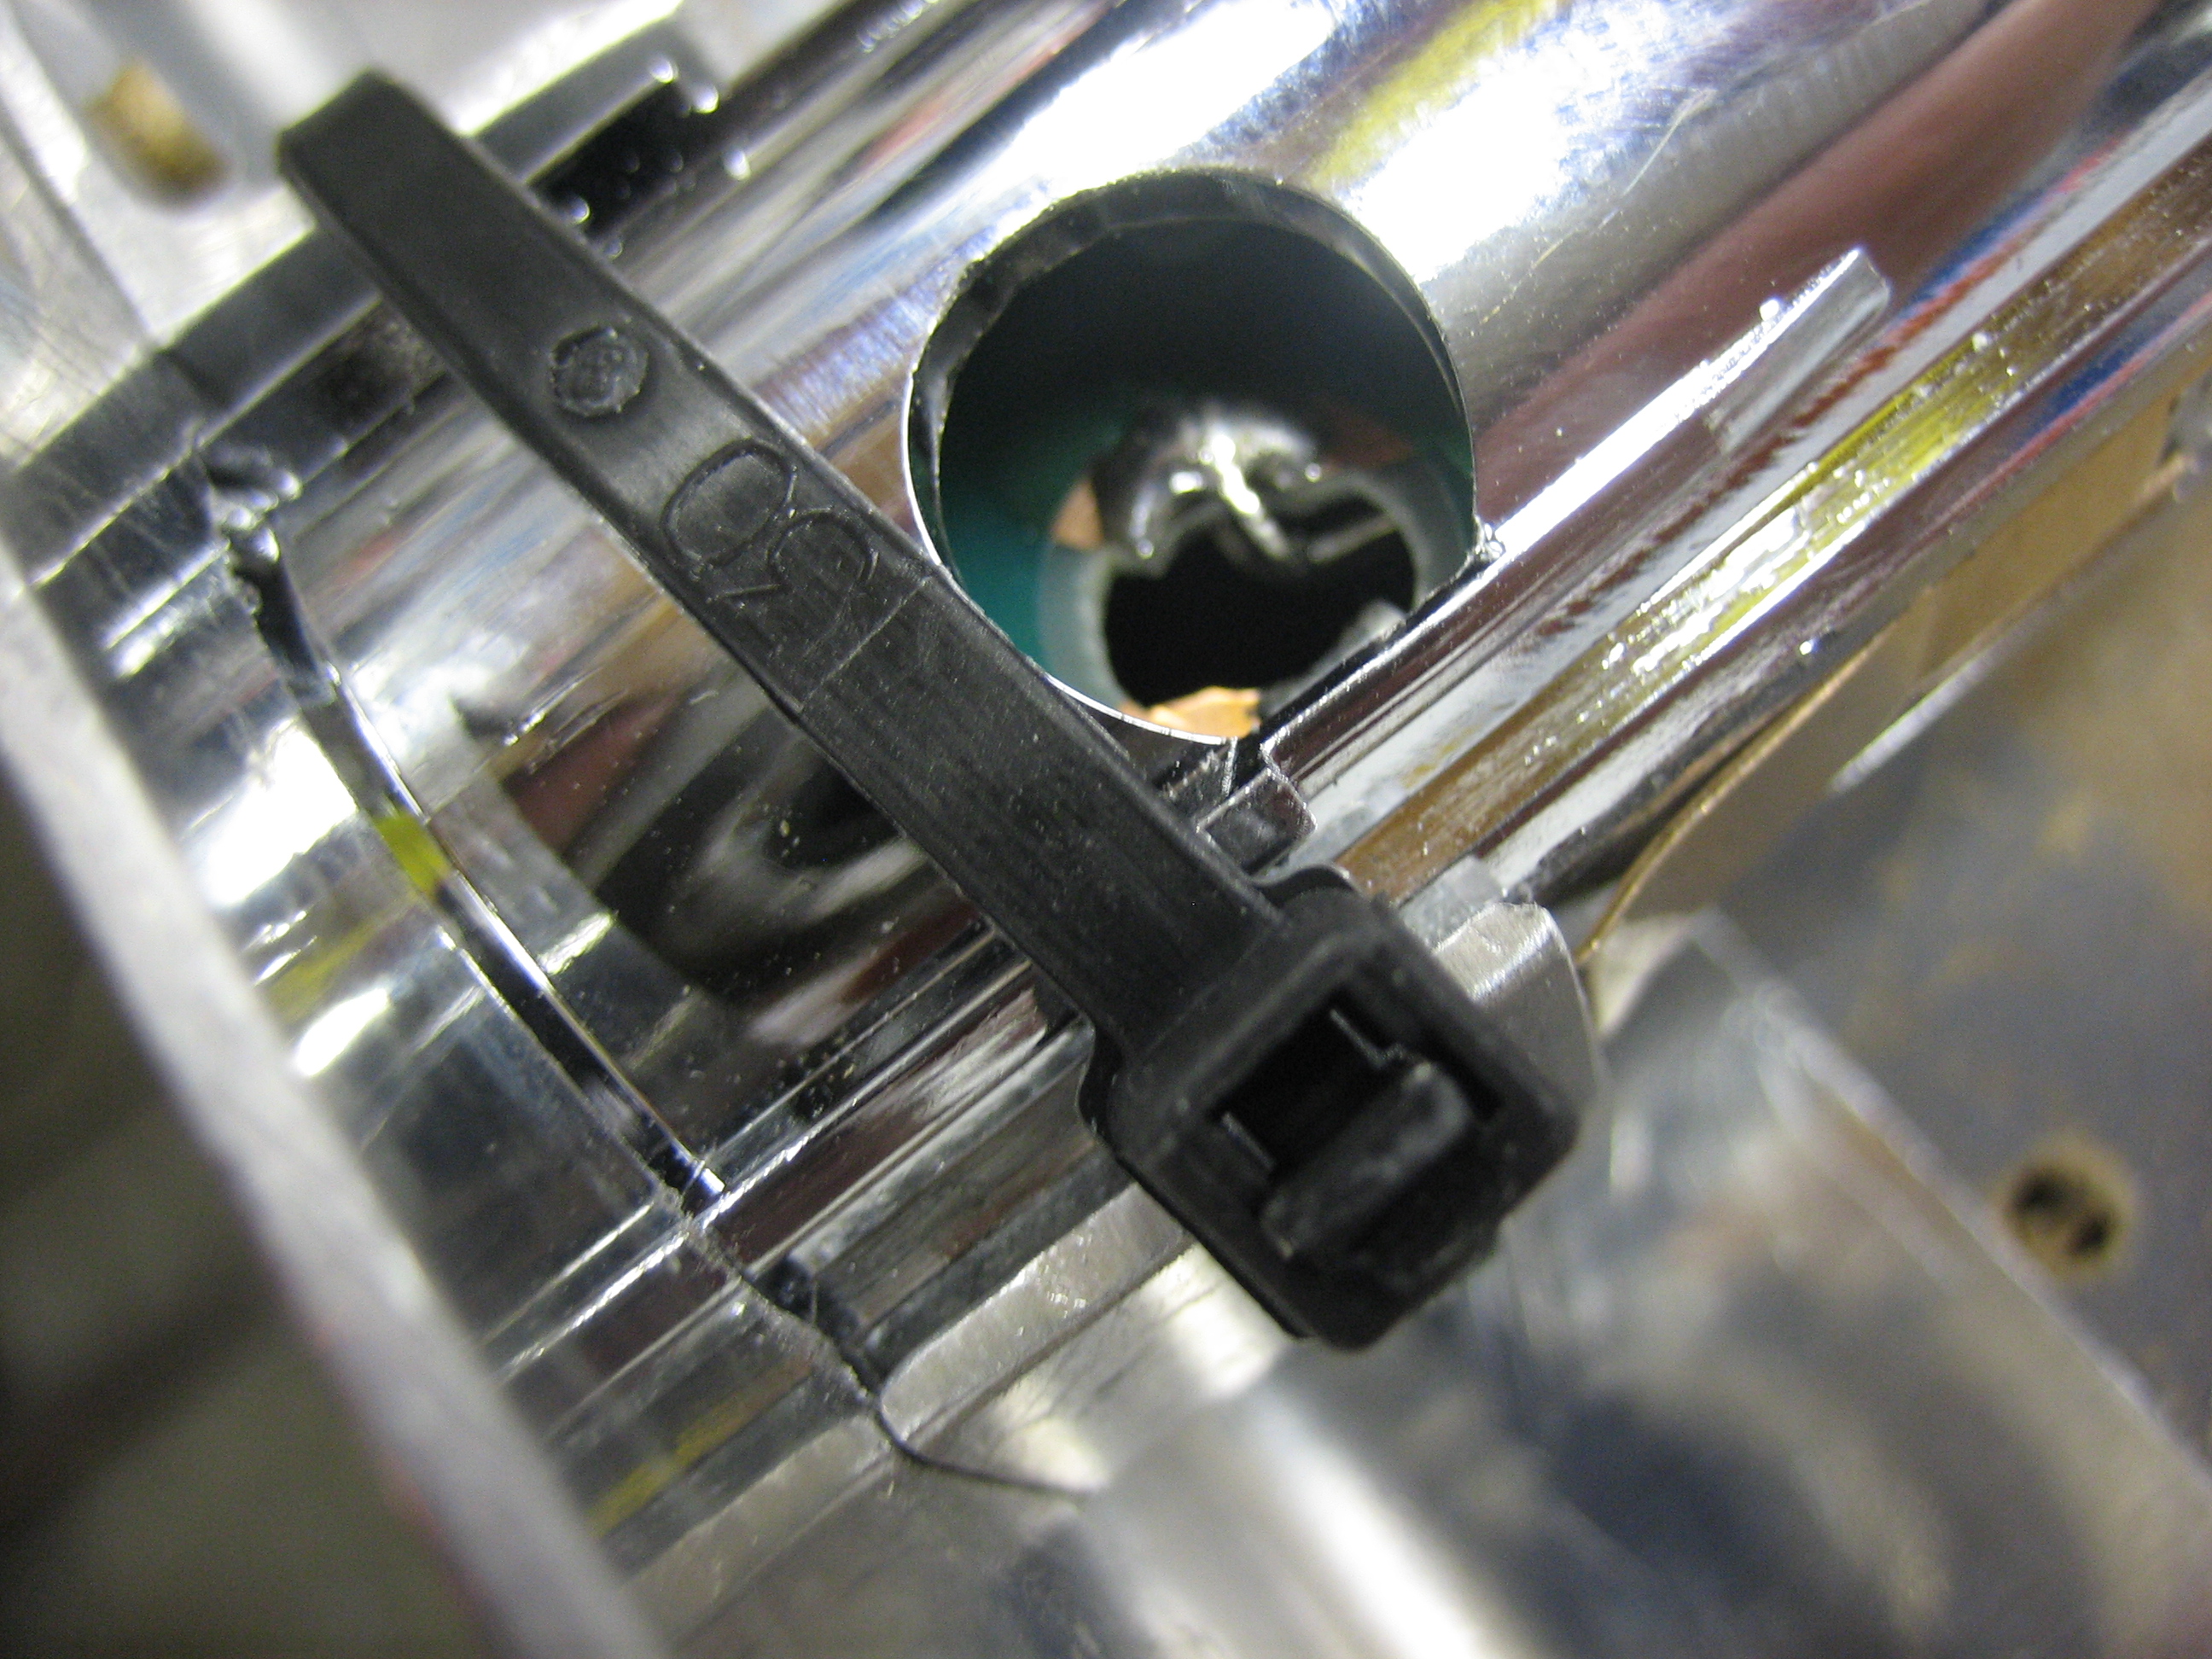
I fabricated a small removable clip for the other side that will hold the clip back when held in place. You can see that it also has a beveled edge to fit behind the spring on the right side of the button. I was planning on keeping all of this together with a worm clamp, but a zip-tie does a great job. I might just leave it like this.
All of the switches and breakers installed in the panel have an anti-rotation washer. This has a tab on the inner edge that fits in a keyway on the switch and a tab on the outer edge that fits in a hole in the panel that keeps the switch from rotating.

Most builders fabricate a bracket that sits behind the panel with a hole for the anti-rotation washer, but the panel is thick enough that you can just drill part way through it on the back side.
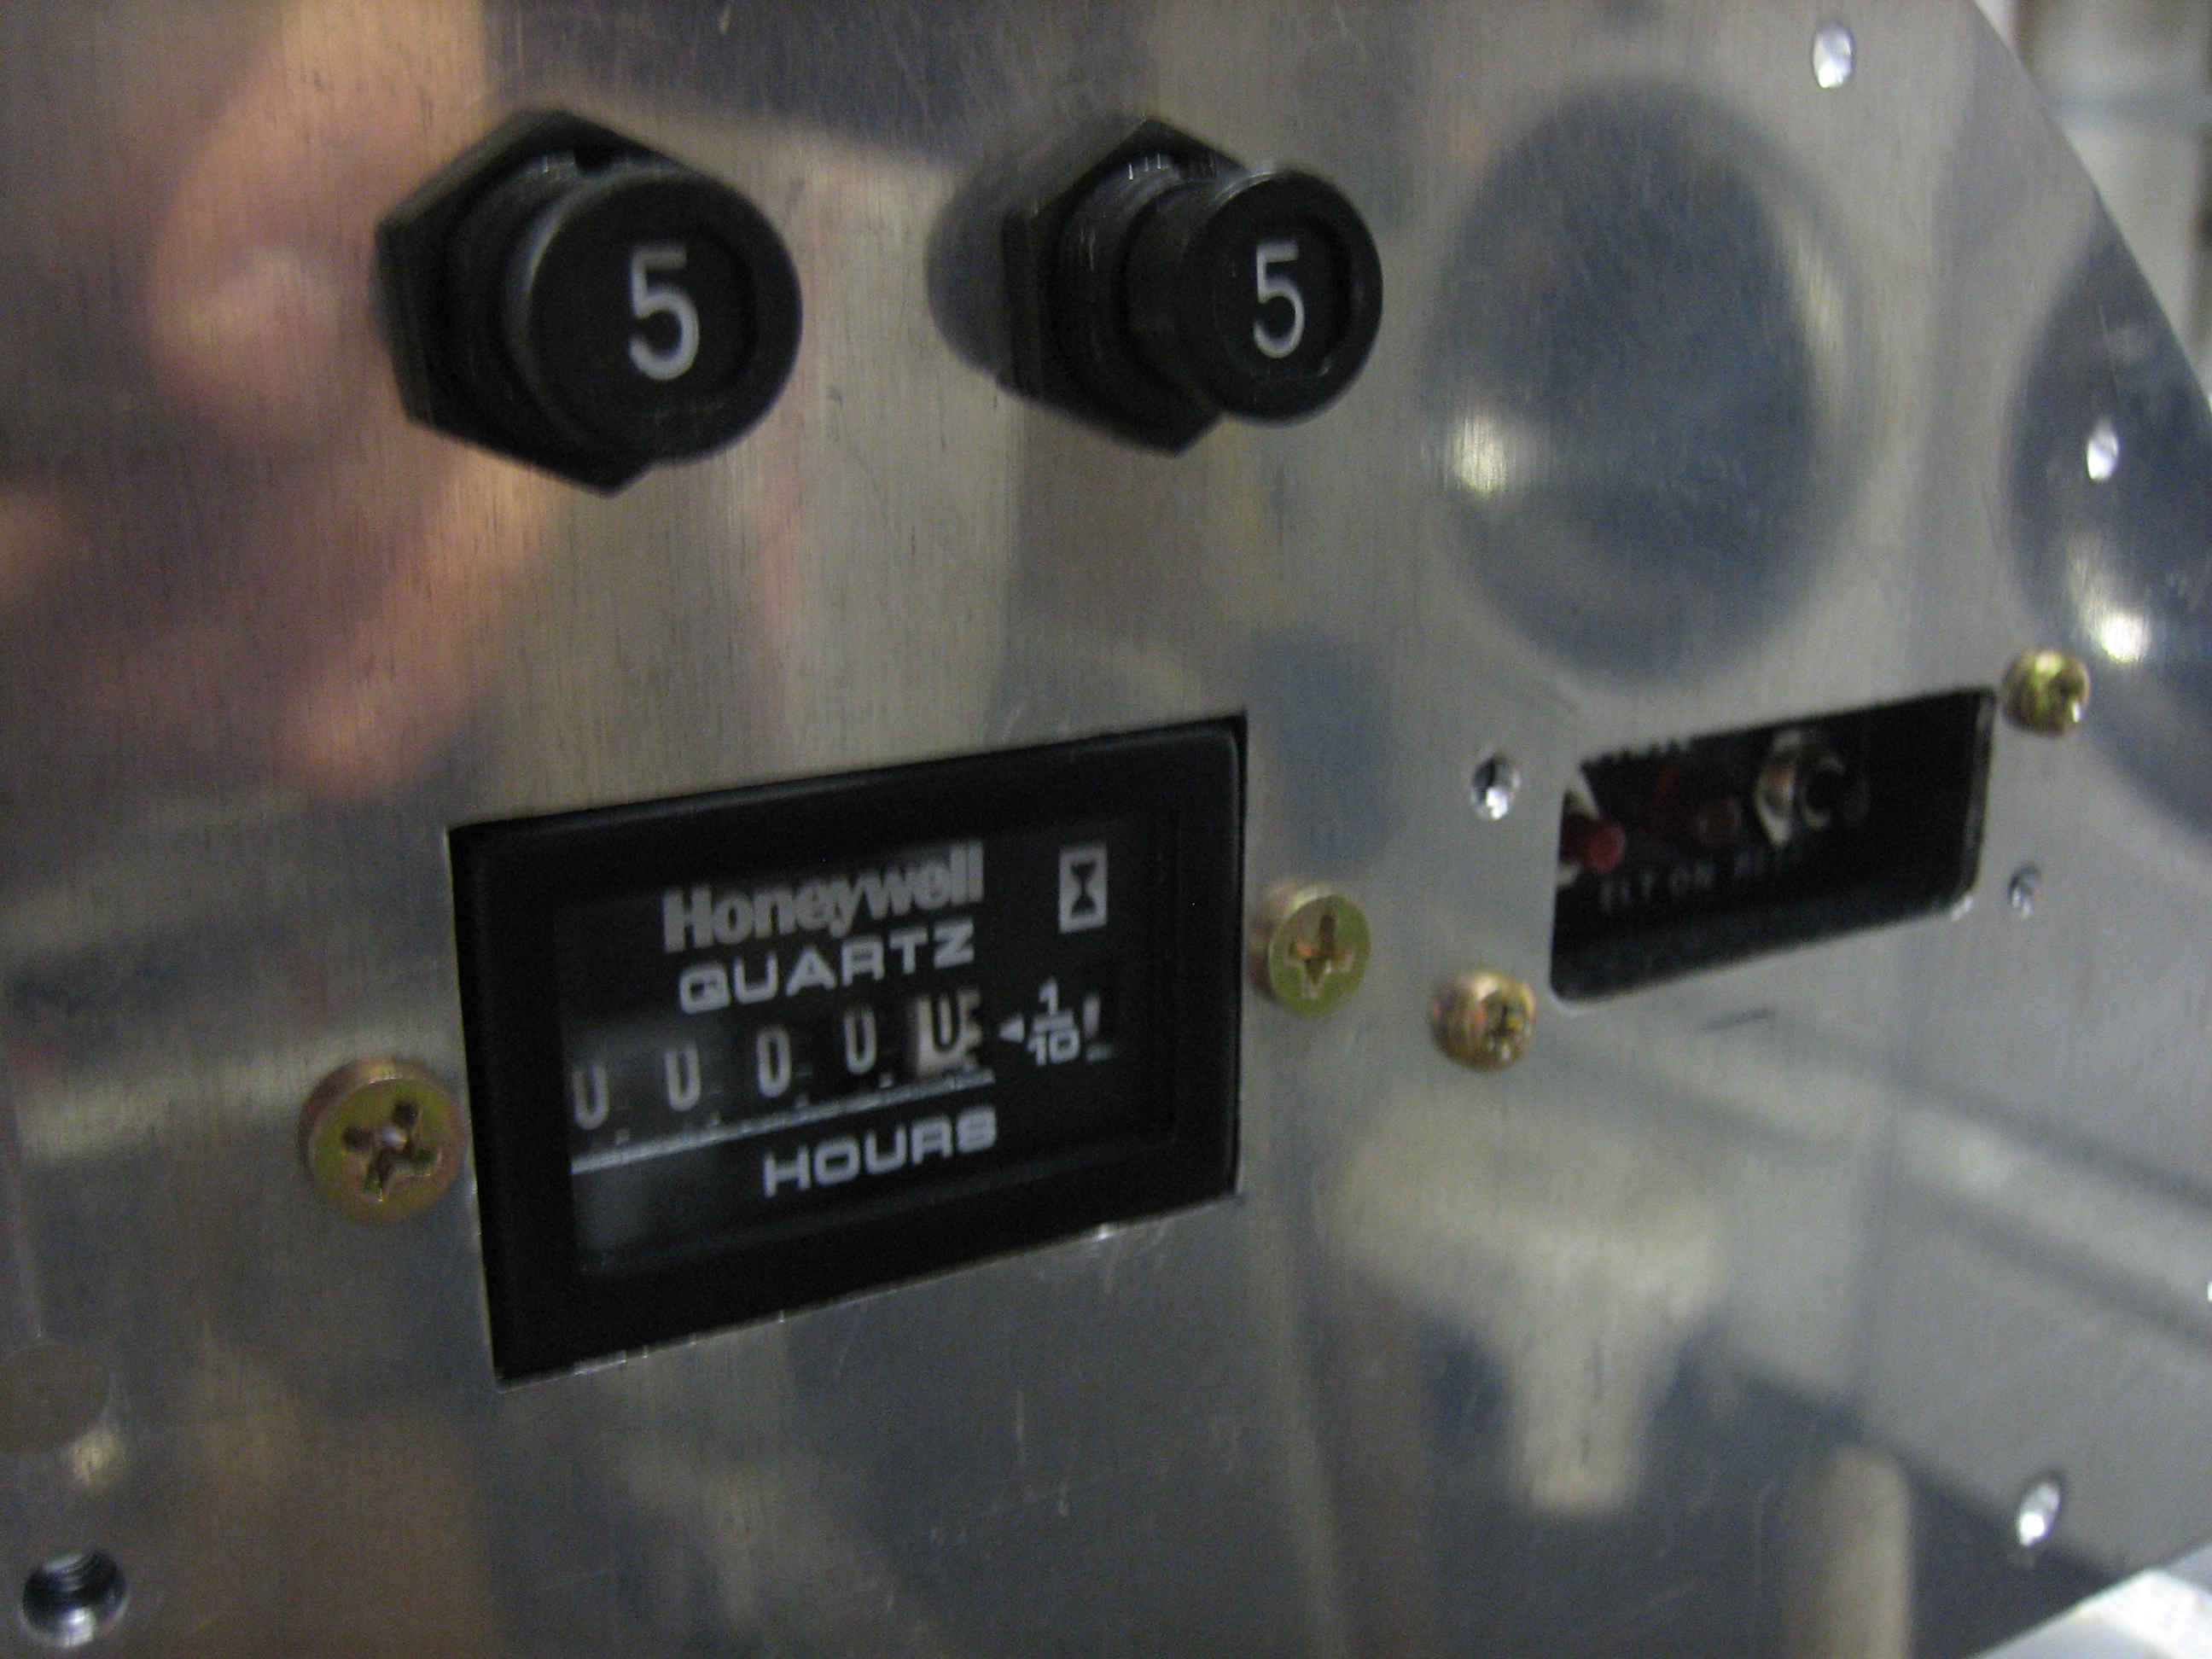
I installed the breakers, hobbs meter and ELT remote. I don’t have the correct screws for the hobbs meter and ELT remote, so I just installed them with some scrap hardware for now.
I also installed all of the switches below the left SkyView screen. The hole in the middle is for a two-pole progressive transfer switch (2-10) like the three on the left. It’s on order and should be here soon. The switch on the right is a 2-7 for the flaps. It is a momentary up and down switch that returns to the center when released.
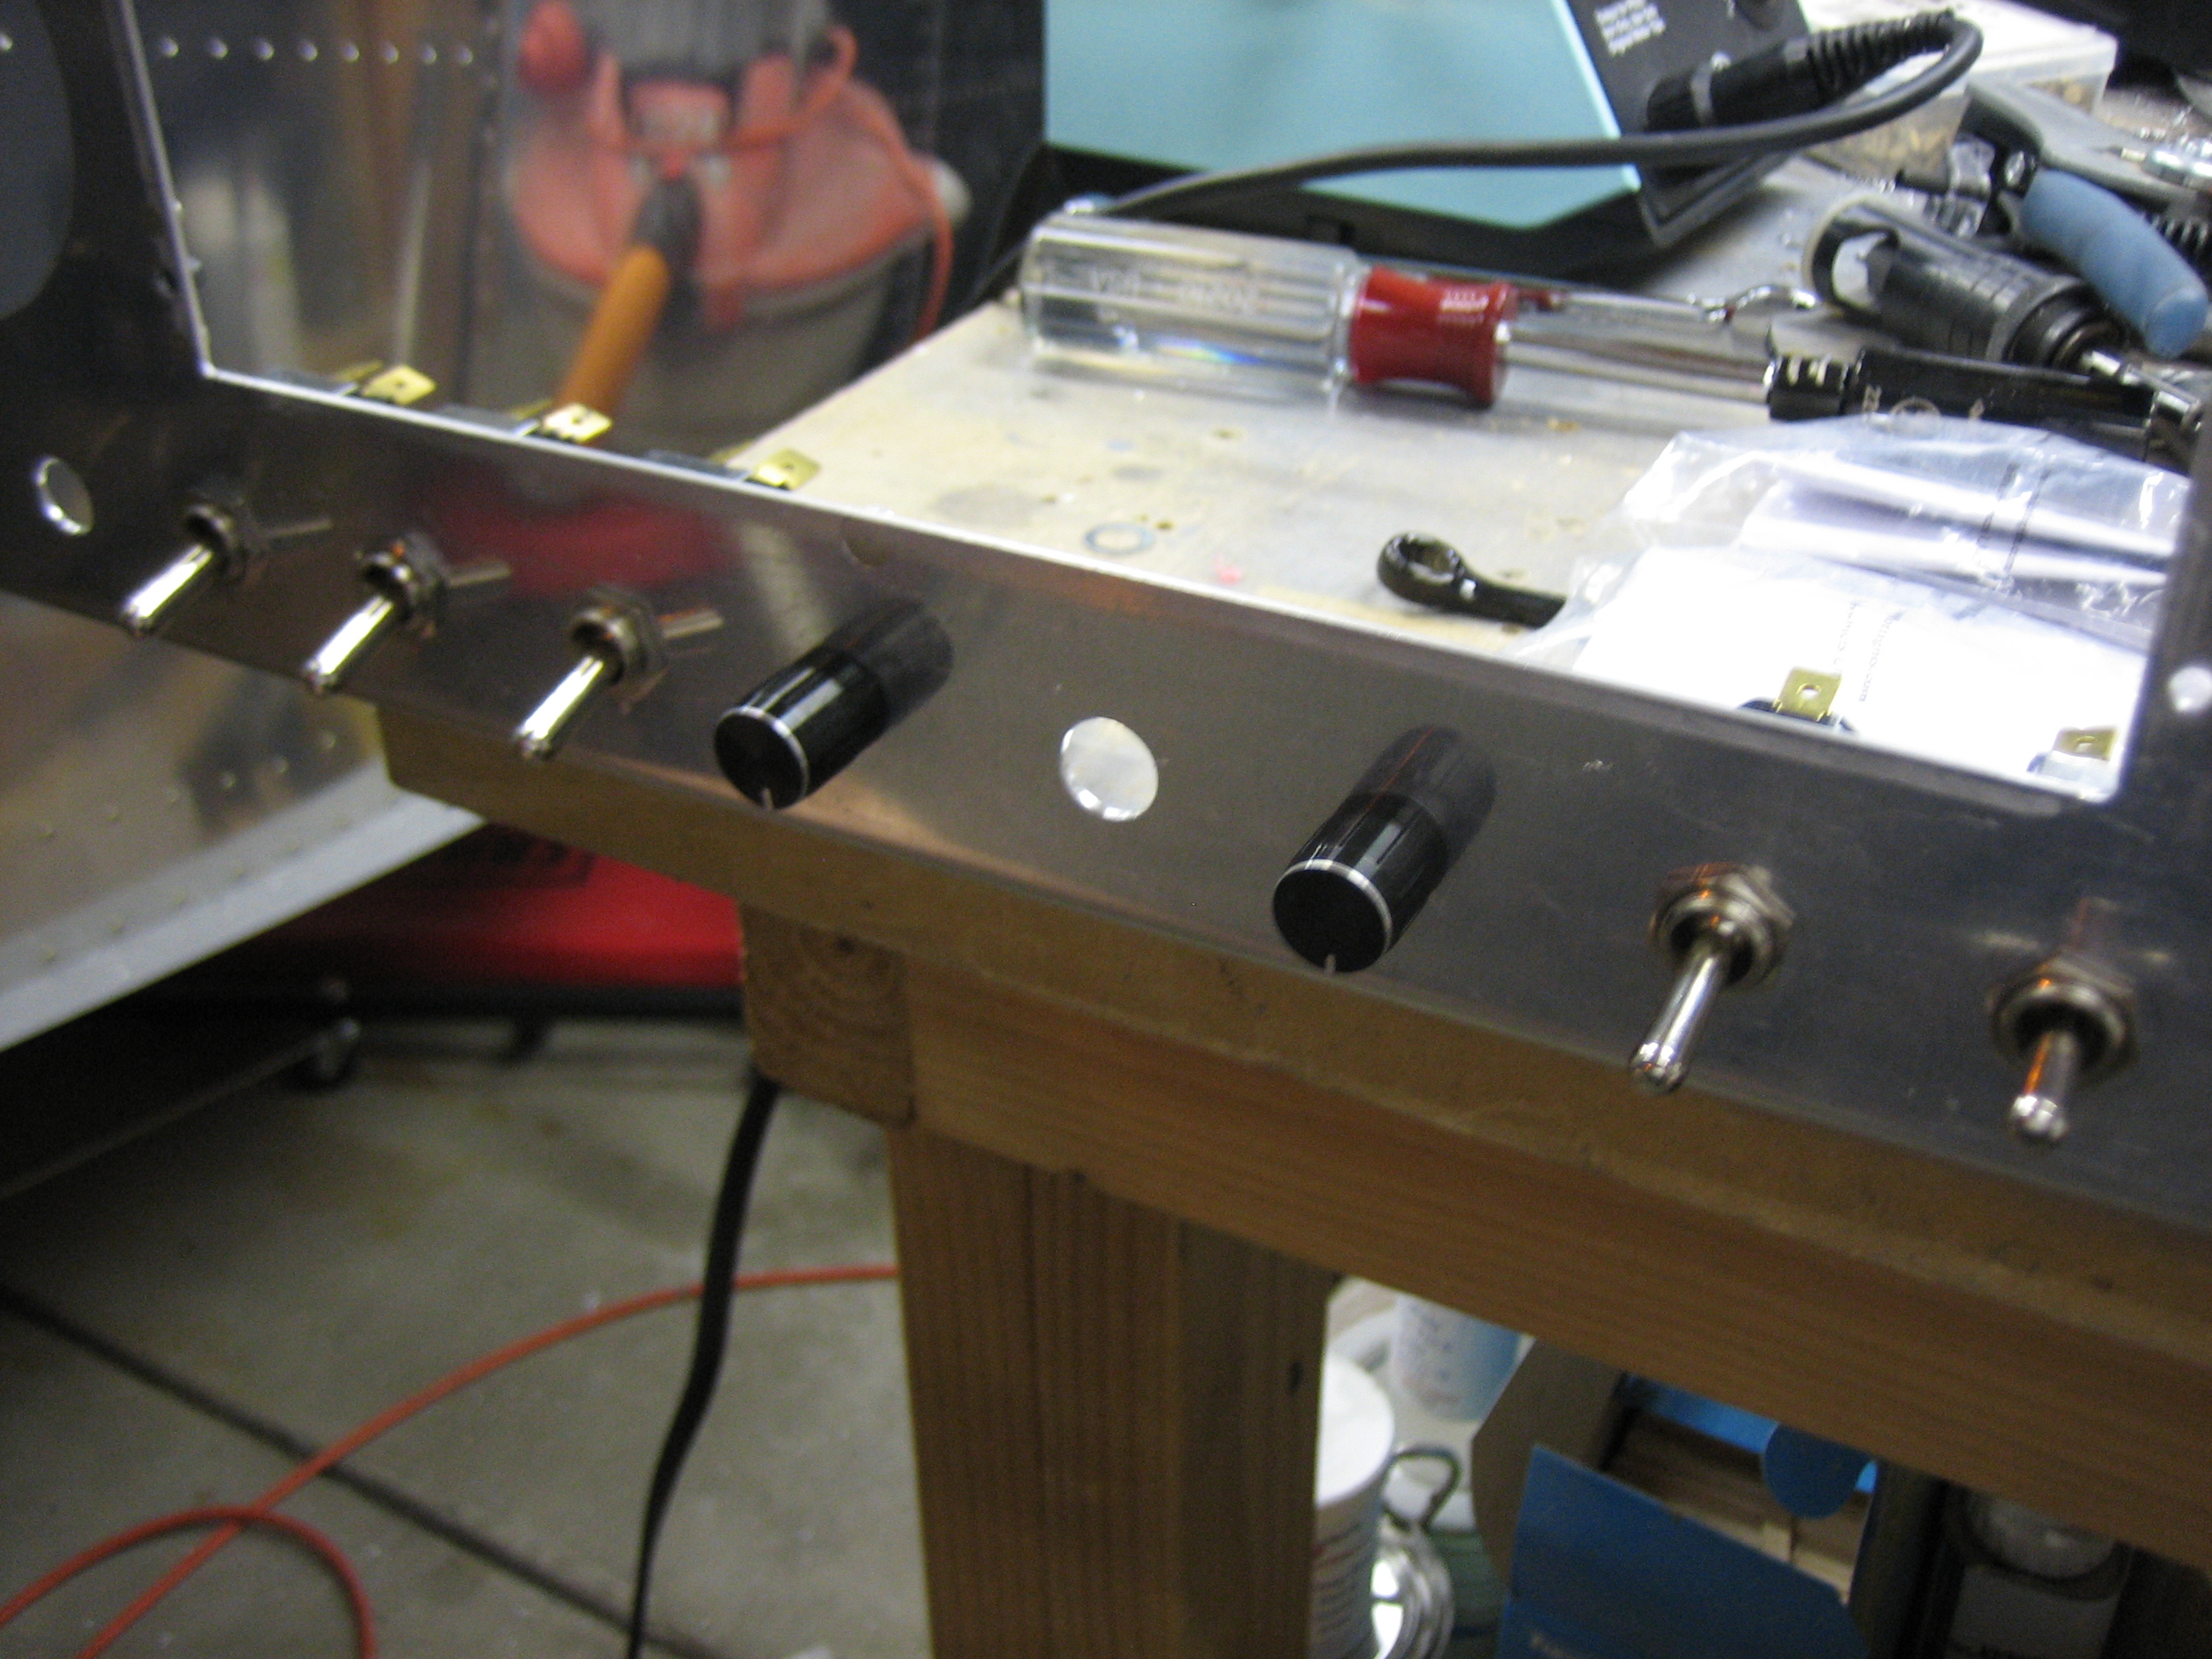
Here are all of the switches in the upper left of the panel. The lower left switch is for the essential bus. The one above that that is brass colored is the alternate static switch. The rest of them are 1-3 switches for master, ignitions, alternator and avionics.
