Cowl and Plenum Work

I previously used the vixen file to shape the flange around the spinner on the lower cowl where the upper cowl overlaps.  This left the flange pretty thin (to the point that I could easily see the shadow of my fingers through it when a bright light was on the other side).  To strengthen the flange, I mixed up some epoxy/flox and spread a coat about 1/8″ thick.

I also trimmed the propeller flange on the upper cowl.  Once I fit the cowl halves together, I make sure the cuts line up.

Marked Propeller Flange on Cowl

The length of the propeller flange on the cowl was uneven, so I decided to trim it to be uniform.  I’m the only person who’s likely to see this, but I didn’t like how ugly it looked (I did mention that I’m a perfectionist).  I clamped a couple of Z shaped extrusions to an angle.

I then placed a sharpie against the Z shaped extrusion and ran the angle against the face of the propeller ring to mark a cut line a uniform distance back.

Prepped Final Skin

I deburred and dimpled the final skin (top of the fuselage behind the cowling) and then reinstalled it on the fuselage to make sure the aft gap on the cowling is perfect all the way around.  I reinstalled all of the hinge pins to ensure the cowling is precisely positioned.  The upper cowl gap is perfect, but I still have a little sanding to do to get the gap perfect on the lower cowl.

Sanded Cowl Seams

I sanded down the filler on the lower cowl, then removed the tape and sanded across the joint to get it flush.

I’m really happy with how this turned out.  You can see here just how flush the joint is.  It sort of looks like there are two joints here, but the upper line is just the edge of the fiberglass tape that covers the row of rivets along the edge.  The actual cowl joint is the lower line closer to my thumb.

Started Filling Lower Cowl

I finished sanding the upper cowl so that there is a minimum amount of filler and all of the edges are feathered.  I then put the cowl back on the plane so that I could apply filler to the lower cowl.

The upper cowl protruded about 1/16″ beyond the lower cowl, so I put a piece of electrical tape on the upper cowl and applied some epoxy with microlight to the horizontal joint and vertical joint along the firewall.  Here’s the right side of the cowl.

And here’s the left side.  Once this has cured, I can remove the tape and sand across the joint to make it perfectly smooth.

More Cowl Sanding

I used a vixen file to rough shape all of the filler I applied a couple of days ago and then sanded everything until you can’t even feel the gap between the upper and lower cowl halves.  I’ll need to open the gap up slightly for paint, but the shape is nearly perfect.  Next, I started flattening the filler on the upper cowl.  I previously picked up this longer flexible sanding block from Harbor Freight.  It has a spring steel plate on the bottom which is flexible enough to conform to gentle curves, but flat enough to sand the surface and eliminate all the waves in the surface.

More Cowl Filling

I had been planning on installing the wheel pants and gear leg fairings while the plane was on jacks, but I’m simply running out of room in my garage.  I needed to lay on the floor to align the left wheel pant, and I practically couldn’t do it.  I had really hoped to accomplish pretty much all the construction at home, but it looks like the gear fairings will have to wait until I’m at the hangar.

Anyway, I mixed up another coat of epoxy with microlight and built up a little bit more around the air inlets.  Here’s the upper cowl on the outside edge of the right inlet.  The electrical tape is preventing the filler from lapping over onto the lower cowl and will provide a nice reference when sanding this to shape.

I also applied a little more filler to the inside edges of the inlets to fill in a small step that I had.

Here’s the outside edge of the upper cowl next to the left air inlet.

I also sanded down the second coat of filler on the prop ring.  I still need to see how the gap looks with the prop on, but I’m pretty sure that the gap will be uniform all the way around.

Started Fitting Wheel Pants

Before fitting the wheel pants, I needed to get the weight off of the wheels and get the fuselage perfectly level in both dimensions.  Since the wings aren’t on, I can’t jack on the tie down points, and I wasn’t comfortable jacking under the firewall flange.  The engine mount is plenty strong, but I didn’t just want to start jacking against one of the horizontal tubes since these are not designed to have loads placed on them perpendicular to the tubing.  Right under the top of the gear leg mount tubing is an exceptionally strong portion of the mount since it handles all of the bear impact loads, but it’s not flat enough to put the jack directly on.  After a little head scratching, I came up with a great way to jack against this point.
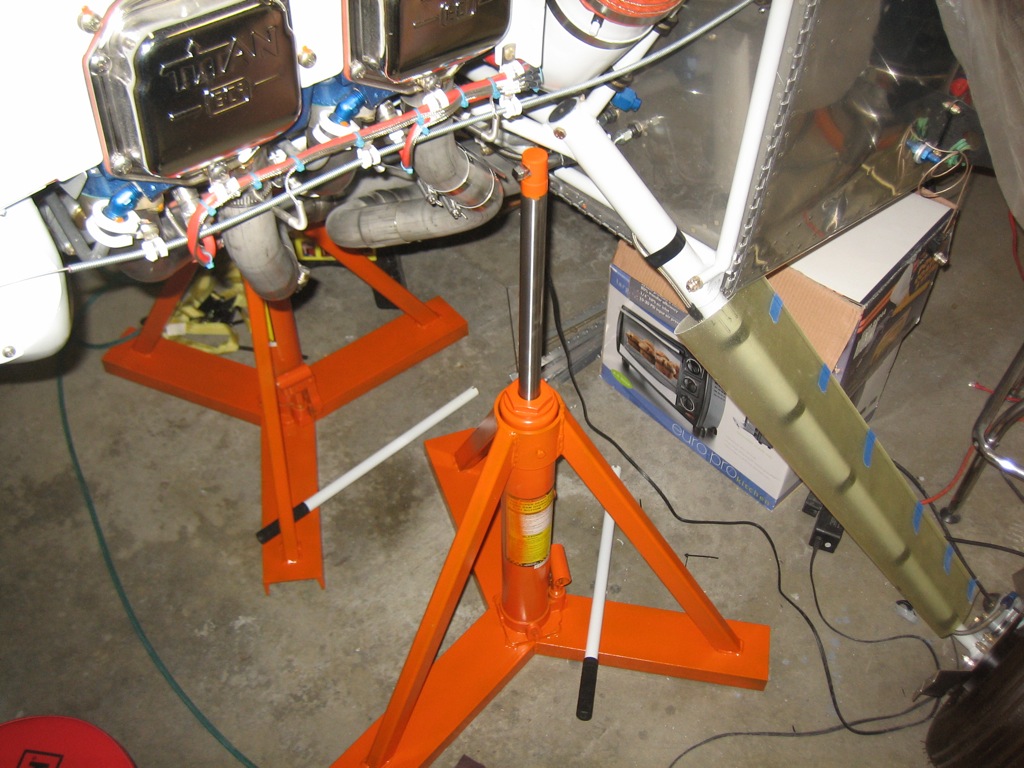
I slipped a 1/2″ socket extension through the hole in the top of the jack and wrapped a piece of MIL6000 hose around the end to pad it.

Here’s a shot looking up from underneath showing how the hose pads the jack point.

After jacking up the front, I raised the tail until the fuselage was level at the longerons.  I also confirmed it’s level laterally.

I’m holding the tail up using a strap around the tailwheel spring.

The other end is wrapped around one of the rafters in the ceiling.  The giant green thing is my cyclone dust collector from when the garage was a wood shop.

Next, I adjusted the outer wheel pant attach bracket to be perpendicular to the floor using a carpenter’s square.

The wheel pant needs to be 1″ above the top of the wheel.  I hunted around the shop for a bit and found these old wooden knobs.  I taped a washer to the end to bring them up to exactly 1″ thick.

These will sit on the top of the tire to keep the wheel pant the appropriate distance away.  After this, I used a long piece of duct tape to temporarily attach the knob to the tire.

After opening up the hole on the bottom for the tire and trimming a relief on the inside for the gear leg, I fit the wheel pant for the first time.  This is going to require quite a bit of adjustment, but it’s approximately the right position here.